

Setting up first responder access to your eBinder
Your SDS Management and SDS/Chemical Management accounts gives you the ability to share safety data sheets, maps, and product information in your eBinder with first responders, such as fire departments or emergency planning teams outside your organization. This tool, referred to as First Responder Share Service, gives your first responders real-time access to information about the hazardous chemicals in your facilities.
First Responder Share Service works by creating a unique URL, username, and password for each first responder you add. If multiple Chemical Management customers share their eBinders with a single first responder via First Responder Share Service, the first responder can use this username and password to access all shared information via the First Responder Share portal.
VelocityEHS recommends that you establish a relationship with your local first responder before adding them to your account. This ensures that you have accurate contact information and they know to expect information from you via VelocityEHS in regard to your hazardous chemicals.
Adding a First Responder
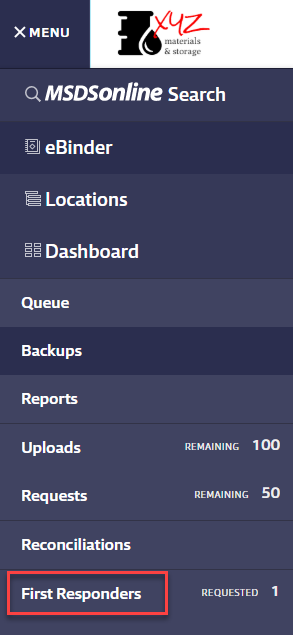
To share your eBinder with a first responder, click on the Menu button in the upper left-hand corner of your account and then select First Responders.
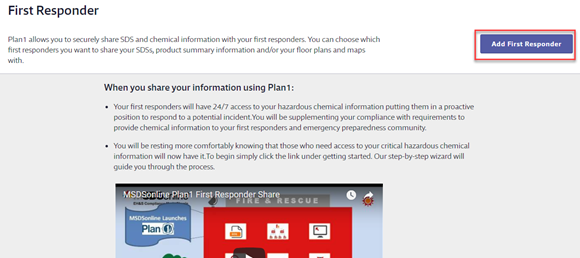
Once on the First Responder page, click Add First Responder.
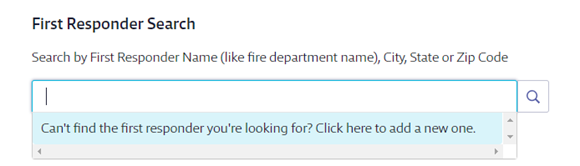
Use the First Responder Search box to search for a first responder by name, city, state, or ZIP Code. For a first responder name search, try using the name of the fire department.
If there are matches in the database, you can select the first responder from the list.
If the first responder for which you are searching is not available in the database, you will see an option to add a new one.
If you select a first responder from the list, the address details saved in the database will automatically populate. If you enter a new first responder you will need to enter the details.
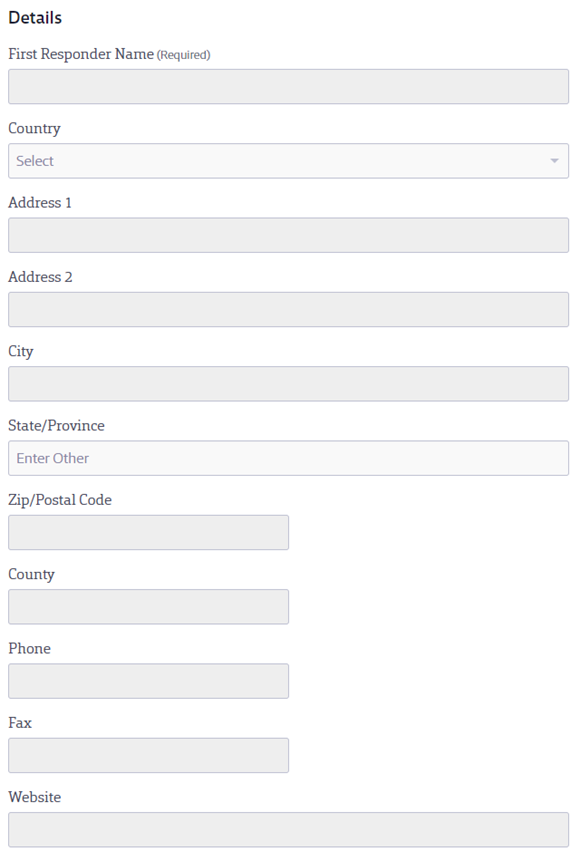
After you’ve entered the address details, you need to enter the contact information for the first responder. This contact information is for the firefighter or first responder that will receive access to your eBinder. For example, the Battalion Chief or Ambulance Commander.
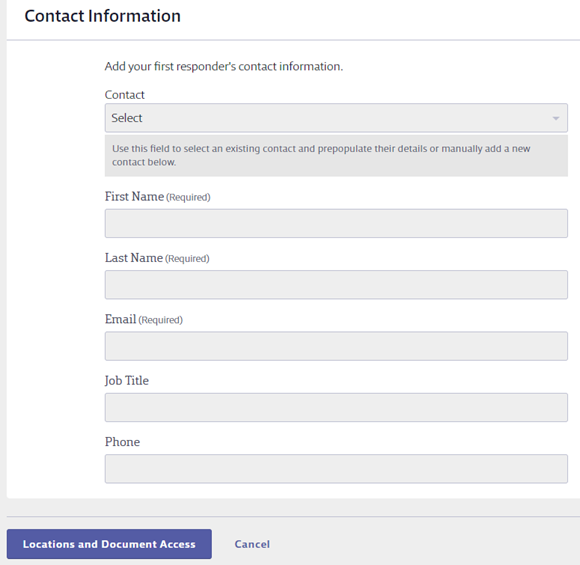
Once you’ve entered all required fields, click on Locations and Document Access.
Selecting Locations and Document Access Permissions
Location Access Section
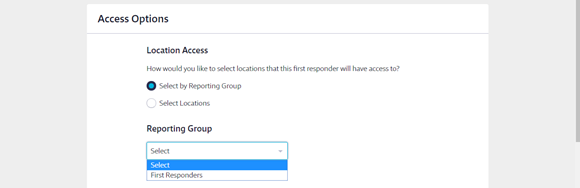
If you have created Reporting Groups and you want your first responder to have access to the products assigned to all the locations in that Reporting Group, you can select the radio button for Select by Reporting Group and then select the Reporting Group from the drop-down menu. If you have not created any Reporting Groups this option will be grayed out. See [Creating Reporting Groups] for more information.
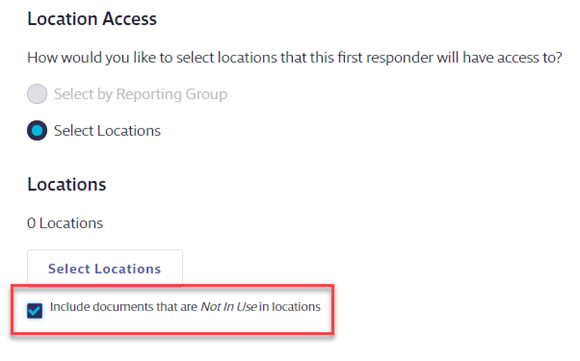
If you prefer to select individual locations or you have not created Reporting Groups, choose Select Locations. Then click the Select Locations button. By default, all locations will be checked. If you are sharing your eBinder with a first responder who only services a few of your locations, we recommend you only select the locations to which they would respond.

By default, first responders will only see information for products that are In Use at the selected location(s).
If you wish to share information for a product that you’ve marked Not In Use, select the checkbox for Include documents that are Not In Use in locations.
Document Access Section
By default, your first responder has access to see the safety data sheets, the Product Summary Sheets (read-only versions of the Product Summary) for your products, and any maps of containers for the locations you selected.
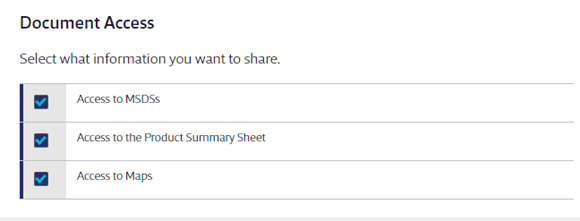
VelocityEHS recommends that you share all of this information with your first responder, but you can uncheck them as necessary.
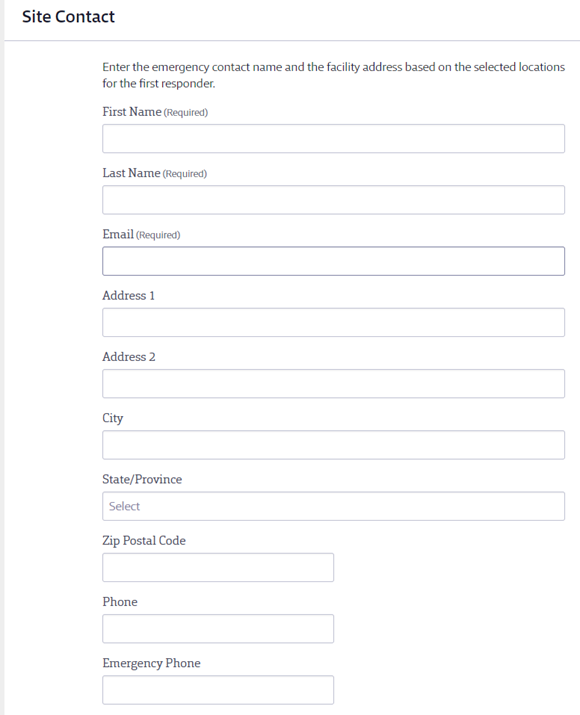
Site Contact
If the emergency contact for the location(s) you selected earlier is a licensed user in your account or assigned to a Reporting Group, you can select them from the Site Contact drop-down and any information entered for them will automatically populate. Otherwise, enter the information for the emergency contact at the location(s). This is the person the first responder will be directed to contact in the event of an emergency.
Once you’ve completed the relevant fields, click Review and Share.
Notifying the First Responder
After you click Review and Share you’ll see the email message that will be sent to the first responder you added. This email includes information about the First Responder Share Service as well as how the first responder can access it. You can add a personalized message in the Custom Message section.
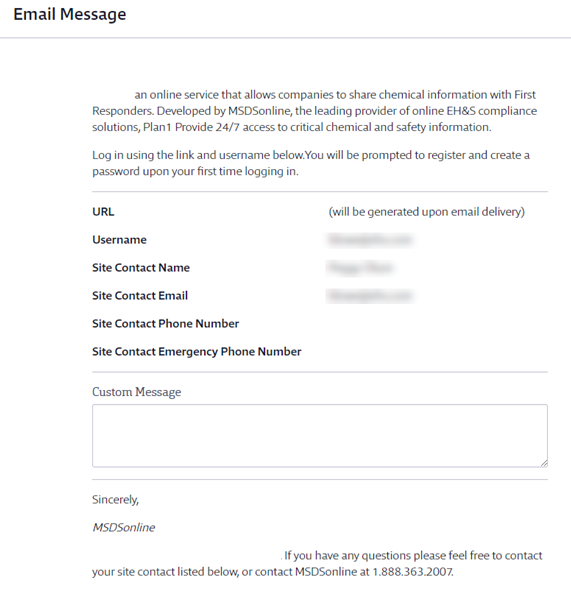
Use the Review section to ensure that you’ve entered all information correctly. If you need to change anything, click the Back button. Otherwise, click the Share button to send the email to the first responder.
After you click Share you’ll be taken back to the First Responder page which will now list any first responder(s) you created.
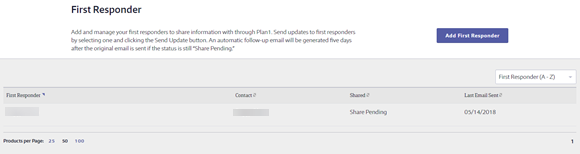
The Shared column shows whether a first responder has used the links in the email message to access the First Responder Share portal and view your shared eBinder.
If the status is Share Pending then the first responder has not yet clicked on the link and registered for the First Responder Share Service. The First Responders section of the Menu in the upper-left-hand corner also displays a count of the number of first responders that are still listed as Share Pending.
If the status is Shared then the first responder has clicked on the link provided in your email message, has registered for the First Responder Share Service and viewed your shared eBinder.
The Last Email Sent column shows the date and time the email was sent to the first responder.
To edit the first responder information, click on the first responder card to launch the summary panel. Use the Actions button in the summary panel to make adjustments, send an updated email, or remove the first responder entirely.

You can also add additional first responders from this page. To add another first responder click on the Add First Responder button.
