

Assigning Products to Locations
You will need to create locations before you can assign safety data sheets to them. See Creating Locations for more information.
If you want to filter your eBinder by products being used at a specific location, you first need to ensure the safety data sheets in your account are assigned to a location or locations.
Assigning safety data sheets to locations also allows you to run reports on products at specific locations, as well as to create containers for those products.
There are several ways to assign safety data sheets to locations:
- From SDS Search
- From the eBinder
- From the summary panel
- From the Product Inventory page
- From the Product Summary page
From SDS Search
When you find a safety data sheet in SDS Search that you want to add to your eBinder you will also have the option to assign the product to a location.
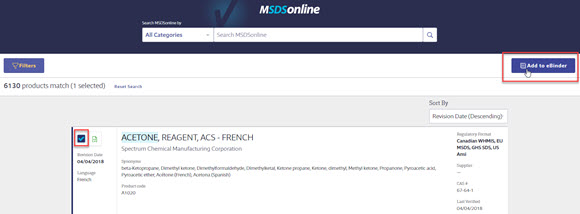
Once you find the safety data sheet you want to add, select the checkbox and then click the Add to eBinder button.
In the locations modal that appears, select the location(s) to which you want to assign this product. Then click the Submit button.
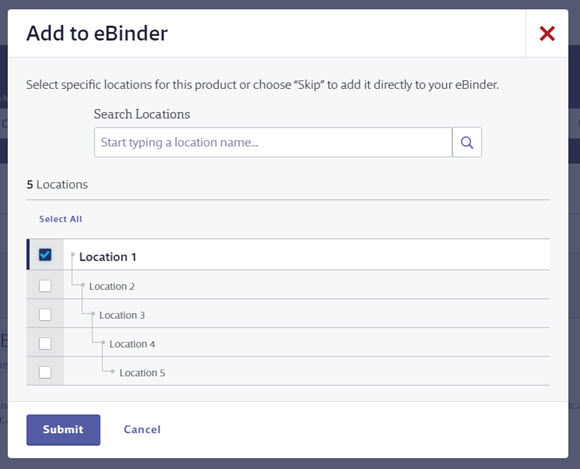
You will receive a success message confirming that the product has been assigned to the location(s). This product is now assigned as In Use at those locations.
If you do not want to assign the product to a location or locations, click the Skip button.
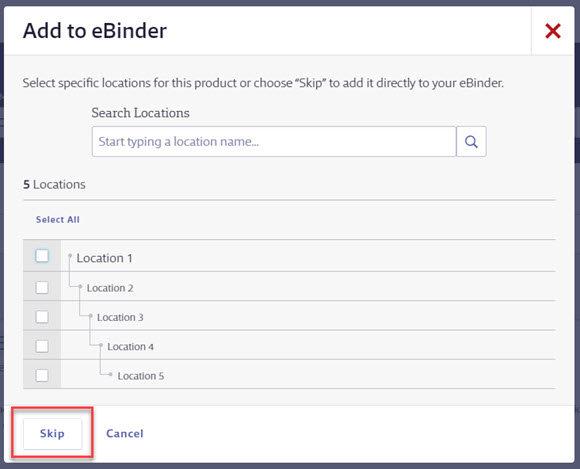
You will receive a success message confirming that the product has been assigned to your eBinder.
Note that your options to assign to locations from SDS Search may differ depending on your permissions. See Editing Licensed User and Role Permissions for more information.
From the eBinder
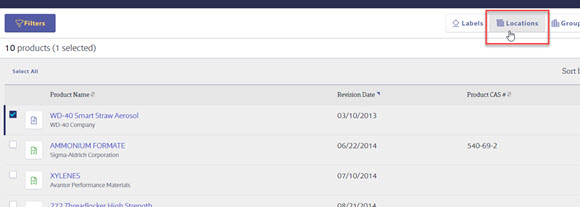
Once you’ve added the safety data sheet to your eBinder, select the checkbox next to the product name to enable additional function buttons at the top right of the eBinder. Click on the Locations button to bring up the list of your locations.
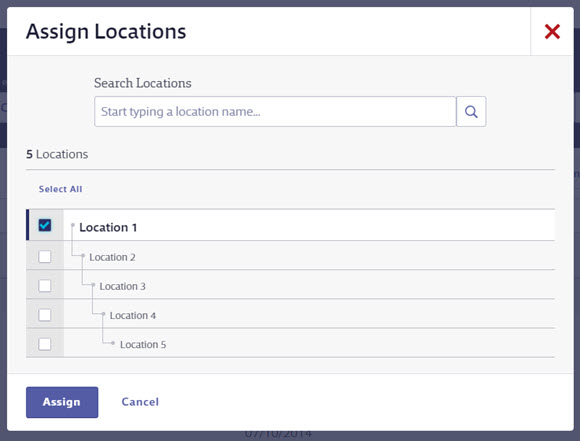
In the Locations modal, find the location(s) to which you want to assign the safety data sheet and select the checkbox next to the location name. Note that when you assign a safety data sheet to a lower level location it will automatically be assigned to the locations above it in the location tree.
You will receive a success message confirming that the product has been assigned to the location(s). This product is now assigned as In Use at those locations.
From the summary panel
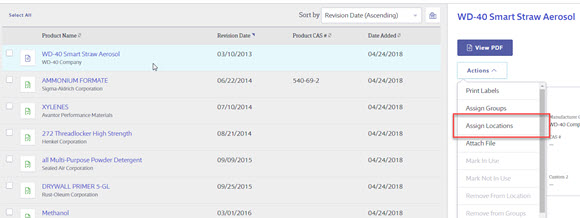
From the eBinder, click on the product card to open the summary panel. Click on the Actions menu and then select Assign Locations.
In the Locations modal, find the location(s) to which you want to assign the safety data sheet and select the checkbox next to the location name. Note that when you assign a safety data sheet to a lower level location it will automatically be assigned to the locations above it in the location tree.
You will receive a success message confirming that the product has been assigned to the location(s). This product is now assigned as In Use at those locations.
From the Product Inventory page
To assign safety data sheets to a location from Product Inventory, click on the product card in the eBinder to open the summary panel. In the summary panel, click the Product Inventory button.
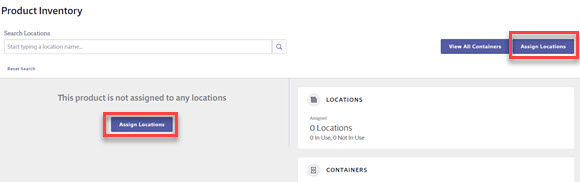
On the Product Inventory page, click the Assign Locations button.
In the Locations modal, find the location(s) to which you want to assign the safety data sheet and select the checkbox next to the location name. Note that when you assign a safety data sheet to a lower level location it will automatically be assigned to the locations above it in the location tree.
You will receive a success message confirming that the product has been assigned to the location(s). This product is now assigned as In Use at those locations.
From the Product Summary page
You can also access Product Inventory from the Product Summary page. Access the Product Summary either by clicking on the product name or by clicking on the product card and then clicking Go to Product Summary.
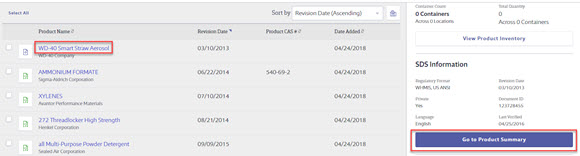
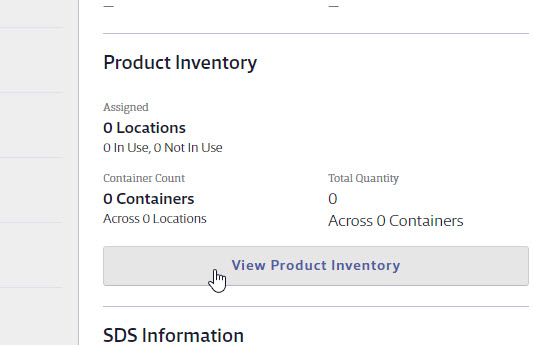
Once in the Product Summary, click on View Product Inventory in the Product Inventory module.
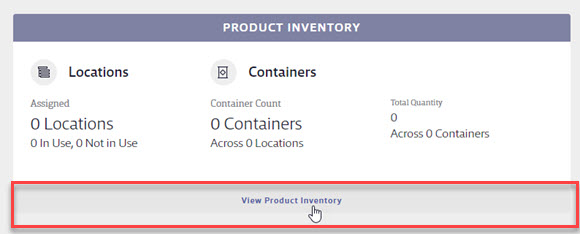
On the Product Inventory page, click the Assign Locations button.
In the Locations modal, find the location(s) to which you want to assign the safety data sheet and select the checkbox next to the location name. Note that when you assign a safety data sheet to a lower level location it will automatically be assigned to the locations above it in the location tree.
You will receive a success message confirming that the product has been assigned to the location(s). This product is now assigned as In Use at those locations.
Assigning Uploads and Requests to locations
For information about assigning Uploads and Requests to location, see:
Location Requests from General Users
If enabled, General Users can use the Product Inventory page to assign an SDS in your eBinder to a location to which is not already assigned. This is called a Location Request. By default, these requests are routed to the Queue for review. Administrators can choose to route them directly to the eBinder, which means the location assignment will update automatically. Alternatively, you can make these requests Subject to Approval and require General Users answer questions about why they want to assign the SDS to the new location. See Configuring Queue and Approval Processes for more information.
Removing a product from a location
If you are no longer using a product at a specific location, you can change the status from In Use to Not In Use so that you can keep the history of that product being used at that location. See Managing Products in Locations for more information.
