

Attach Files
Attach Files is available for GM Pro, SDS, and Chemical management accounts.
You can attach additional files to the safety data sheets in your eBinder. Attached files are typically documents that are relevant to your organization with regard to using a particular product. These could include anything from a Technical Data Sheet, a purchase order, or a PowerPoint presentation on how to use the product.
Creating Attached File Categories
You can create categories for your attached files in the Product Summary settings available in the Settings menu.
Once in the Product Summary Settings page, scroll down to the Attached File Categories section under Product Details.
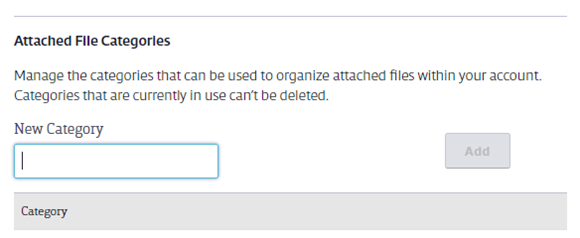
Enter the name of the category in the New Category field and click Add. For example, if you plan to attach training documentation, you could create a category called Training Documents.
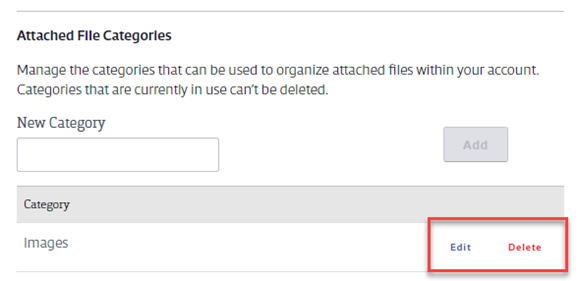
To edit or delete a category name, click Edit or Delete. Note that a category cannot be deleted once it’s been assigned to a file.
Attaching Files to Products in the eBinder
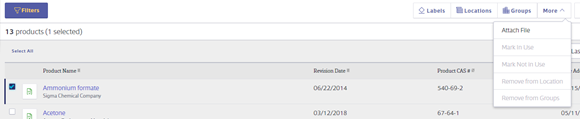
Use the Attach File function in the eBinder to easily attach a file to more than one product. To attach a file to a product or products in the eBinder, select the checkbox for the product(s) to which you want to attach the file.
Click the More button and choose Attach File.
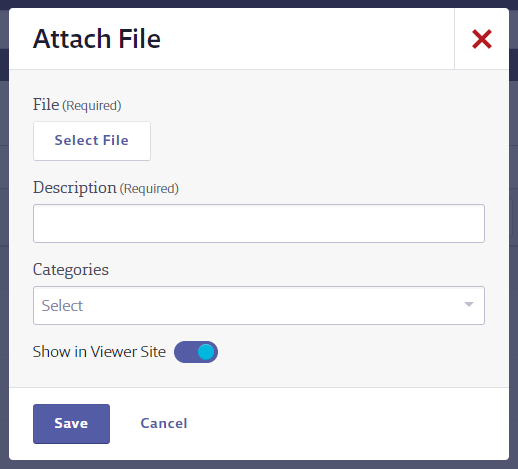
On the Attach File page, click Select File to choose the file from your computer.

Files are limited to a maximum file size of 10.0 MB. File formats allowed are: .BMP, .DOC, .DOCX, .GIF, .JPG, .PDF, .PNG, .PPT, .PPTX, .XLS, and .XLSX.
Enter a description of the file you’re attaching and then, if you’re using file categories, select one from the Categories drop-down menu.
If you do not want your General Users to be able to see this file, click the Show in Viewer Site toggle to hide it from the General User Site.
Click Save.
Attaching Files to Products in the Summary Panel
To attach a file to one specific product, click the product card to launch the Summary Panel. Click the Actions menu and then choose Attach File.

On the Attach File page, click Select File to choose the file from your computer.
Files are limited to a maximum file size of 10.0 MB. File formats allowed are: .BMP, .DOC, .DOCX, .GIF, .JPG, .PDF, .PNG, .PPT, .PPTX, .XLS, and .XLSX.
Enter a description of the file you’re attaching and then, if you’re using file categories, select one from the Categories drop-down menu.
If you do not want your General Users to be able to see this file, click the Show in Viewer Site toggle to hide it from the General User Site.
Click Save.
Attaching Files to Products in the Product Summary
To attach a file to one specific product in the Product Summary, click the product name in the eBinder or the product card to access the Product Summary for that product. Then access the Product Summary from the Summary Panel.
Once in the Product Summary, click the Attach button.
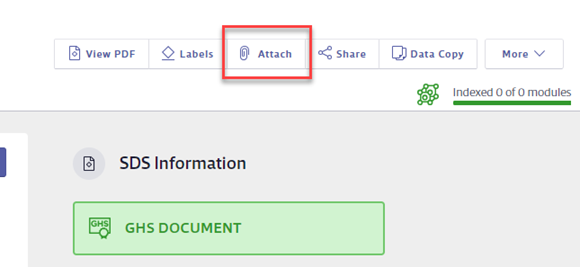
On the Attach File page, click Select File to choose the file from your computer.
Files are limited to a maximum file size of 10.0 MB. File formats allowed are: .BMP, .DOC, .DOCX, .GIF, .JPG, .PDF, .PNG, .PPT, .PPTX, .XLS, and .XLSX.
Enter a description of the file you’re attaching and then, if you’re using file categories, select one from the Categories drop-down menu.
If you do not want your General Users to be able to see this file, click the Show in Viewer Site toggle to hide it from the General User Site.
Click Save.
Viewing Attached Files
To see the file(s) attached to a product, go to the Product Summary for that product and scroll down to the Attached Files section on the right-hand side.
This section will show up to 3 attached files with their file names and the date they were added. To open the file, click the file name and download it to your computer.
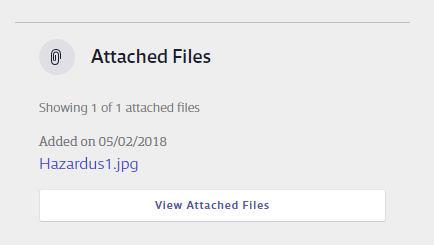
To see any additional attached files or more information about the attached files, click View Attached Files.
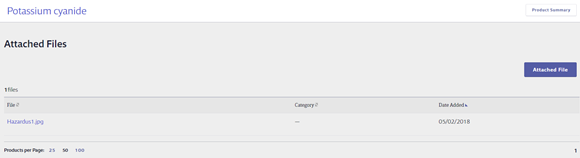
Click the file name to download the file to your computer.
To see the file description or to edit or delete the file, click the file row to open the summary panel.

