

Printing OSHA Secondary Container Labels
OSHA Secondary Container labels are only available to GM Pro, SDS Management, and Chemical Management accounts
For general information on accessing the Print Labels feature, see Printing Labels Overview.
The OSHA Secondary Container label option gives you the ability to create a label that can include both NFPA/HMIS and GHS information. In order to print this label, the following must be true:
- The GHS Classifications or the NFPA/HMIS indexing modules must be enabled. See Indexing Safety Data Sheet Information for details on enabling these modules.
- Users who need to print these labels must have at least View Module access to the GHS Classifications or NFPA/HMIS indexing modules. See Manage Roles Overview and Editing General User Role Settings for more information.
- The OSHA Secondary Container Label option must be turned on in General Settings.
- The information you want to include on the label must be indexed in the Product Summary for the product for which you need the label. See Indexing Safety Data Sheet Information for details on indexing.
To print an OSHA Secondary Container label, click Generate on the Print Labels page.

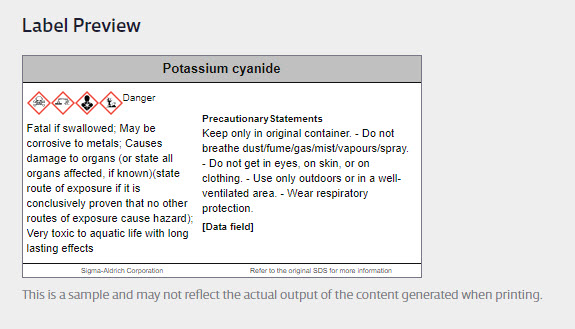
Select the label size. Each label size indicates to which Avery brand label stock it corresponds as well as how many hazard symbols and data fields can be included on the label.
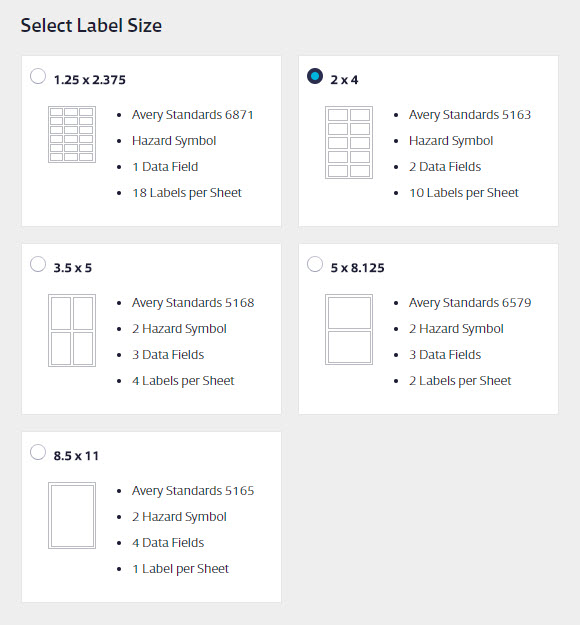
Note that the Label Preview will not change the size to match the size you selected.
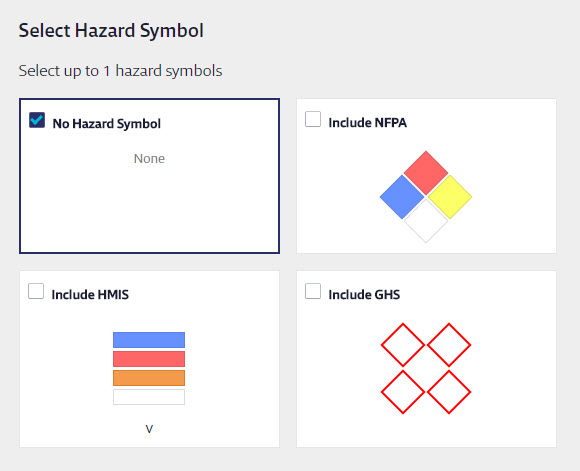
Select the hazard symbol(s) you want to include on the label. The symbol(s) will appear on the Label Preview. Note that if the symbols are blank it is because you have not indexed that information yet. See Indexing Safety Data Sheet Information for details on indexing.
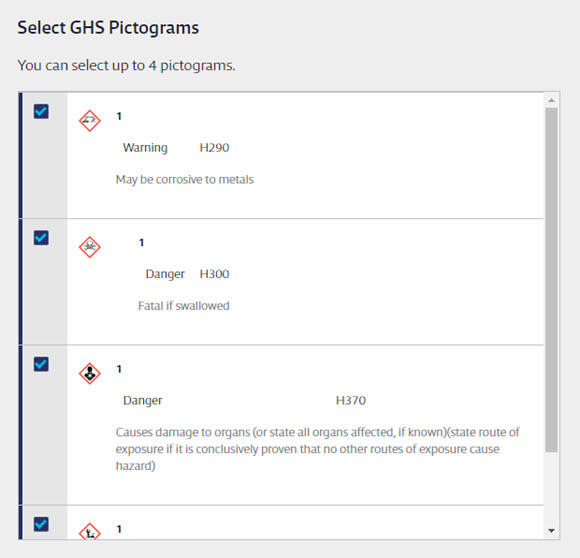
If you select GHS Pictograms, you have the option to rearrange the order of the pictograms. Hover your cursor over the pictogram and then click and drag to rearrange them. By default, the system will automatically select up to the first four unique indexed pictograms, but you can uncheck one of those check boxes then check one for a different indexed pictogram to add it to the label.
Select the data fields you want to include on the label. If a user does not have access to view a specific data field they will not see that field as an option in the list.
If you select a data field that has more than one item, you can rearrange them by clicking and dragging to change the order.
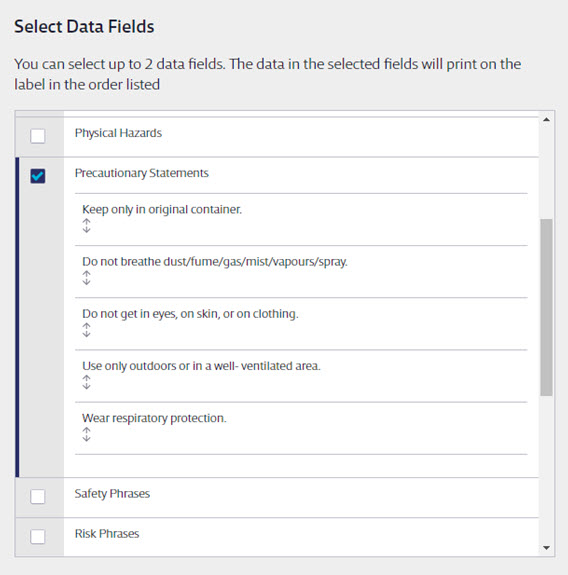
As you select data fields, the Label Preview will update to show your selections. If you select a data field and no information appears under the field name on the preview this means that you have not indexed information for that field yet.
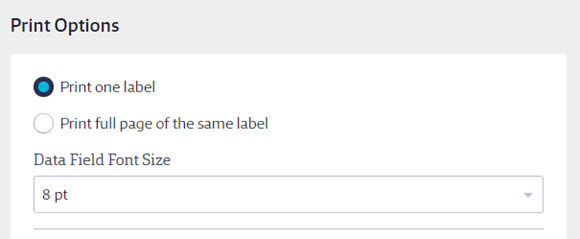
In Print Options, select whether you want to print a single label or an entire page of the same label. You can also select a font size. This is useful if your label includes a lot of text. Making the font smaller may allow more of the text to appear on the label.
The information will appear on the label in the language in which it was indexed and the language drop-down menu should default to the same language you’ve selected in your account. This will automatically translate the following label information:
- Data field names
- Signal Words
- The phrase “Refer to the original SDS for more information”
If you need the label to be in another language, select that language from the drop-down menu. This will also translate the following:
- Unedited/original Precautionary Statements
- Unedited/original GHS Classifications/Hazard Statements
For example, if you indexed the Precautionary Statements in French and made edits to them, your edits will appear on the label. However, if you then changed the language to English, your edits will not appear.
Note that changing the language does not translate any other information.
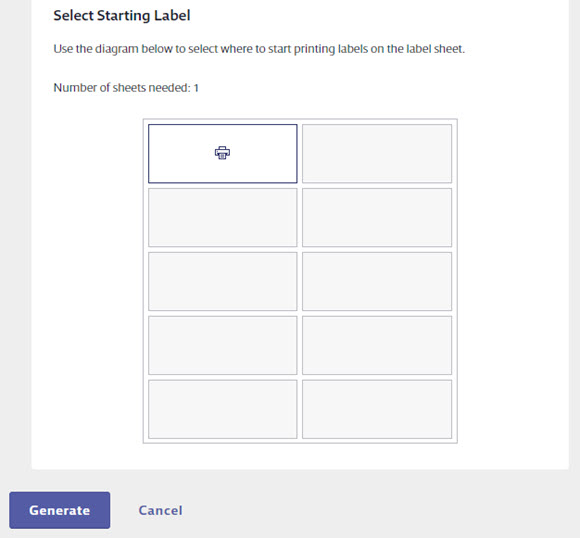
Lastly, use Select Starting Label to change where on the label sheet your label will print. If you are only printing a single label and you don’t want to waste a whole sheet of blank labels, this is where you can select where to put the image on the sheet for printing.
Click Generate, and your Internet browser will either automatically download a PDF of the label(s) or give you the option to open it. Use your PDF reader to open and print the labels. For best results, set your print options to print at actual size.
