

Scheduled Reports
Scheduling a report sends report data to recipients. Optionally, the reports can be sent on a recurring basis. Reasons for scheduling a report could include the following:
- To ensure data or metrics important to the organization get pushed to recipients (i.e., a means to email a report to users other than yourself)
- To grant users access to data that they would not otherwise have access to see (e.g., company-wide data)
- To save time for end users in cases where the same data needs to be reviewed regularly
- To ensure consistency of reporting between locations and over time
Recipient Access
To access a scheduled report, a recipient must have the following:
- A link to the scheduled report (sent by email)
- Access to the VelocityEHS V5 EHS application
Recipients will receive a link to the scheduled report via email, valid for 30 days. Users must authenticate into the V5 EHS application to access the report.
The report will already have been run and saved as a PDF or Excel file, which recipients can download and save.
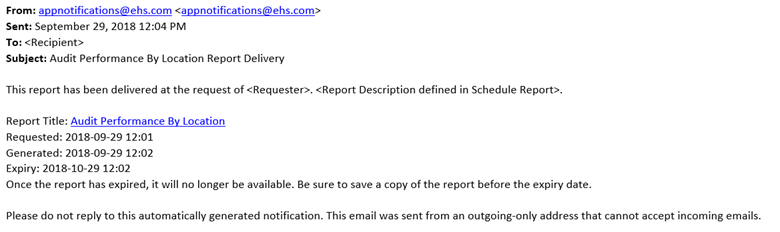
Example of an email containing a link to a scheduled report:
Scheduling a Report
- To schedule a report, run the report you want to schedule and ensure the parameters are set as desired.
If you plan to schedule a recurrence pattern, select a “Dynamic” Date Type. This enables current data to be pulled every time the report is run.

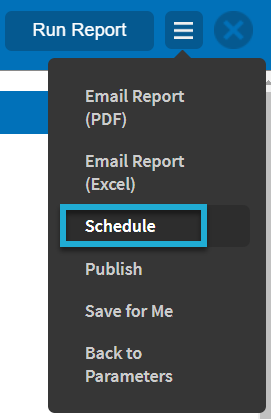
- Select Schedule from the menu to open the Schedule Report dialog window.
- Specify the Recipient(s) of the report.

There are two options for specifying recipients: Role and Name.
Refers to the location selected in the left-hand pane of the report parameters.
This option must be used when scheduling reports for Named recipients. It can also be used for Role recipients.

Important: The generated report will include data for all selected locations and below, even if the recipients do not have permission to see that data in the system. Scheduled reports are run based on the permissions of the user scheduling the report, not those of the recipient.
- If you selected recipients by Role, set the scope of the scheduled report by choosing a location for Schedule To. Users with the assigned roles at or below the Schedule To location will receive the report. If using Named recipients, Schedule To is ignored.

- Choose a format for the report (PDF or Excel).

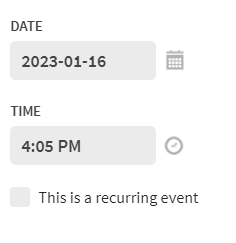
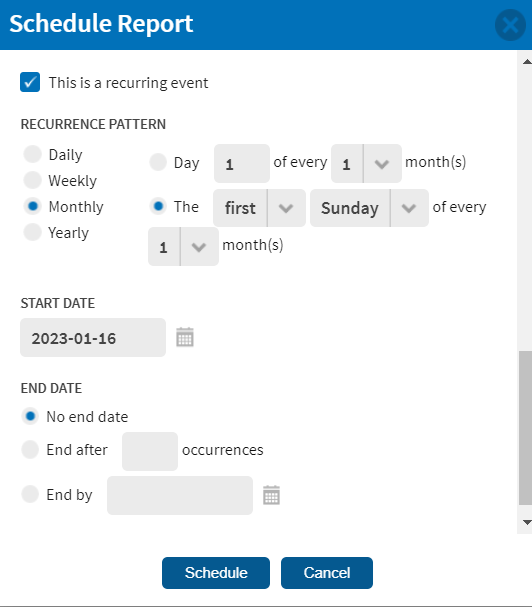
- You can send the report once or on a recurring basis. If sending once, select a Date and Time; this should be in the future. If you wish to set up a recurrence pattern, select This is a recurring event and choose a Recurrence Pattern.
- Select Save to schedule the report.
Administering Scheduled Reports
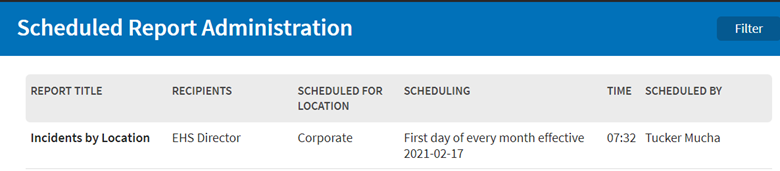
Administrators should reference the list under Admin > (General) > Scheduled Report Administration to see which reports have already been scheduled or to edit the parameters of an existing scheduled report.

The Scheduled Report Administration page lists all scheduled reports. All Administrators will see all the reports listed here but will only be able to edit reports scheduled at or below the location of their own Administrator permissions.
 Editing an Existing Scheduled Report
- Navigate to the scheduled report and select it. Administrators can find a list of all scheduled reports under Admin > General > Scheduled Report Administration.
- To edit the report parameters, update them in the parameters interface, and then select Save Changes.
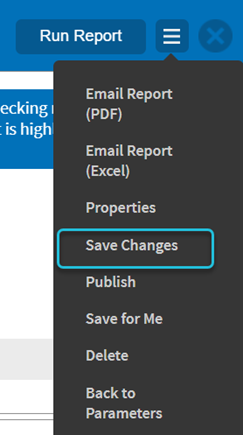
- To edit properties associated with scheduling (e.g., Description, Scheduled To), select Properties from the menu to open the Scheduled Report properties window. Update properties as needed, and then select Save.
- To delete, select Delete from the menu. Deleting a scheduled report will prevent it from sending in the future and will remove it from the Scheduled Report Administration list.

