

Completing a Job Assessment Using the Advanced Whole-Body Assessment
Opening Your Job Assessment
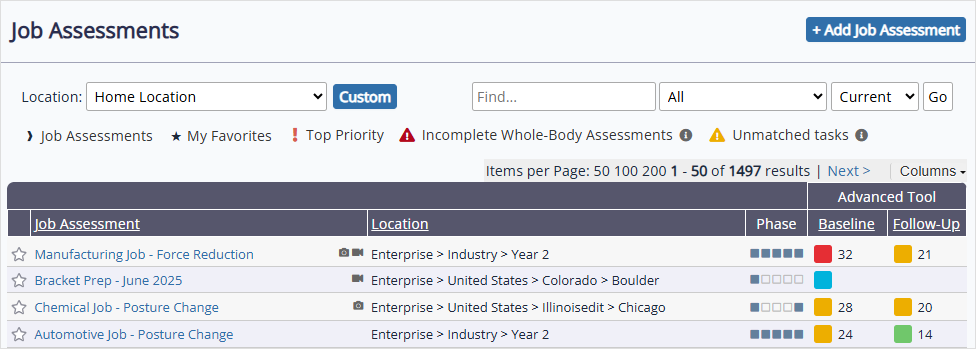
Once you’ve created a job assessment, select Job Assessments > Do from the menu and select the job assessment you wish to complete. You can also use the options along the top of the page to locate a job assessment, where you can filter by location, search by name, or select job assessments that have been recently opened.
Note: To open a job assessment in a separate tab, right-click the assessment and select Open link in new tab.
The “Baseline” Phase
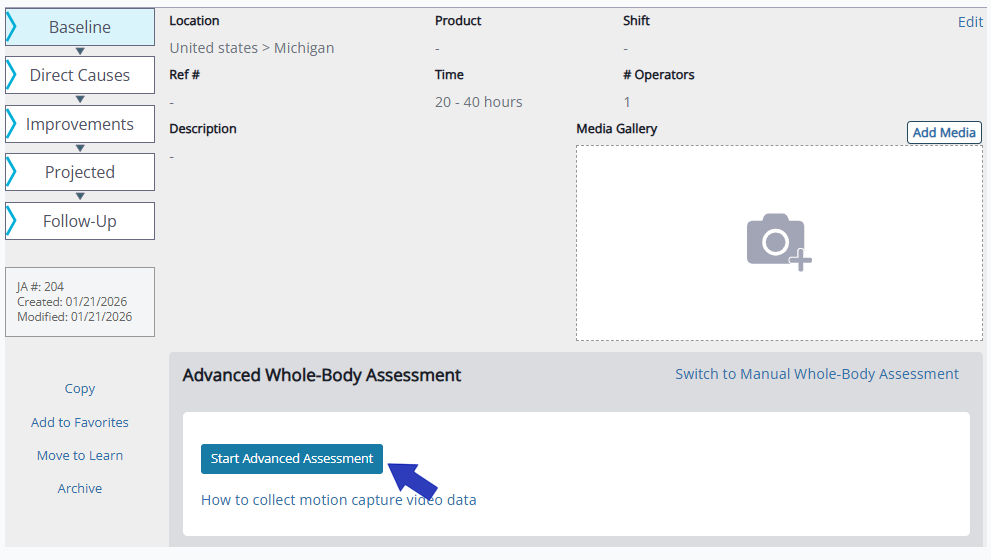
When opening a new job assessment for the first time, you will see the Baseline phase. This phase is where you will conduct your Baseline assessment.
Here, you can upload a video that you’ve recorded of the operator performing the job for evaluation, which provides you with the data you need for your job assessment.
To learn more about best practices for recording and uploading motion capture videos, see Recording a Video for Motion Capture.
Once you have recorded your video, select Start Advanced Assessment to upload it to the Advanced Whole-Body Assessment.
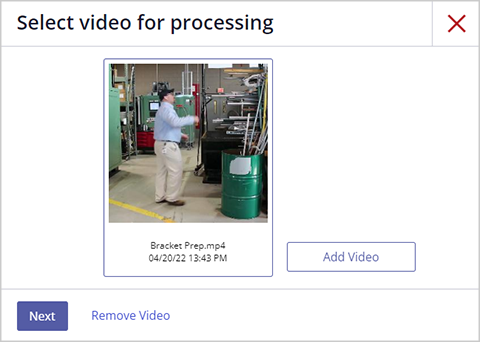
Select your video file from the Add Motion Capture Video page. Make sure it is no larger than 500 MB. It must also be either a .MOV or .MP4 file.
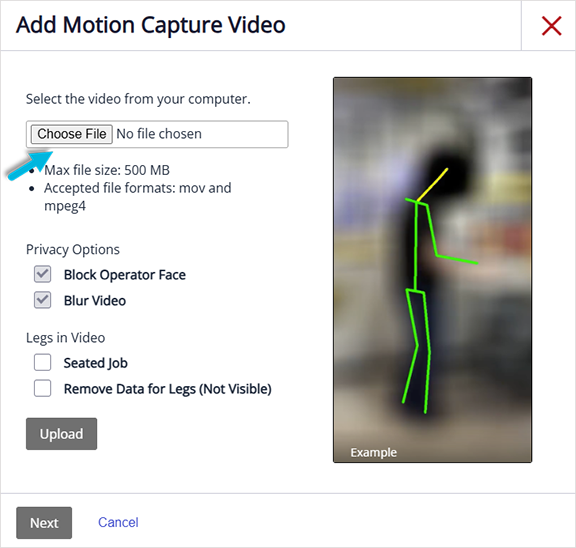
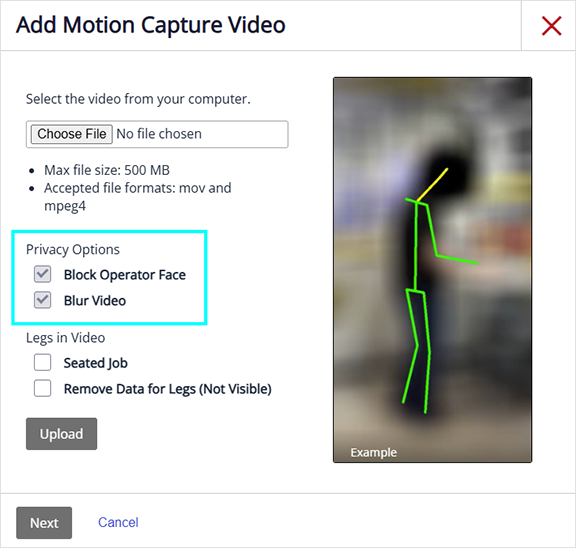
You may be able to select privacy options to blur the video and/or block the operator’s face, depending on the Video Privacy settings your organization selected upon system setup. Both options still allow important motion capture data to be collected.
To learn more about motion capture video privacy, see How private are motion capture videos?
You can also decide whether to include leg data before you upload your video.
- Include leg data for standing jobs.
- For seated jobs or jobs in which the legs are not clearly visible, the data can be omitted to ensure results are not skewed.
When you have selected your privacy and leg data options (if applicable), select the Upload button.
When your video has been uploaded, select the Next button.
If you have uploaded multiple videos for this job, select the video to process using motion capture. You can also delete any videos that have previously been uploaded for this job, if applicable. If you have selected privacy options on the previous page, you will see a video icon in place of a video preview. To start processing your video, select Next.
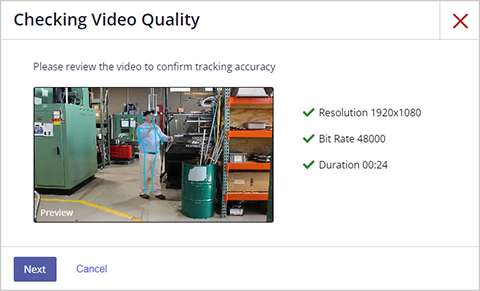
The system performs a series of checks to make sure that your video is eligible for motion capture processing. When your video has passed the checks, select Next to proceed.
Adding Force Information
You will need to enter force information if force is involved in the task. To learn more about entering forces, see Entering Forces for an Advanced Whole-Body Assessment.

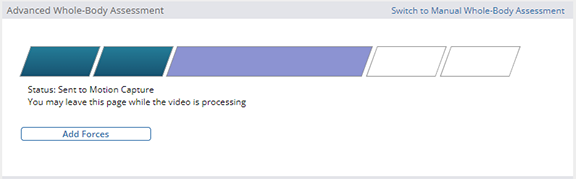
Select the Save button (or Continue Without Force if no forces apply) to return to the Baseline phase, where you can track the progress of your video as it is being processed. You can also navigate from this page without interrupting the process.
Additional Tasks
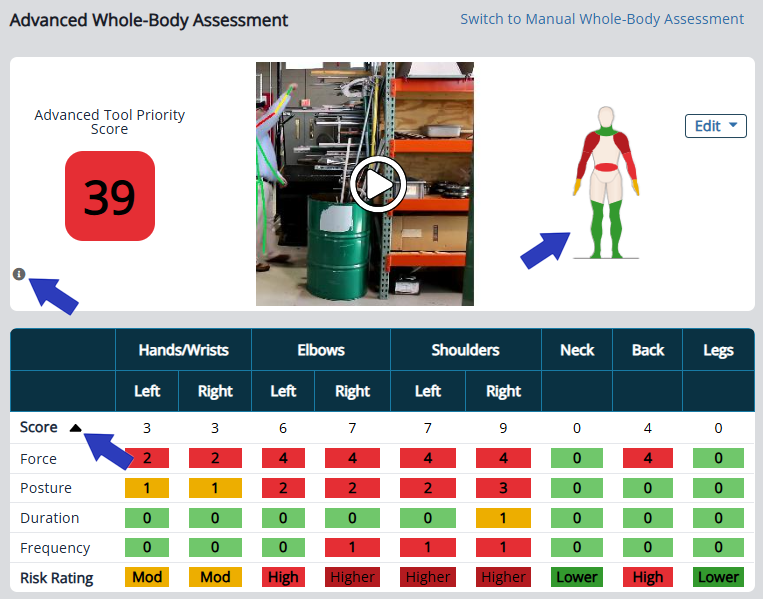
Once you’ve recorded forces (or elected to continue without this data if it does not apply) and your video is finished processing, you will see a color-coded Advanced Whole-Body Assessment Risk Priority Score. This score allows you to determine the priority of this job in relation to other jobs at your organization.
Note that Time on task does not affect the Risk Priority Score for an Advanced assessment; it applies to manual assessments only.
See How the Industrial Ergonomics Software Calculates Risk for more in-depth information about risk calculation.

Now, you can also:
- View your processed video (select the play symbol on the video)
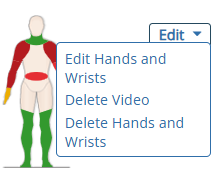
- Delete your processed video (Edit > Delete Video)
- Edit hand/wrist and posture data (Edit > Manually override Hands/Wrists Data). To learn more about hand/wrist risk factors, see Selecting Hand/Wrist Risk Factors.
- Add forces related to PPE (in the Forces section, select Edit next to PPE)
- Indicate whether the operator experiences vibration during the task (in the Vibration section, select Edit)
To expand the grid and see the assessment scores for each body segment, select the figure or the arrow next to Score. To see a score key, select the information icon on the left side of the page.
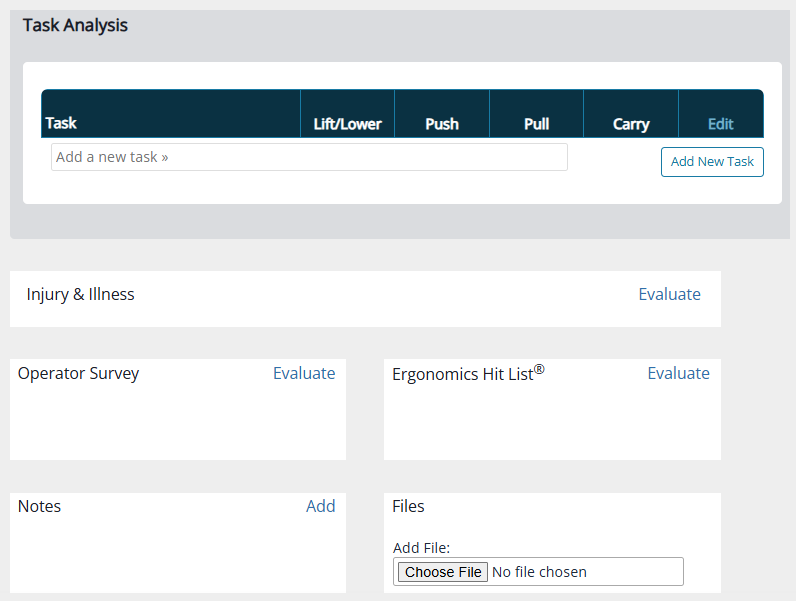
Underneath the grid, you can add manual material handling information under Task Analysis. To learn more, see Using the Manual Material Handling Tasks List.
Scroll to the bottom of the page to add qualitative data for the job, such as Injury & Illness information, an Operator Survey, an Ergonomics Hit List evaluation, and Notes or Files. To learn more, see Adding Qualitative Data.
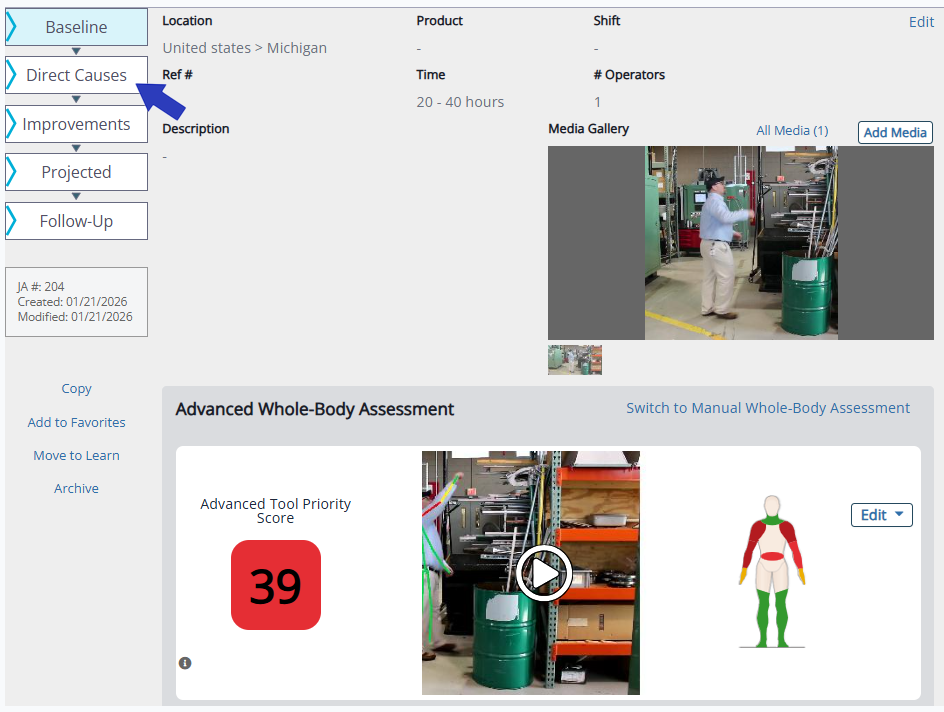
Adding Direct Causes
When the Baseline job assessment is complete, you can add Direct Causes by selecting Direct Causes on the left side of the page. Direct Causes are used to perform a root cause analysis on any high-risk body segments identified in the Baseline assessment.
To learn more, see Adding Direct Causes to an Advanced Whole-Body Assessment.
Adding Improvements
After adding Direct Causes, navigate to Improvements on the left side of the page. To learn more, see Adding Improvements to a Whole-Body Assessment.
The Projected Phase
After the Baseline, Direct Causes, and Improvements phases are complete, you can use the Projected phase to estimate what the future risk priority score of the current job will be if the suggested improvements are implemented.
To complete a Projected job assessment using motion capture technology, select Projected > Start Advanced Assessment. To upload a motion capture video in the Projected phase, use the same process as described for the Baseline phase.
When recording a video for the Projected phase, you should ensure the video reflects what the task would look like if your suggested improvements are implemented. If it is not possible to include the actual improvement listed in the Improvements phase, you might create a mock-up of the job to closely approximate the improvement.
You can use the data from the Projected job assessment to make adjustments to your Improvements phase.
Tip: The Projected Summary provides a side-by-side comparison of your baseline and projected assessment and lists your recorded improvements.
The Follow-Up Phase
Once you have implemented your improvements, conduct a final Follow-up assessment using motion capture: select Follow-Up > Start Advanced Assessment. The process for uploading a motion capture video in the Follow-Up phase is identical to the process described for the Projected and Baseline phases.
The Follow-Up data shows how your improvements changed the risk priority score for the job once they were implemented. You will be able to compare your results with your original Baseline assessment.
