

Adding Direct Causes to an Advanced Whole-Body Assessment
Accurately identifying the reason that risk is present in a job can be a daunting task; however, this is also the most critical information you need to begin implementing effective improvements.
The artificial intelligence and embedded ergonomics capabilities of the motion capture-powered Advanced Risk Assessment provide a powerful and user-friendly way to generate high-quality risk causes and effective improvements to address MSD risk.
For your Advanced Whole-Body Risk assessments, generating direct causes and adding them to improvements to address MSD risk is a guided process. This embedded expert system leads you through a “5 Whys”-style analysis to help you get to the root of the risk without having to write your own direct causes from scratch.
When you have an Advanced Whole-Body Assessment for which you’ve already completed the Baseline phase (the video has been processed and you’ve added force data, resulting in a Risk Priority Score), you’re ready to move on to the next phase, Direct Causes.
Add a Direct Cause
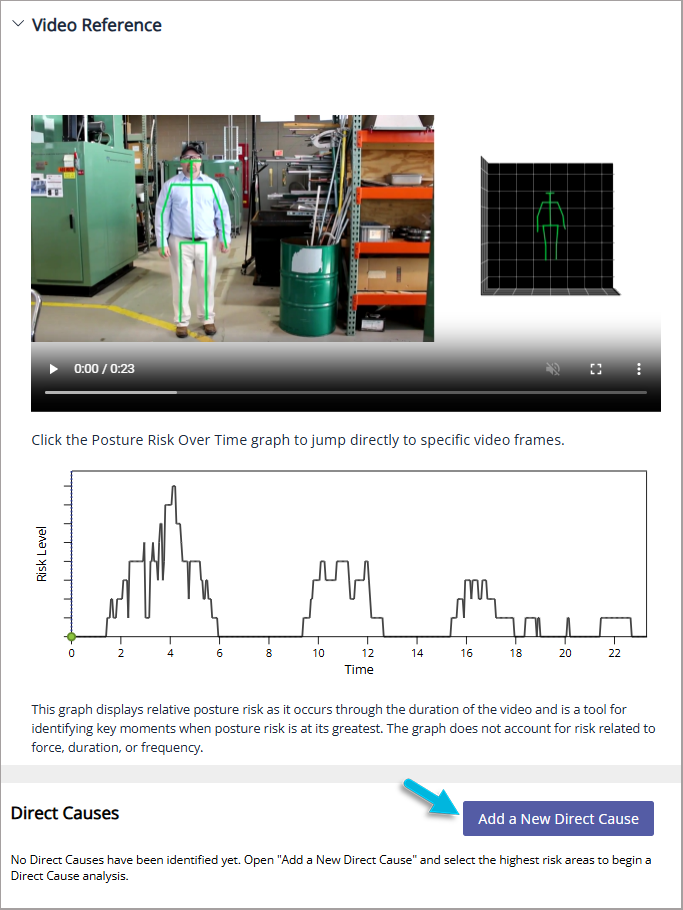
- On the Baseline page, select Direct Causes.

- Choose Add a New Direct Cause.
- The nine body regions display in order of priority according to their risk scores, showing you the highest risk areas at the top. Choose a body region you want to address and a risk factor, Force Risk or Posture Risk. Then click the Select button.
Note: While you’ll start with only a single body region and risk factor here, you can select additional body regions and risk factors later (see Apply an Existing Direct Cause to Another Body Region, below).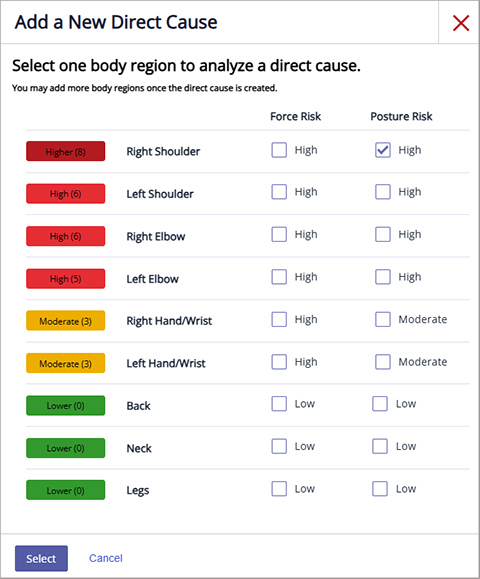
- Click the down-arrow next to the body region label to begin adding a Direct Cause.
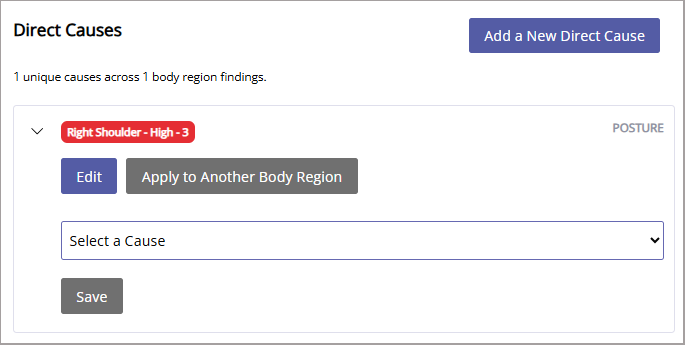
- Click the Select a Cause field to see a list of potential causes for higher risk that is specific to the body region and whether you are analyzing Force or Posture. Select the cause that best addresses the force or posture issue. If none of the provided causes applies, select Other to enter a custom cause and add a short Description for it.
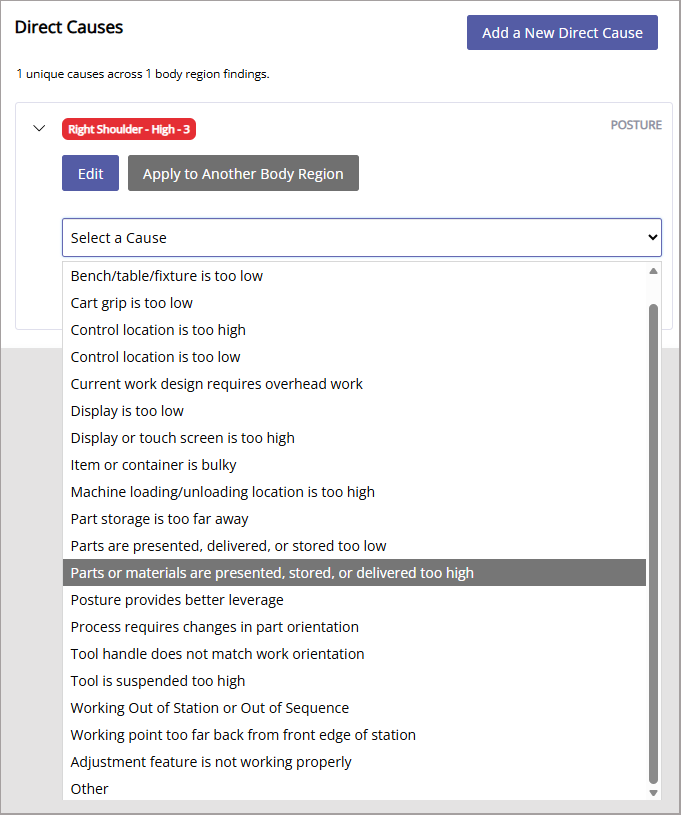
- If you selected a provided cause in the previous step, the software leads you through the “5 Whys”-style analysis. Select additional causes until you arrive at the direct cause of the issue for the body region.
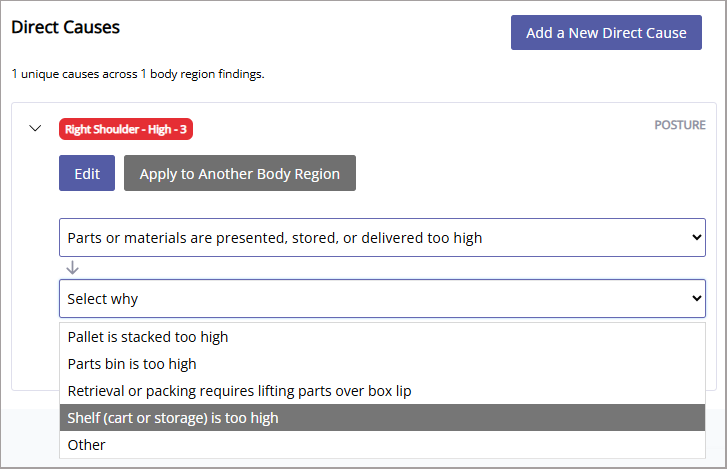
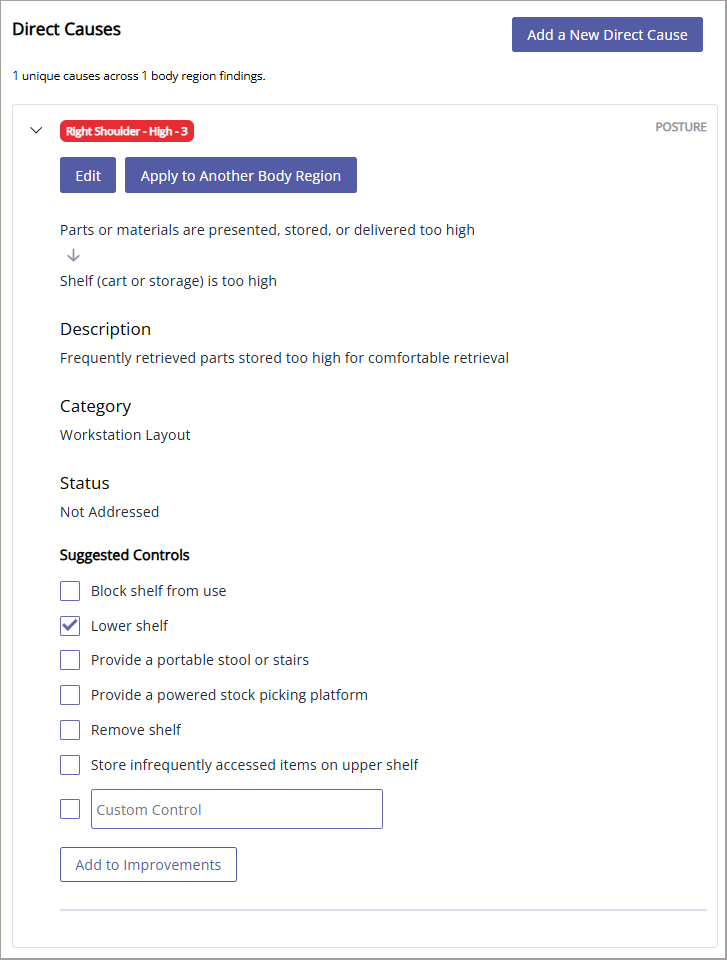
- If you wish, add a Description of the issue so that it’s easy to understand how to resolve it. Then select the appropriate direct cause Category from the following. Save your changes.
- Product Design – Lack of features that increase the ease and speed of handling and assembly
- Process Flow/Design – Inefficient movement of product and/or materials entering or exiting the workstation
- Equipment/Tool Design – Poorly designed, selected, or installed equipment and tools that increase the burden on the employee
- Workstation Layout – Lack of design considerations to accommodate the capabilities of the employee
- Dunnage/Packaging – Handling and manipulating packaging of incoming or outgoing parts and materials makes the job more difficult
- Based on the cause(s) you selected, you’ll see a generated list of Suggested Controls (improvements) you can implement to reduce the risk for this body region. If you’d like to apply any of these, select them and then choose Add to Improvements to automatically add them to the Improvements phase. Note that no Suggested Controls are provided for “Other” causes you may have entered, but you can enter a Custom Control here instead.
- On the Baseline page, select Direct Causes.
Add More Direct Causes
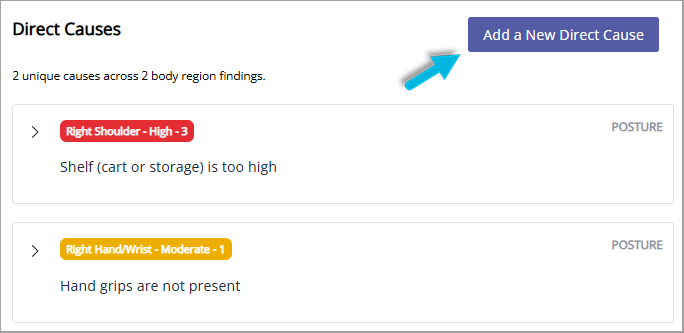
In the Direct Causes section, select Add a New Direct Cause, and then follow the steps above.
Edit a Direct Cause
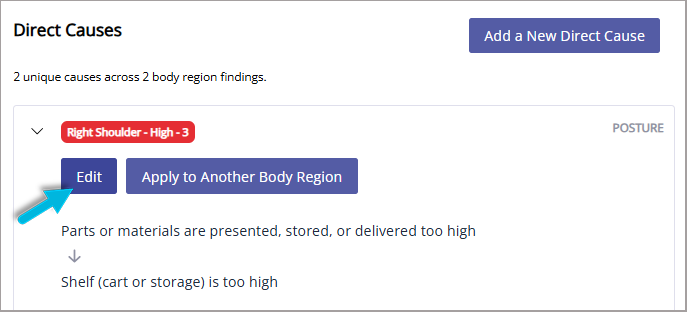
Expand the direct cause using the arrow icon next to it, and then select Edit.
Apply an Existing Direct Cause to Another Body Region
A single direct cause may be a source of force or posture risk across multiple body regions. If this is the case, you can easily apply it to other affected body regions without entering it again manually and creating duplicate records.
- Expand the direct cause you want to work with and choose Apply to Another Body Region.
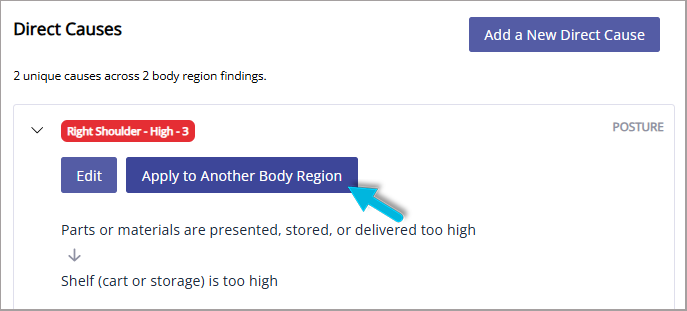
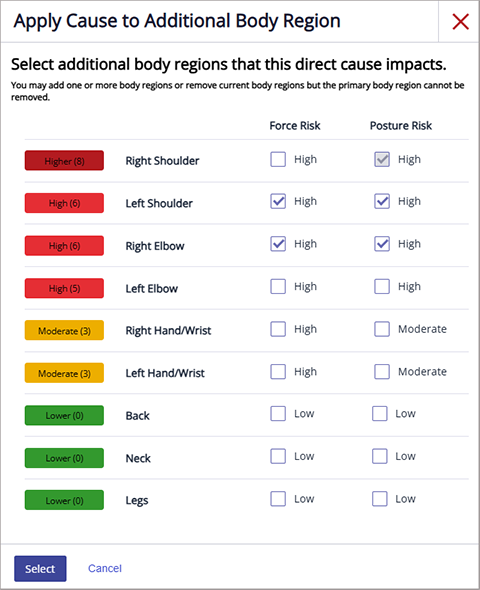
- The body regions already associated with the direct cause are shown as selected (only Right Shoulder in this example). Select Force and/or Posture for the additional body region(s) to which you want to apply the direct cause and click Select.
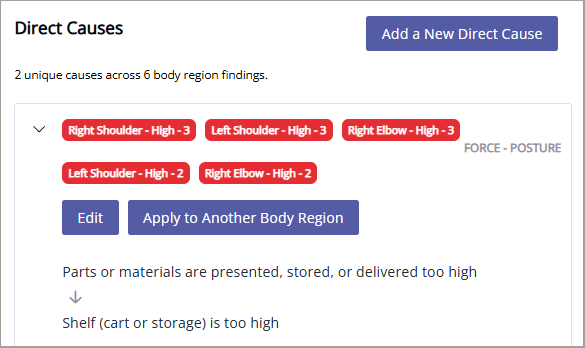
- You’ll immediately see the additional body regions to which you applied the direct cause.
- Expand the direct cause you want to work with and choose Apply to Another Body Region.
Delete a Direct Cause
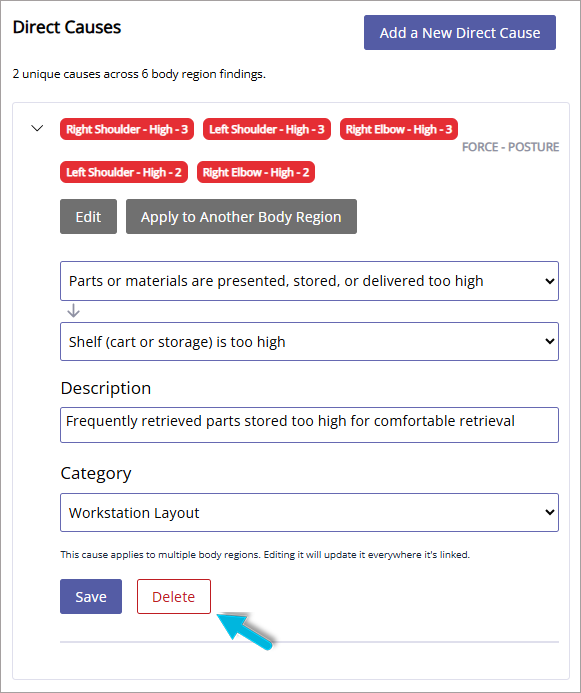
Expand the direct cause you want to delete and click Edit > Delete > OK.
Direct Cause Statuses
Direct causes can have one of the following statuses:
- Not Addressed. This is the default status. No improvements have been created in the system that are linked with this direct cause.
- In Progress. An improvement linked with this direct cause has been created.
- Addressed. An improvement linked with this direct cause has been completed.
For more, see Adding Improvements to a Whole-Body Assessment.
What’s Next?
When you move to the next phase, Improvements, you’ll see the controls you selected during the Direct Causes phase to “Add to Improvements.”
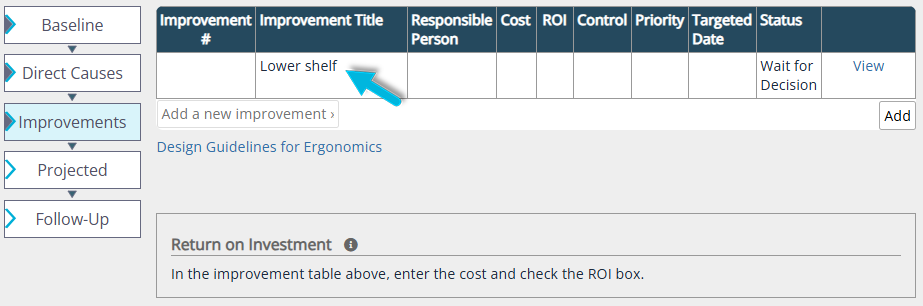
Once you’ve selected controls during the Direct Causes phase, you’ll use the Improvements page to manage them from that point on; here you can edit the improvement and add more detail, as well as delete the improvement, if necessary. If the improvement is linked with one or more direct causes, they’ll also display here.
Note: If you selected a “built-in” control during the Direct Causes phase, the Improvement Title cannot be edited.

