

Adding and Managing Users
Adding a Single User
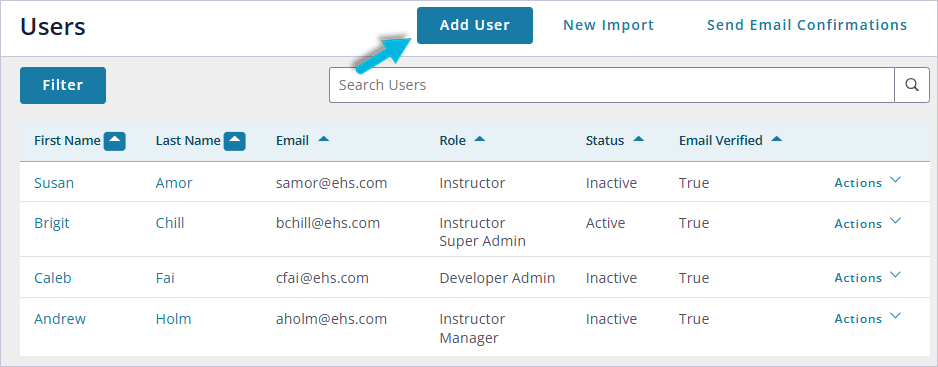
To add a single user, select Administration > Users > Add User.
While there are only a few required fields, VelocityEHS recommends you complete as many as possible. Then select the Add User button to save the details.
Note: An email address and username can only be used once in the system.
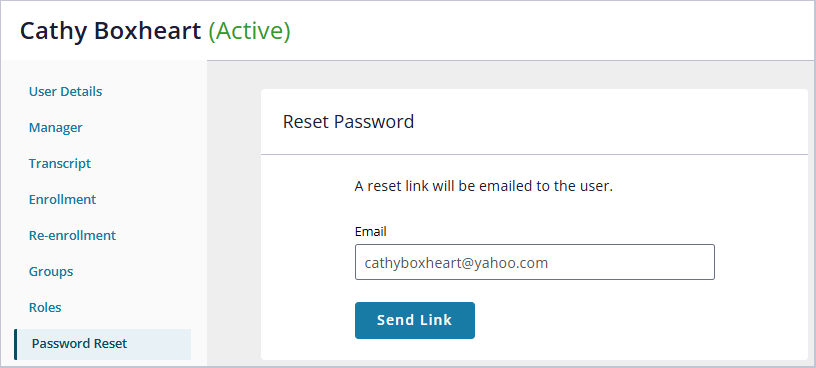
Once you’ve added a user with an email address, they will receive an email prompting them to set their account password. You can also manually send or resend the registration email using the Password Reset or Resend Complete Account option.
-
- Password Reset – prompt the user to reset their password once one has already been created.
- Resend Complete Account – prompt the user to register and set up their initial password. This option is only available for users that have not set up an initial password.
By default, an Email address is a required field. If your users do not have email addresses, you’ll need to disable the Require User Email option in System Settings > Security Settings. See System Settings for more information. This will also allow you to set users’ passwords manually.
Note: The system will not notify users of their passwords. You will need to do that outside of the system.
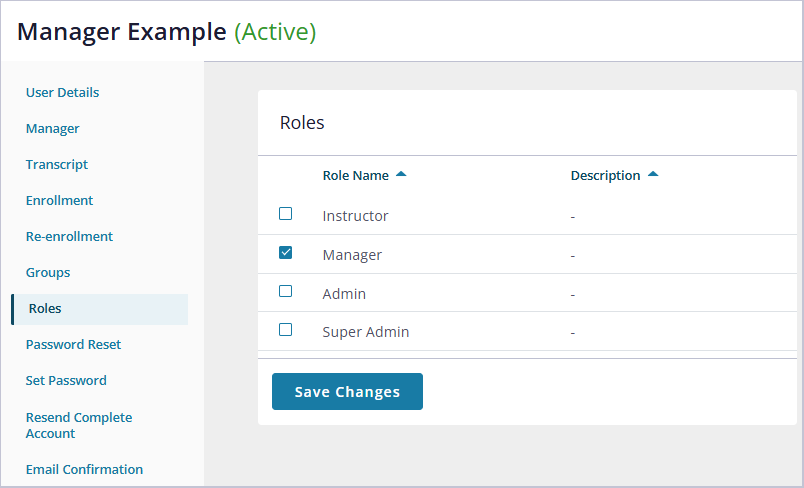
Setting a User’s Role
By default, all users will be added as Learners. However, if they need to have additional permissions, select the Roles option in the user’s profile to select Instructor, Manager, Administrator, or a combination.
For more about each of the roles see:
Managing Existing Users
To update a user’s details, change their status or role, or assign a manager in the system, select Administration > Users.
Locate the user on the Users page and select the user’s name or Actions > Details.

From the user’s profile page, you can change their Status from Active to Inactive (or vice versa) using the Edit Status button. Note that Inactive users cannot be assigned courses, classes, or programs, and they do not count toward your account’s user limit.
Use the other options on the left to
-
- view or update additional user information,
- assign the user’s manager,
- add the user to a Group,
- change their role,
- prompt them to reset their password, or
- set a new password.
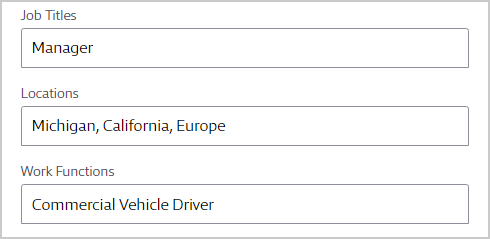
Administrators can assign users to one or more groups according to their Job Titles, Locations, and/or Work Functions.
Select the Save Changes button at the bottom of the page to update the record.

Adding multiple users
You can upload multiple users simultaneously using the User Bulk Imports option in the Administration menu.
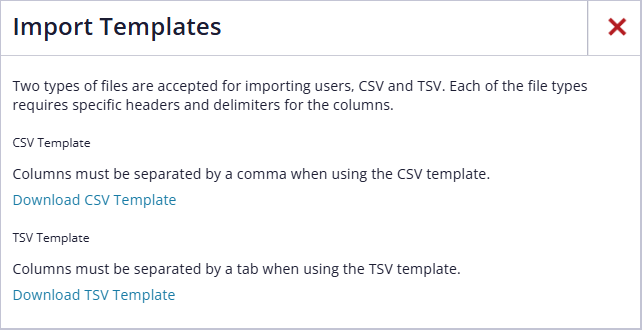
The first step is to download the Import Template: select the Import Templates button and then select the file format you wish to use (CSV or TSV).
Complete the Microsoft Excel Import Template, including the following fields.
-
- Email – user’s email address. Each user must have a unique email address. If they do not, disable the Require User Email option (System Settings > Security Settings). See System Settings for more information. Otherwise, this field is required.
- First Name, Last Name – user’s full name (required)
- Middle Name – user’s middle name
- Department – user’s assigned department
- Phone Number – user’s phone number
- Onboard Date – user’s start date with your organization (mm/dd/yyyy)
- Manager – username for the user’s manager
- Job Title, Location, Work Function – These group types simplify the enrollment process, enabling administrators to enroll multiple users at once into courses, classes, or programs, according to the Group Type with which they are associated. If a Job Title, Location, or Work Function included in the import doesn’t currently exist in the system, a new group will be created for it.
If the Require User Email option is disabled for your account, you’ll also need to include the following fields:
-
- Username – unique for each user
- Password – must adhere to the system’s password requirements: minimum of 8 characters, including at least one uppercase and lowercase letter, one number, and one special character.
Once you’ve completed and saved the template, select New Import on the Bulk User Imports page.
Click Select Import File to select the completed template file from your computer. Then select New Import.
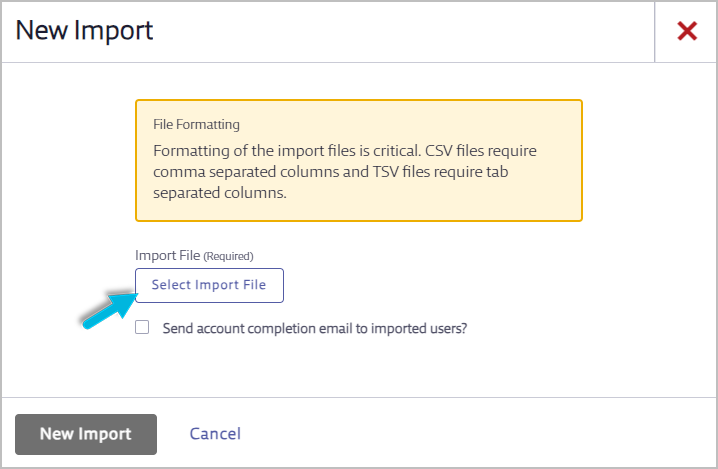
If you’ve entered email addresses for your users, use the Send account completion email to imported users? checkbox to send them a notification that their account has been created. This will prompt them to set up their password. In addition to the account creation email, users with email addresses will receive an email that asks them to confirm their email address, regardless of whether this option is selected.
You’ll have a chance to review the import data before finalizing the import. Depending on the amount of data, the import may process quickly or it may take a few minutes.

Only administrators in your organization can define or change user roles and permissions. VelocityEHS Support cannot make these changes.