

Creating New Classes and Sessions
Before creating a new class or class session, VelocityEHS recommends you make sure whoever is teaching the class session has already been added as an Instructor in your Training & Learning account; the Instructor field is required when creating a class session. See Adding and Managing Users for information about assigning a user an Instructor role.
Adding a New Class
To add a new class, select Administration > Classes.
Think of a Class like a folder and the Sessions like the documents in the folder. You create the folder once and then you can put each new document in it. So the first step is to create the Class folder.
To add a new class, select the Add Class button.

Enter the Class Name, Description, and select a Subject from the drop-down list. The Subject you select determines where the class is placed in the Learning Center. Select Add Class.

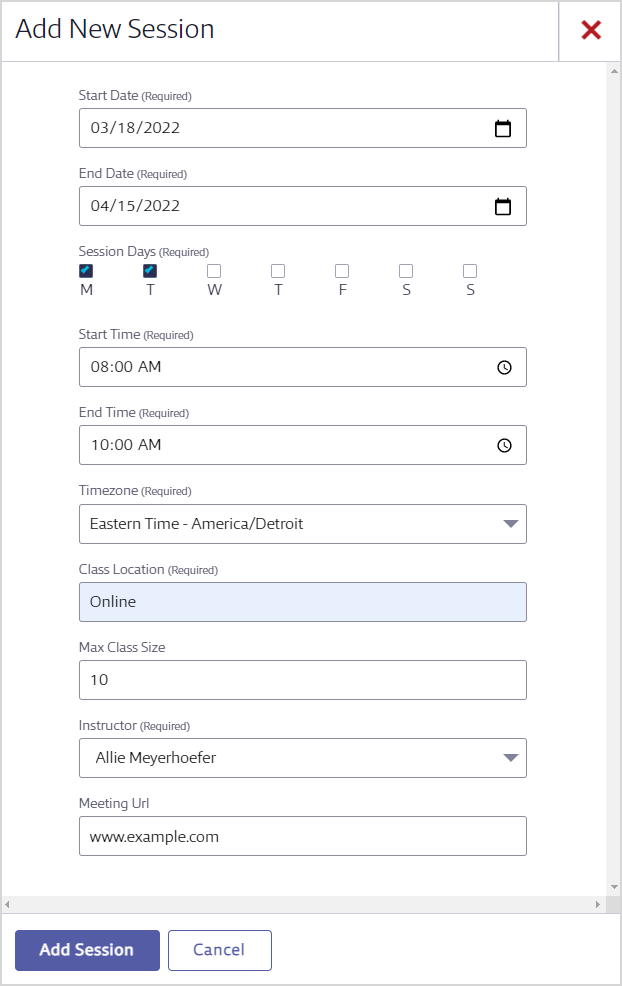
Next, select Sessions in the left-hand menu. Remember, learners are enrolled at the Session level, so to enroll learners in a class, you’ll need to create specific sessions in which to enroll them. Select Add Session.

Complete all required fields.
If you enter a Max Class Size, any users that try to enroll in the session after this size limit is reached will automatically be placed on a waitlist.
Select Add Session.
Users can now be enrolled in this session. See Enrolling Learners in Courses, Classes, and Programs for more.
Adding a New Session
To add a session to an existing class, select Administration > Classes.
Locate the class on the Classes page. Select the class Name > Sessions, or select Actions > Sessions.
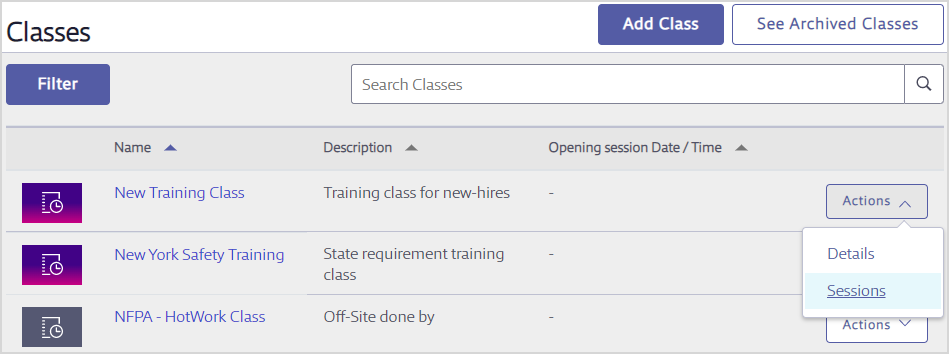
Select the Add Session button.

Complete all required fields and select Add Session. Users can now be enrolled in this session. See Enrolling Learners in Courses, Classes, and Programs for more.
Archiving a Class
Archiving a class allows you to remove it from your account without losing records of who completed it. Archiving also removes any enrollments that have not been completed.
To archive a class, select Administration > Classes.
Locate the class on the Classes page and either select its name or select Actions > Details.
Select the Archive button and then confirm the action.

If you need to unarchive a class, please contact Customer Support.
