

Completing a Job Assessment Using the Manual Whole-Body Assessment
Opening Your Job Assessment
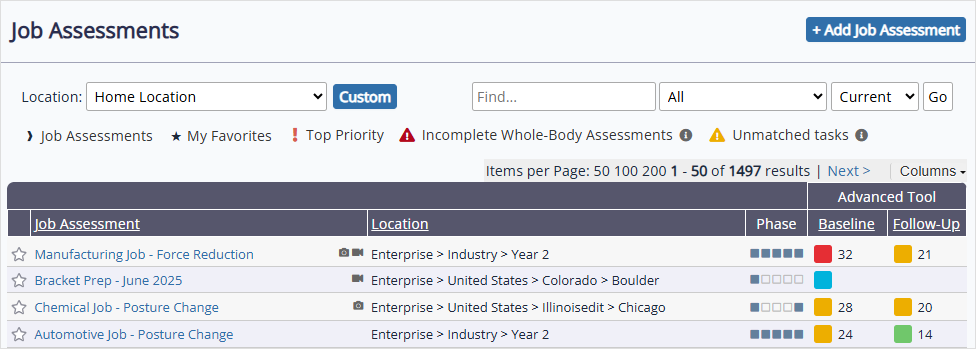
Once you’ve created a job assessment, select Do > Job Assessments from the menu and select the job assessment you wish to complete. You can also use the search and filter options across the top of the page (My Favorites, Top Priority, etc.) to locate a job assessment.
Note: To open a job assessment in a separate tab, right-click the assessment and select Open link in new tab.
The “Baseline” Phase
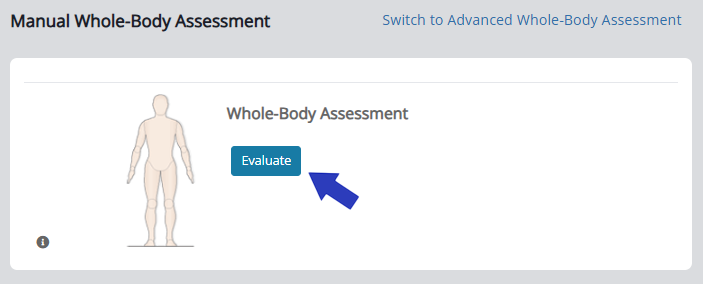
The first phase in completing a job assessment is the Baseline phase. Navigate to the Manual Whole-Body Assessment tab. Remember, when completing a Manual Whole-Body Assessment, observe only a single operator completing a task.
Select Switch to Manual Whole-Body Assessment > Evaluate to start the Baseline assessment and display the assessment page.
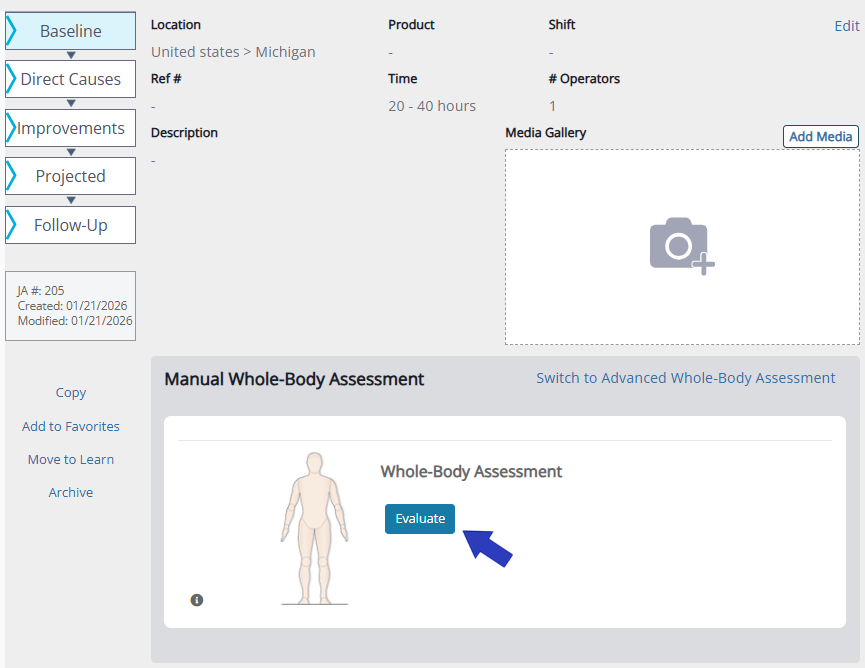
Note that you have the option to download the assessment as a PDF, complete it offline, and manually enter the results later.
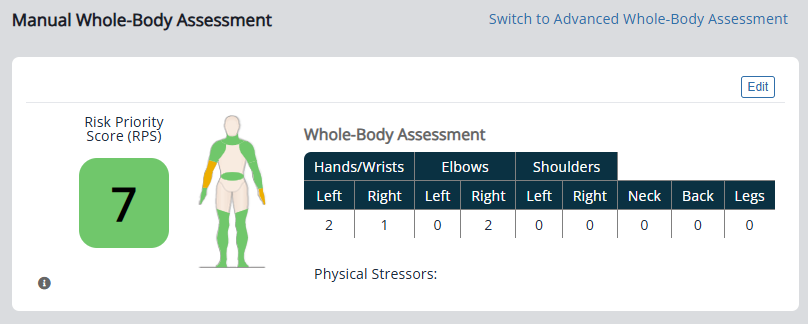
The Manual Whole-Body Assessment evaluates 9 different body segments according to 4 different MSD risk factor categories: posture, force, duration, and frequency.
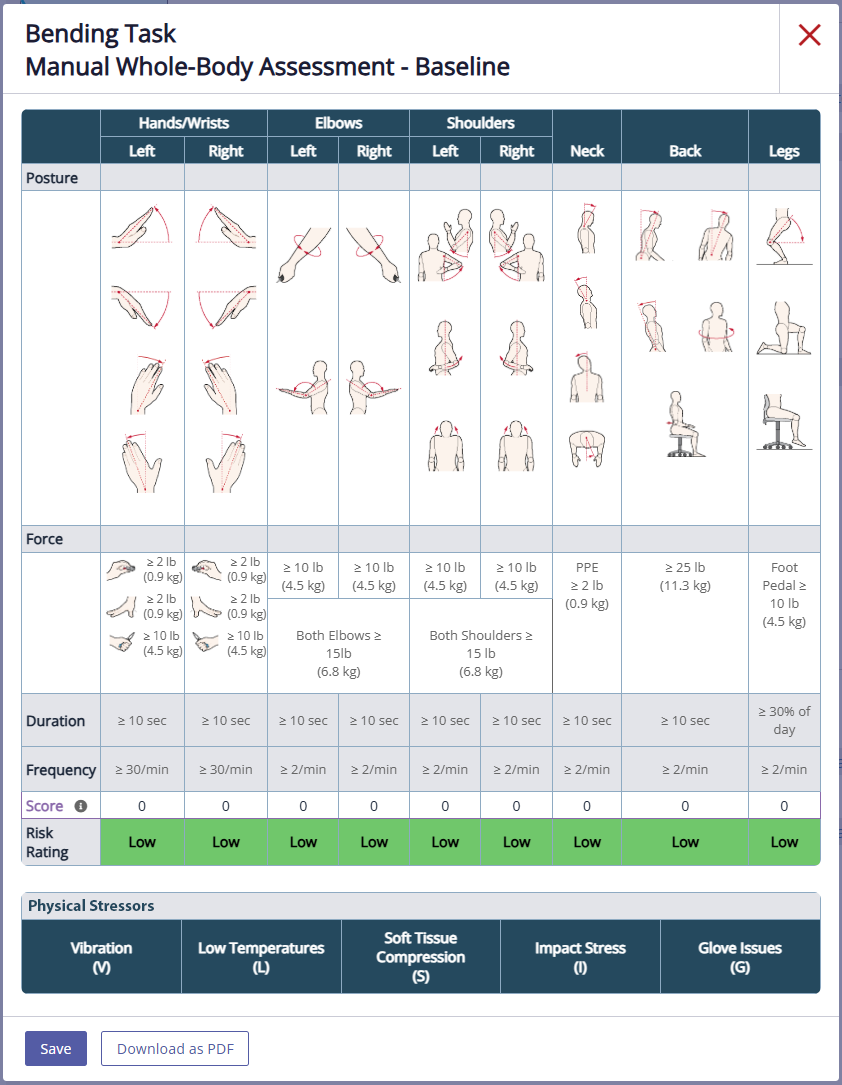
Posture
For each body segment, select all postures you observe that meet or exceed the specified threshold value, regardless of how many times you observe them during the job task.

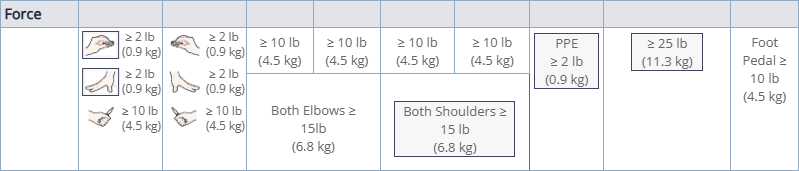
Force
Select each force that meets or exceeds the specified threshold value. Forces refer to any external load the operator handles (parts, tools, equipment), or any pushing or pulling forces they apply when performing the task.
Hand forces should be a measurement of the operator’s exertion on an item, not the weight of the item.
- Pinch Grip: When the fingers (one or multiple) and the thumb apply opposing forces on the item the operator is holding. You can use a pinch grip dynamometer to indirectly measure this force performed in a task. To learn more, see Using a Dynamometer.
- Finger Press: When the fingers (one or multiple) or whole hand apply force in a single direction. You can use a force gauge to directly measure this force performed in a task. To learn more, see Using a Force Gauge.
- Power Grip: When the thumb fully wraps around the object and touches other fingers. You can use a hand dynamometer to indirectly measure this force performed in a task.
Postures and forces are independent of each other. They do not need to occur simultaneously to be marked on the assessment.
Duration
Duration can apply to either a posture or a force. Mark duration on the assessment when the operator holds the posture or force for a full, uninterrupted 10 seconds.

Frequency
Count the number of times that a posture, force, or a combination of the two occurs in this job. This factor is evaluated based on average frequency throughout the job cycle and does not assess peak frequency.
Duration and frequency are independent of each other and do not need to occur simultaneously to be marked on the assessment.
Duration or frequency cannot be marked for a body segment unless a posture or force has already been marked for that body segment.

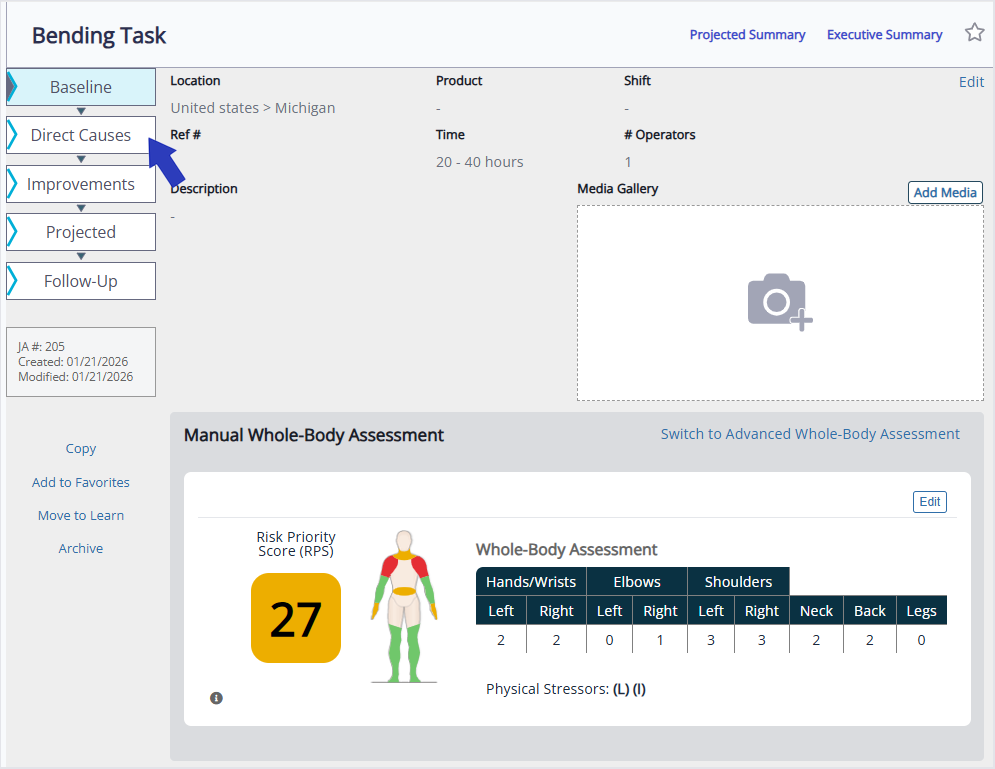
Score and Risk Rating
As you enter postures, forces, duration, and frequency information, the score, and risk rating (high, moderate, or low) are automatically calculated for each body segment. These scores will be used to determine the overall Risk Priority Score for the job.
Time on task is also taken into account when calculating the Risk Priority Score. See Settings Options for more.
Note that the scoring in the Manual Whole-Body Assessment is different than in the Advanced Whole-Body Assessment and cannot be compared. To learn more, see Why is the Advanced Whole-Body Assessment scoring different from Manual Whole-Body Assessment scoring?

Physical Stressors
Select any physical stressors that apply to the job:
- Vibration can be either segmental or whole-body and can be a result of using powered tools or equipment or coming in contact with a vibrating surface, such as riding in a forklift or distribution truck.
- Low temperatures are considered 66°F (19° C) or colder when the operator is exposed for two or more hours of the day without appropriate clothing or personal protective equipment.
- Soft tissue compression is a static force applied to the body for long periods, such as leaning against hard surfaces or kneeling.
- Impact stress is a sudden dynamic force applied to the body, such as using the hand as a hammer, or torque reaction from a hand tool.
- Glove issues can occur when gloves are too tight and restrict blood flow, or when gloves are too large, which limits dexterity and requires higher force when gripping.

Select the Save button.
Additional Tasks
On the Baseline page, you can add your video recording by selecting Add Media. You can also add a job description by selecting Edit next to the Description.
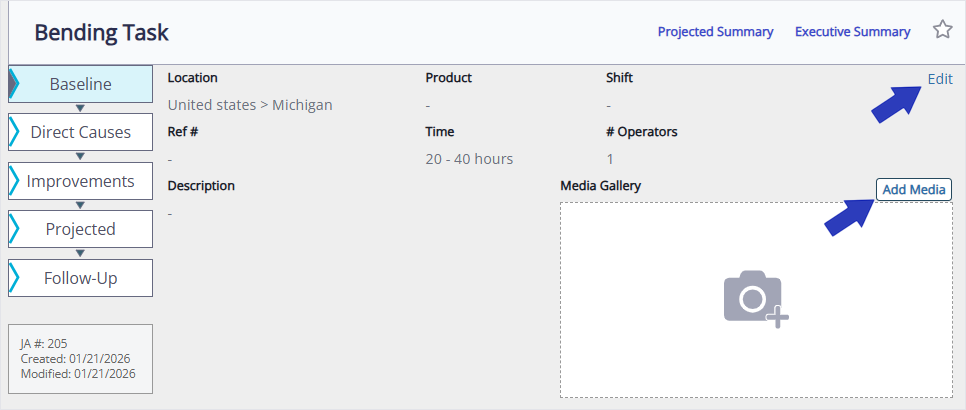
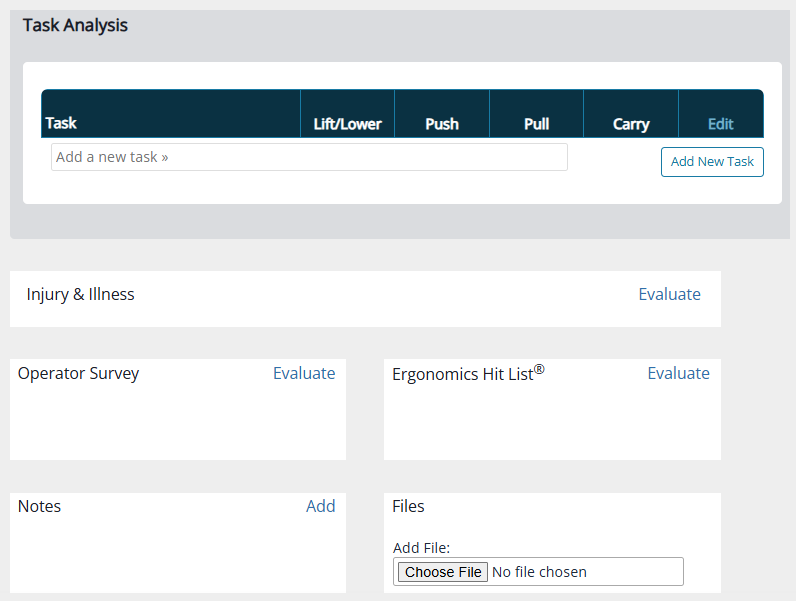
You can add manual material handling information under Task Analysis. To learn more, see Using the Manual Material Handling Tasks List.
Scroll to the bottom of the page to add qualitative data for the job, such as Injury & Illness information, an Operator Survey, an Ergonomics Hit List evaluation, and Notes or Files. To learn more, see Adding Qualitative Data.
You can also record results from Key Indicator Methods and Occupational Repetitive Action assessments, if Specialized Assessments (KIMs and OCRA) is enabled in Settings. To learn more, see Settings Options.
Your Baseline job assessment is now complete.
Adding Direct Causes
When the Baseline job assessment is complete, you can add direct causes by selecting Direct Causes on the left side of the page.
Direct Causes are used to perform a root cause analysis on any high-risk body segments identified in the Baseline assessment. For help in writing Direct Causes, see Writing Direct Causes.
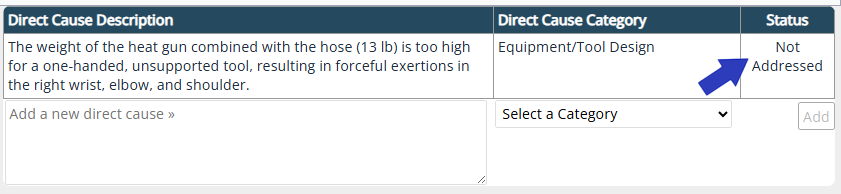
Enter a Direct Cause Description. Next, select a Direct Cause Category from the drop-down menu. Select the Add button to add the direct cause.
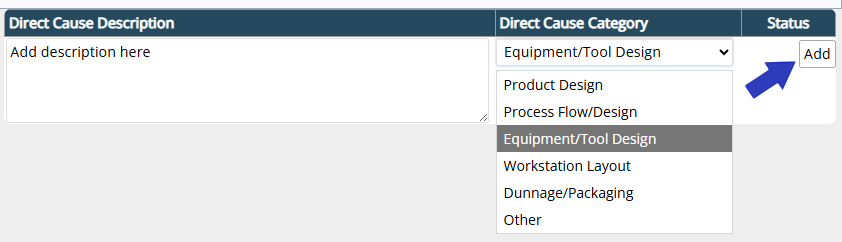
- Product Design – Lack of features that increase the ease and speed of handling and assembly
- Process Flow/Design – Inefficient movement of product and/or materials entering or exiting the workstation
- Equipment/Tool Design – Poorly designed, selected, or installed equipment and tools that increase the burden on the employee
- Workstation Layout – Lack of design considerations to accommodate the capabilities of the employee
- Dunnage/Packaging – Handling and manipulating packaging of incoming or outgoing parts and materials makes the job more difficult
- Other
Your job assessment may include more than one direct cause; create a separate entry for each direct cause using the same process.
After adding a direct cause, you will see a status of Not Addressed. As you add improvements in the next phase, this status will update to one of the following:
- In Progress. An improvement linked with this direct cause has been created.
- Addressed. An improvement linked with this direct cause has been completed.
The “Projected” Phase
After the Baseline, Direct Causes, and Improvements phases are complete, you can use the Projected phase to estimate what the future risk priority score of the current job will be if the suggested improvements are implemented.
If you used the Manual Whole-Body Assessment during the Baseline phase, use it in the Projected phase to ensure you have an adequate score comparison.
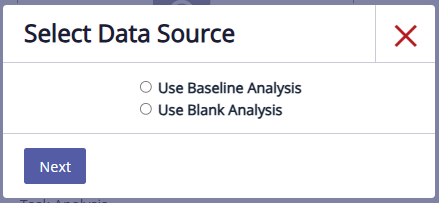
When you select Evaluate, you will have the option to select your data source for your projected assessment.
You can either use the data from your Baseline analysis or start over with a completely blank analysis.
Complete the Projected job assessment in the same way that you completed your Baseline job assessment. You can use the data from the Projected job assessment to make adjustments to your Improvements phase.
Tip: The Projected Summary provides a side-by-side comparison of your baseline and projected assessment and lists your recorded improvements.
The “Follow-Up” Phase
Once you have implemented your Improvements, conduct a final Follow-Up assessment using the Manual Whole-Body Assessment. The process for completing the Follow-Up assessment is identical to the process described in the Baseline phase.
The Follow-Up data shows how your improvements changed the risk priority score for the job once they were implemented. You will be able to compare your results with your original Baseline assessment.
