

Bowties
Creating a Site Bowtie
Site bowties create a site-specific risk scenario, using the template of a master bowtie (which reflects set corporate standards) to save time and ensure consistency across all locations. Site bowties are linked to a master bowtie when created, inheriting the master’s causes, consequences, and any controls determined as relevant.
Note: Site bowties can be unlinked from a master bowtie via the Master Bowties page. For more about master bowties, see Working with Master Bowties.
The ad-hoc risk scenario remains as a user-customizable option, but there are some major differences between the two scenario types.
| Ad-hoc risk scenario | Site risk scenario |
|
|
Note: Before initiating this process, be sure that you have a published master bowtie to which you want to link the site bowtie.
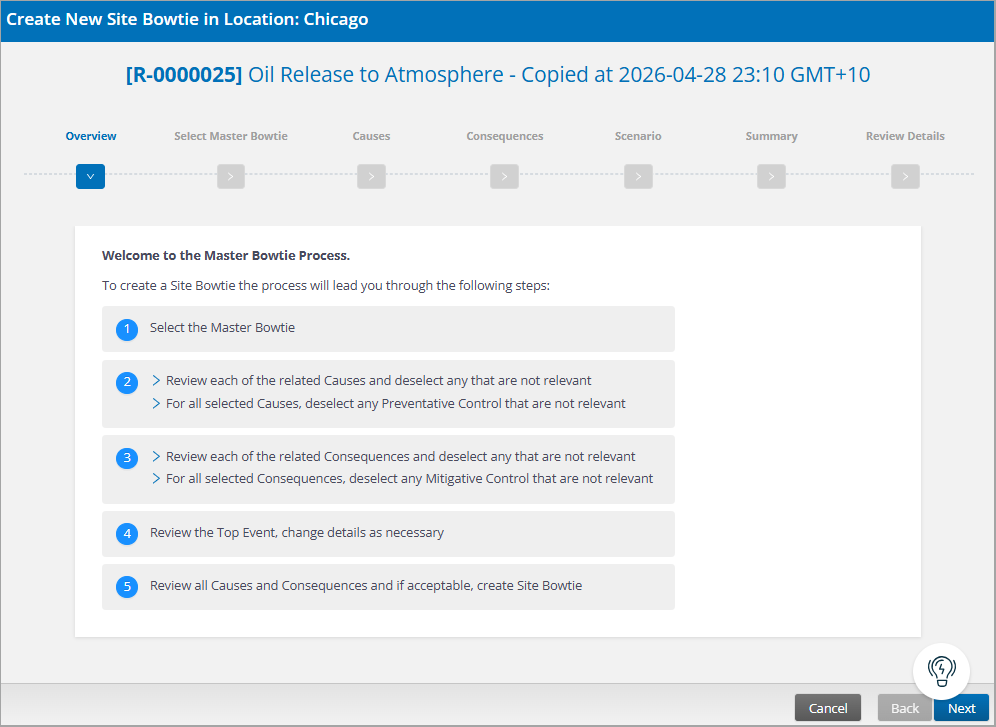
- To create a site bowtie, select Hazards & Risks > Bowties > Add > Site Bowtie.
- The Site Bowtie “wizard” leads you through the five steps required to create one. When you’re ready, select Next to continue.
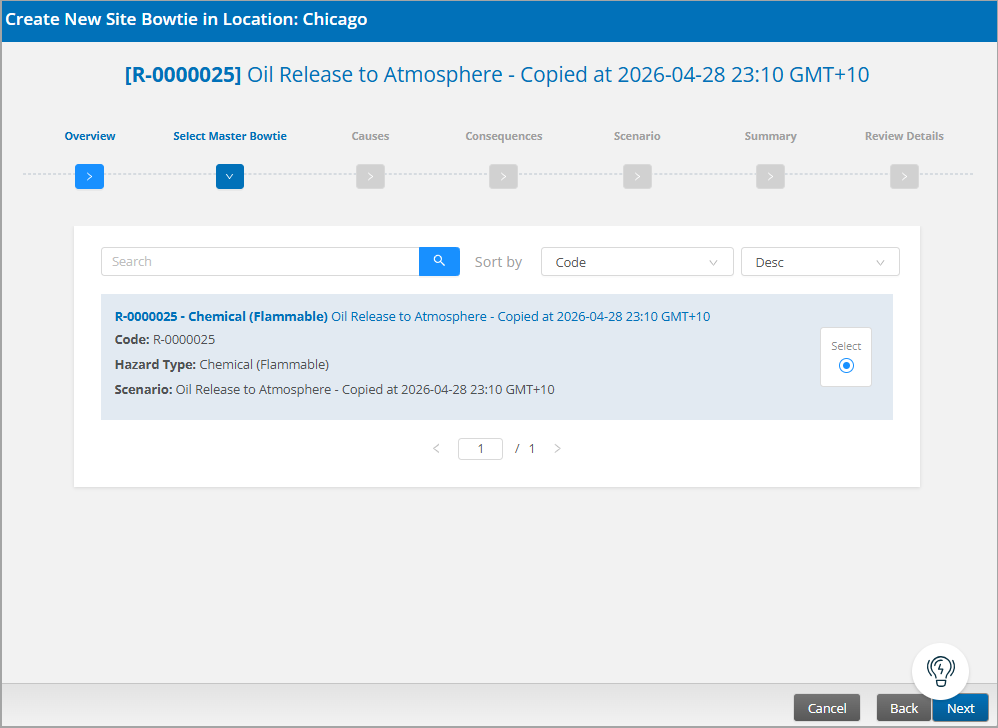
- Find and select the master bowtie to which you want to link this site bowtie. Select Next.
- The related Causes and controls display. Make your selections and then select Next to continue.
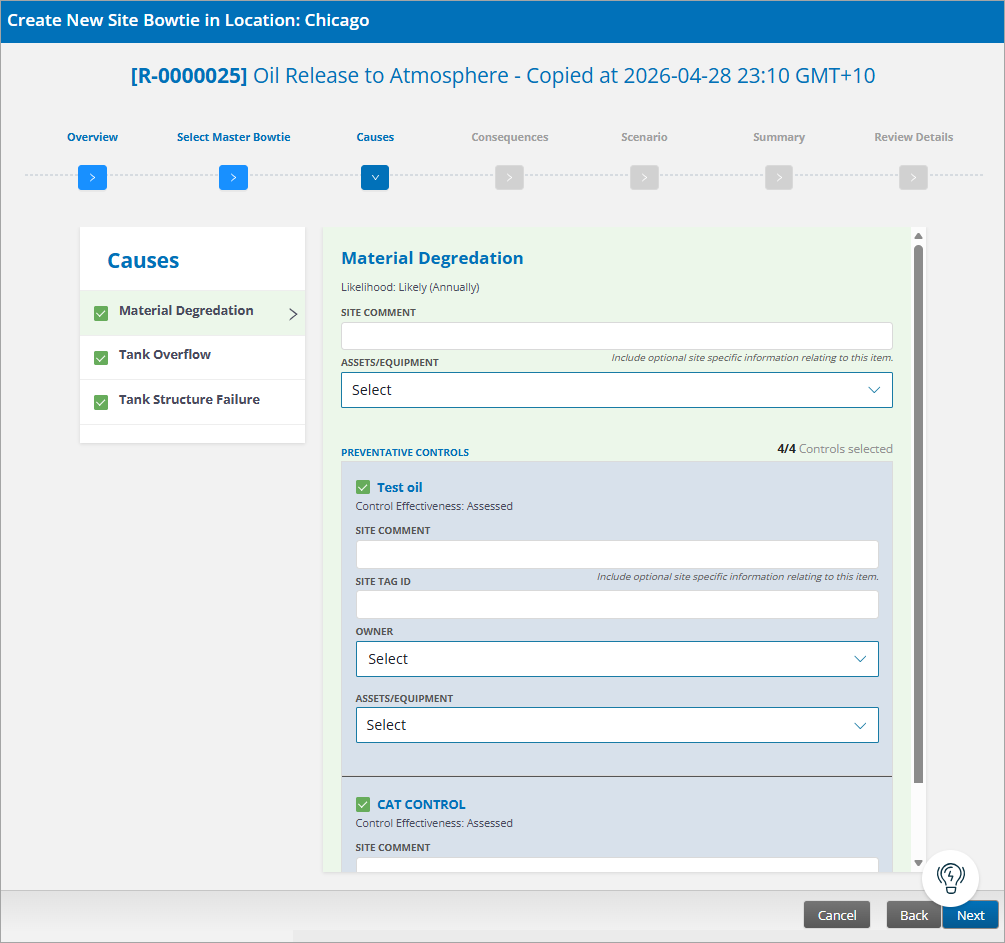
- By default, all causes and controls are selected.
- Any deselected items (cause or control) will require a comment explaining the reason.
- Critical controls are marked in the list.
- If your site tracks risk associated with particular assets or equipment (tanks, vehicles, etc.) for asset-level risk visibility (Configuration Editor > Register Policies > Risks > Enable Site Bowtie Equipment, Enable Equipment in Bowtie Controls), select one or more Assets/Equipment from the list to link site-level bowtie causes (as well as consequences and preventative controls) to assets.
- All items are color-coded: red dot = invalid item; green background = item accepted in site bowtie; gray background = item rejected in site bowtie.
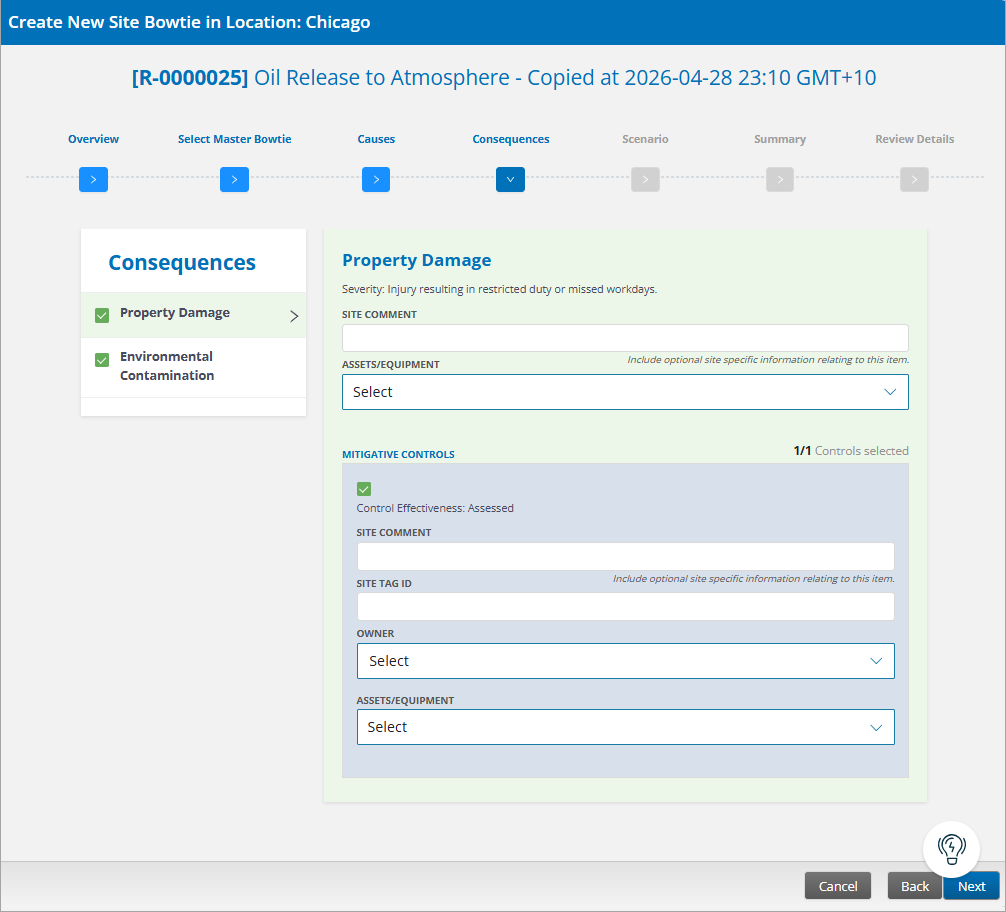
- The Consequences page is similar to the Causes page, with the same selection process. When you’re finished, select Next to continue.
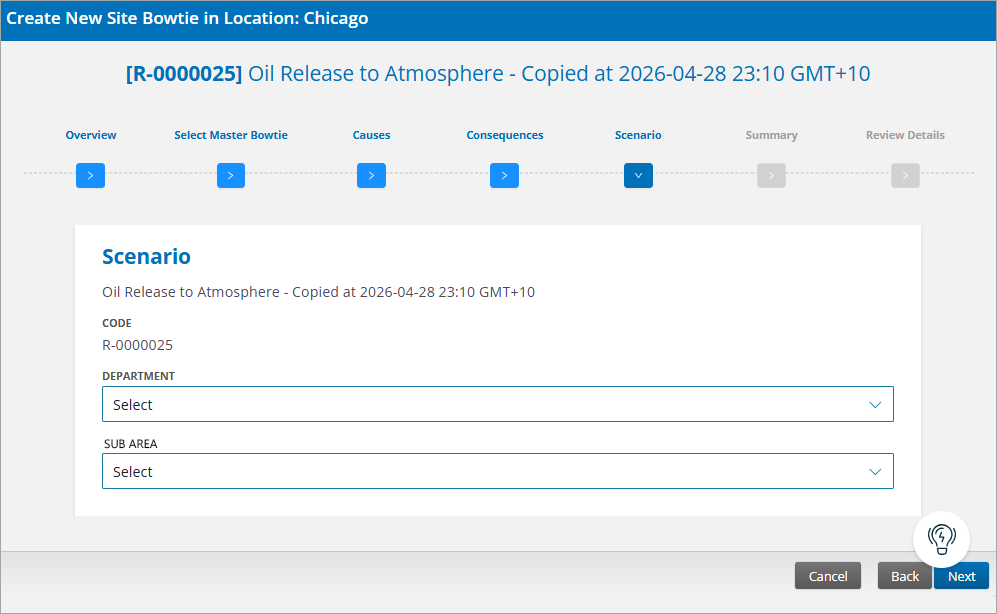
- Select the Department and Sub Area/Location on the Scenario page and select Next.
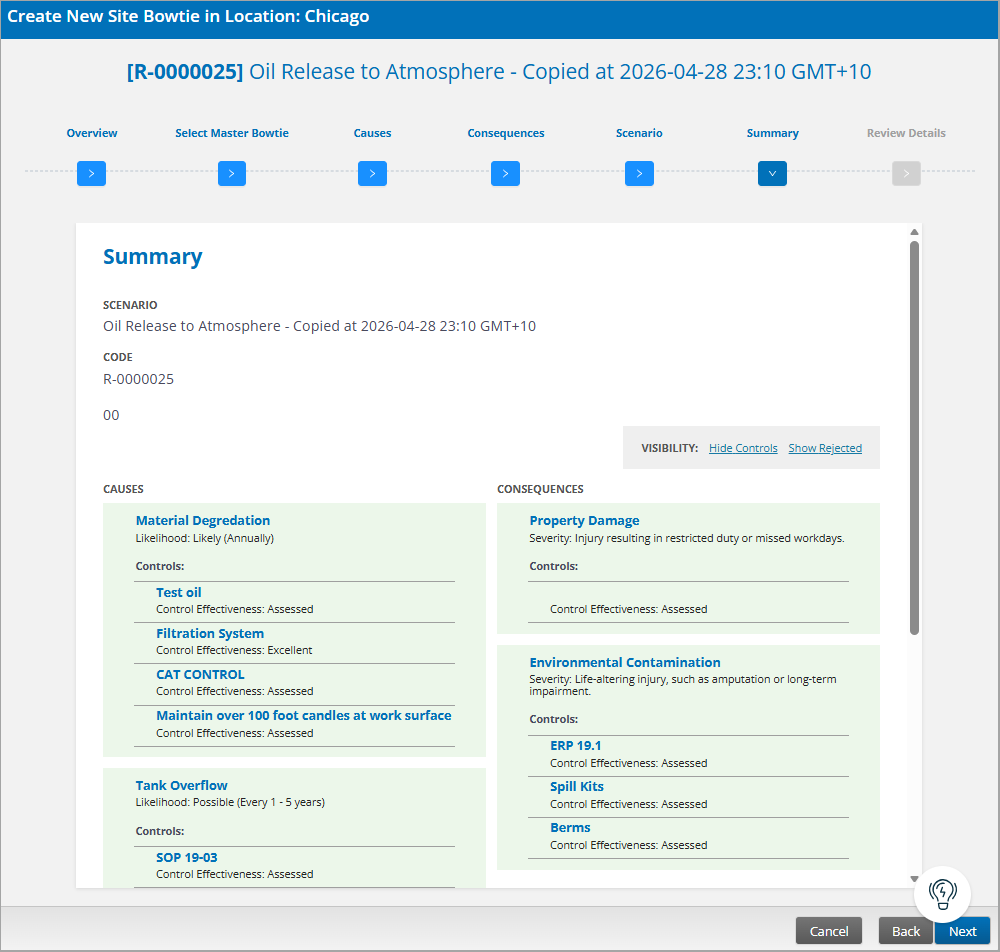
- On the Summary page you can review all selected items. Select Next to continue to the last step.
- Add Review Details including the following. When the information is complete, select the Finish button to save the site bowtie.
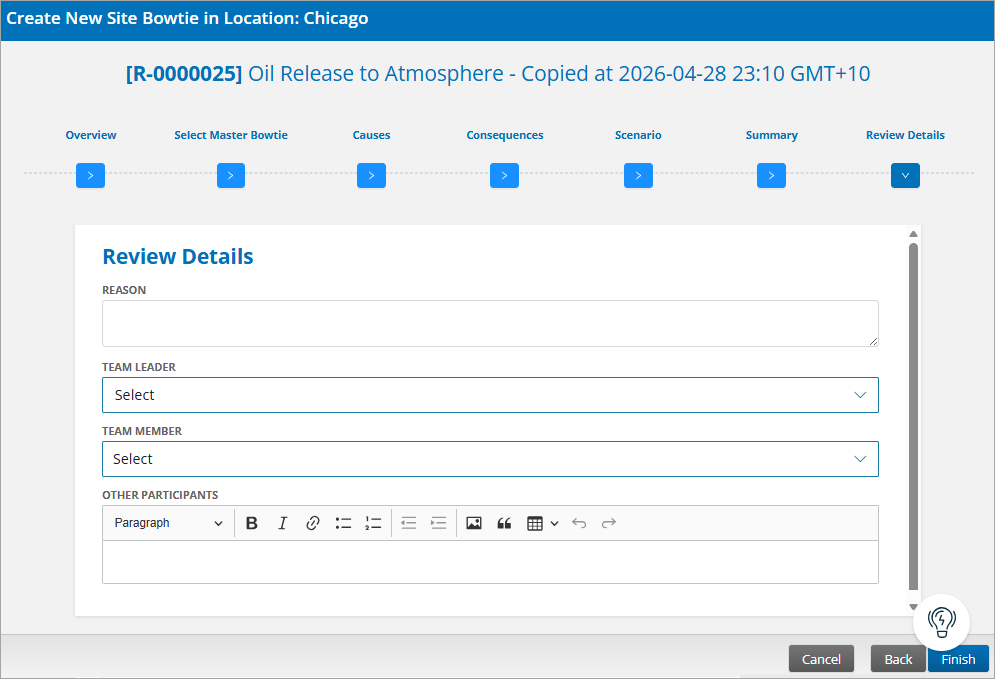
- Reason – purpose for implementing changes to the site risk scenario (required)
- Team Leader – person facilitating or leading the review of the site risk scenario (required)
- Team Member – other participants in the review process who are users
- Other participants – other participants in the review process who are not users, such as external consultants, vendors, and third-party contractors
- Session Date – date of the review session (default is the current date)
- Finding – any findings identified in the review session, which may include additional context justifying the changes
- Completed – date the review was completed/approved (default is the current date)
- Attachments – any supporting documentation, pictures, or other files
Was this helpful?
Thanks for your feedback!
