Performing Verification Activities
Once you’ve accessed the verification activity, the system walks you through the verification process, which follows these steps:
- Introduction
- Overview
- Questions (including attachments and actions)
- Comments
Introduction
Review the Introduction (defined in the verification template). Select the Next button to continue.

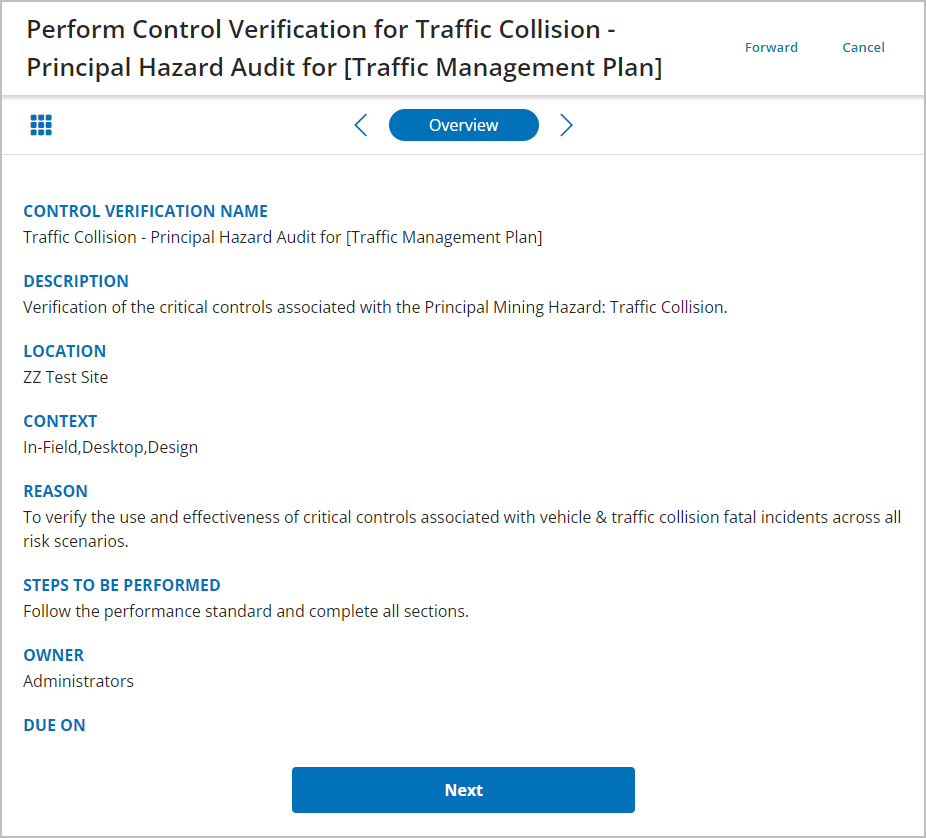
Overview
The Overview provides more context about the verification activities (steps to be performed, and potentially, bowties related to the verification activities, etc.). Select Next to continue.
Questions
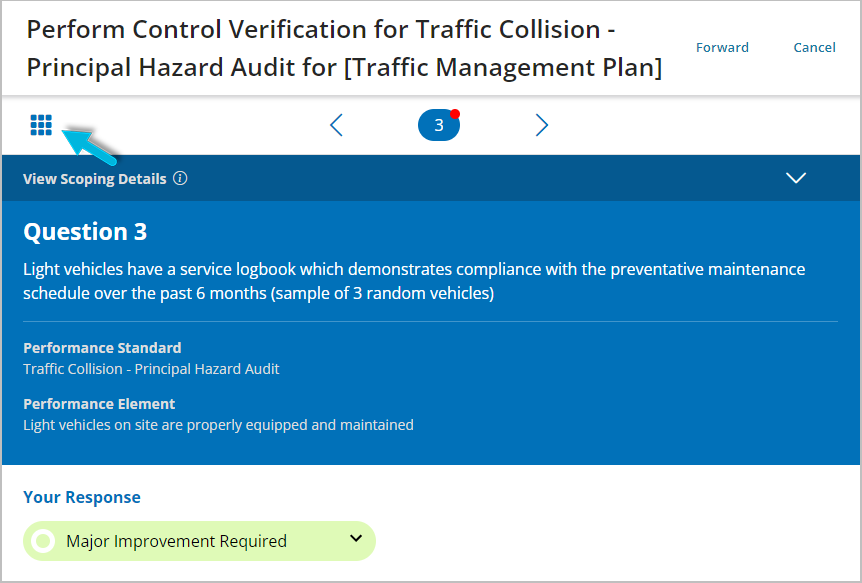
For all questions that display (as defined for the performance standard), select Your Response. (Response options are defined during system setup in Administration > Editor > Lookups.)
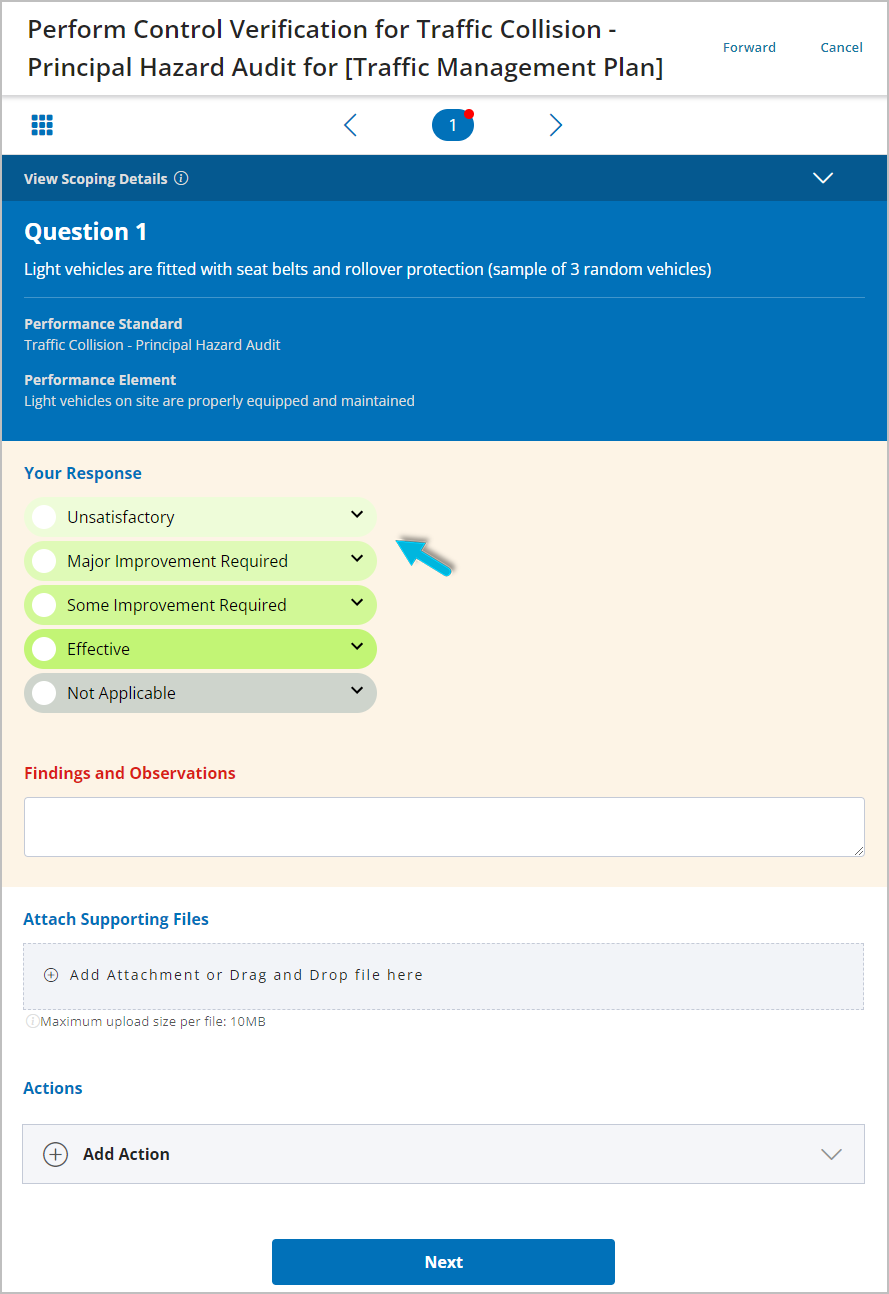
Complete each question. Required fields display in red.
- For all responses, justify the response in the (required) Findings and Observations field.
- For certain response types, the Immediate Action Taken field is required.
- For the least favorable response types (for example, Unsatisfactory and Major Improvement Required in the example above), the Immediate Action Taken field is required, along with at least one longer-term corrective Action.
- For any question, you can select Add Attachment to attach any necessary supporting files (documentation, photos, scans of certificates, training records, etc.).
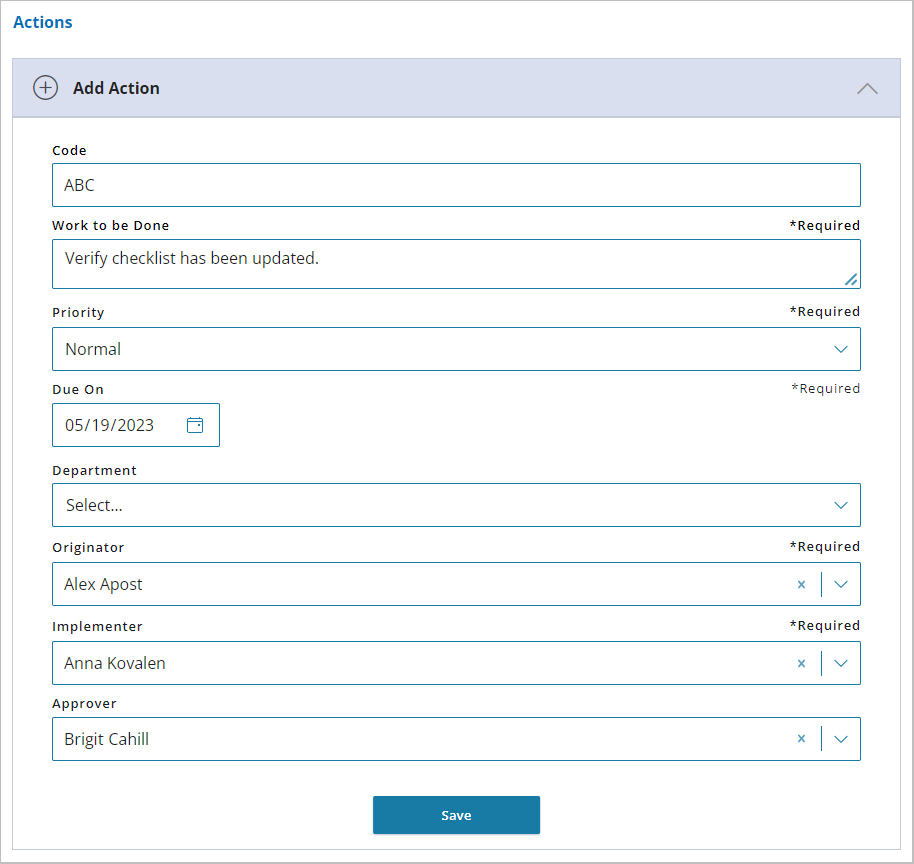
- For any question, you can select Add Action to create an action item related to the question. (To access action items, select Actions from the main menu. Action items assigned to you also appear in your To-Do list.)
When all requirements for a question are met, the red dot indicator at the top of the page disappears. Select Next to continue to the next question until all questions are complete.
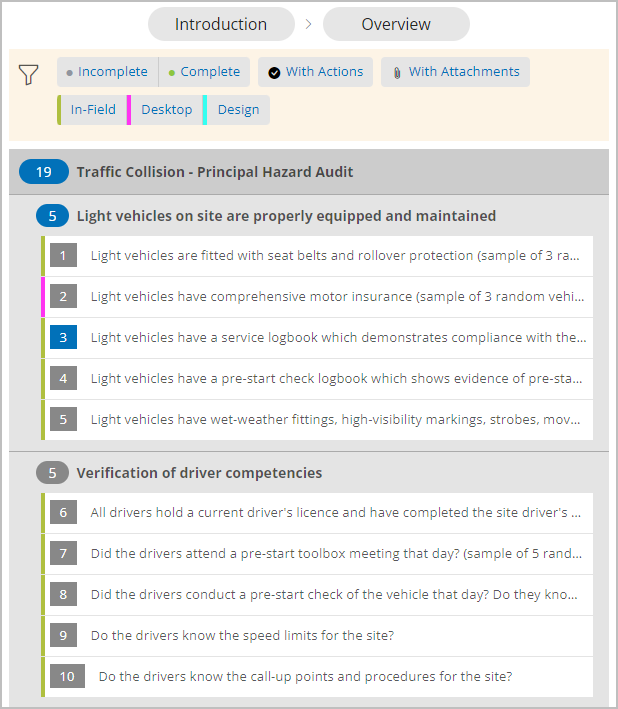
Checking Your Progress
At any time during this process, you can select the icon at the top left of the page to see a quick overview of the questions and your progress.
Forwarding the Verification Activity
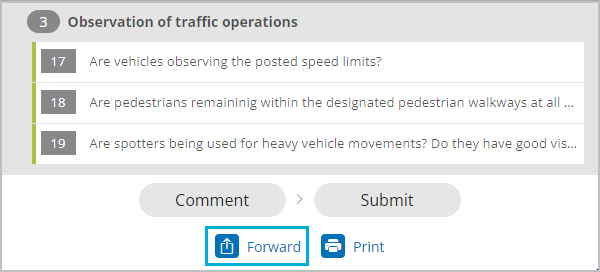
Forwarding allows users to share the work so that it can be completed by someone else or reviewed. To forward, select Forward at the bottom of the page while viewing your progress.
Select the name of the recipient and any (optional) comments, and then select the Forward button.
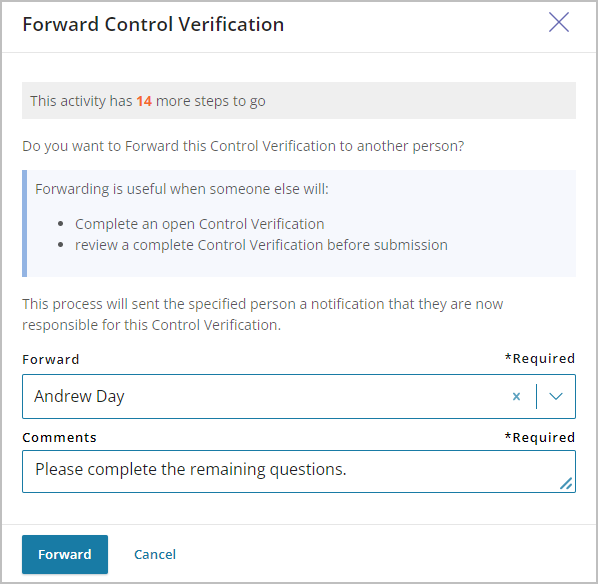
The recipient will see a new task on their To-Do list and, if email notifications are enabled, will also get an email reminder.
You can also forward a verification activity from the Comments section, or when you’re ready to Submit the activity.
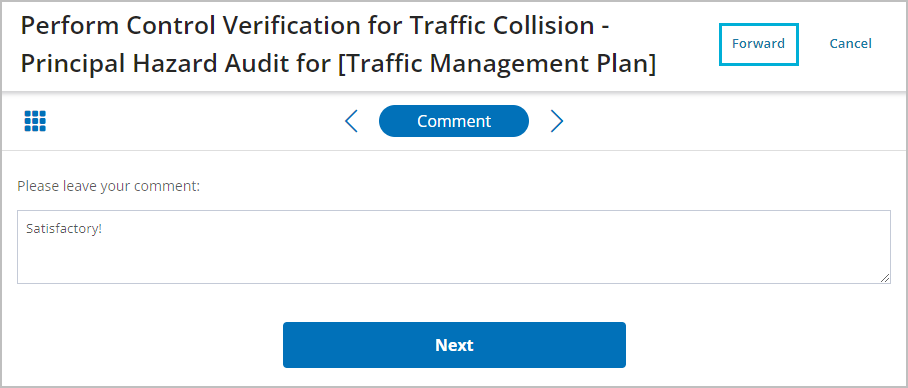
Adding Comments
Use comments to capture any additional information, for example:
- The overall sense of how the verification activity process was conducted and received
- Key learnings from the performance of the verification activity
- Recommendations for improvement of the verification activity
Note: The option to Forward a verification activity is also available here.