

Using Perspectives in Grids and Worksheets
When there is a large amount of data available to view at once in a table format, “perspectives” enable you to choose and arrange exactly the information you want to see in a format that’s most useful and meaningful to you, and then save that particular view of the data so that you don’t have to rearrange and filter it again next time. You can show/hide columns of data, rearrange columns by dragging/dropping them, adjust column widths, apply filters, and specify search terms. (See Working with Grids and Worksheets for more.)
Perspectives are especially beneficial when you want to reuse a table format for similar purposes, for example, when conducting multiple, similar risk assessments. For instance, when working with a risk assessment worksheet, if you’re focusing on action items, you can choose to view all information related to action items and hide the rest, and save a perspective named “Actions Only.” Team leaders might set up one perspective for their own personal monitoring purposes, and one or more additional perspectives for assessment teams to use to encourage consistency across worksheets.
Perspectives, as described in this article, are available when working with risk assessment worksheets and performance standards. You can create as many perspectives as you wish.
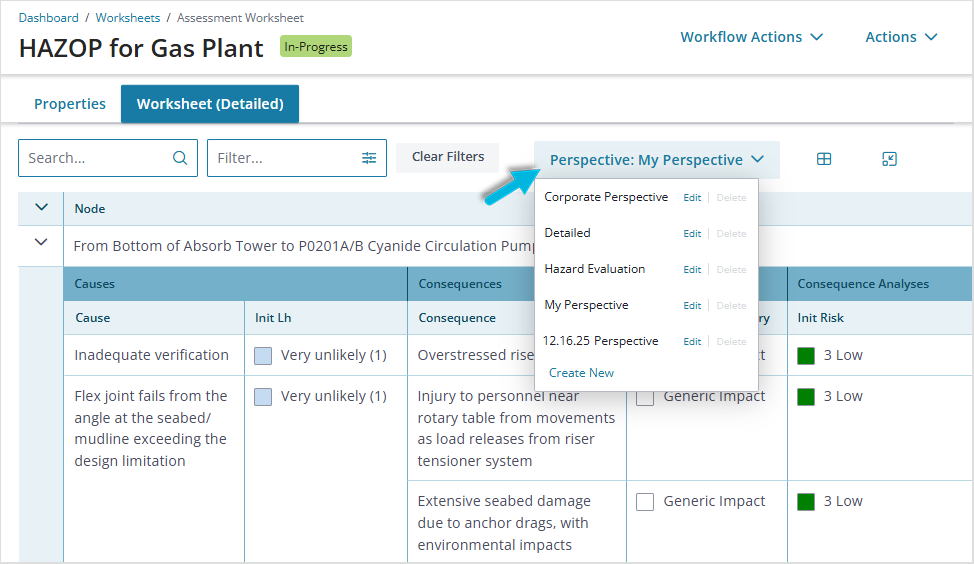
In this example risk assessment worksheet, the perspective currently in use is called “My Perspective.”
Create a new perspective
- Open a risk assessment worksheet or performance standard.
- From the Perspective dropdown, select Create New and enter a unique name for your new Perspective.
- If this perspective should be available for selection to all Operational Risk users, select Make Global. Otherwise, the new perspective will be available only to you.
- Click Create to save the perspective.
- To begin using the new Perspective, select it from the Perspective drop-down.
Edit a perspective
System Administrators can choose one of two protocols for editing perspectives for your organization (in Admin > Configuration Editor > Register Policies > Risk Assessment > Lock Down Perspectives). Depending on the option selected, the perspective editing process varies a bit.
Automatically update
Using this method, the system automatically applies updates to perspectives “on the fly” as you change information currently displayed and how it’s arranged. This is the default method.

- To edit the details of a perspective (columns, order, etc.), simply select the perspective you want to modify from the dropdown list and then make your changes. These changes, and all subsequent changes you make, are automatically saved to the selected perspective with no further action from you. If you make a change unintentionally, just change it back to automatically resave the perspective.
- To edit a perspective’s name and/or “global” designation, find it in the dropdown list and select Edit. Make your changes and click Update to apply them.
- To delete a perspective, find it in the dropdown list and select Delete > OK.
Lock down updates
If your organization has chosen to “lock down” perspectives, the editing process requires an additional, deliberate step to save your changes. This option helps prevent unintentional updates to a perspective.

- To edit the details of a perspective, find the perspective you want to modify in the dropdown list and select Edit Table to enter edit mode. Make your changes and click Save at the top of the page.
- To edit a perspective’s name and/or “global” designation, find it in the dropdown list and select Edit Name. Make your changes and click Update to apply them.
- To delete a perspective, find it in the dropdown list and select Delete > OK.
