Importing and Exporting Data
To reduce the time it takes to enter data in the Operational Risk software and to simplify management activities, you can import and export data from and to Microsoft Excel in many areas of the application. The import/export options available from the toolbar vary depending on the area of the system you’re working with.
Exporting to Excel
As a simple example, let’s assume you’d like to define a list of “guidewords” for use in the Operational Risk system, but you haven’t added any yet. It might be time consuming to enter all guidewords you want to use manually, one by one; the export/import functions will help expedite this process.
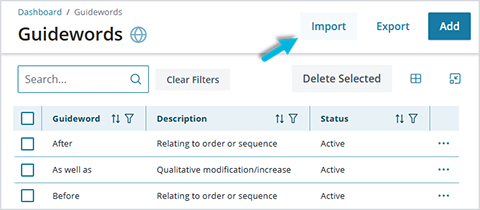
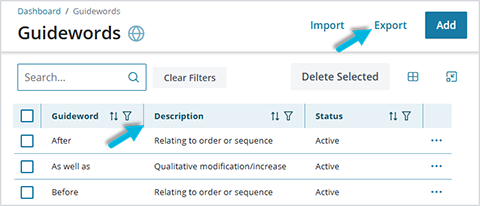
- Select Administration > Guidewords.
- Select Add on the toolbar.

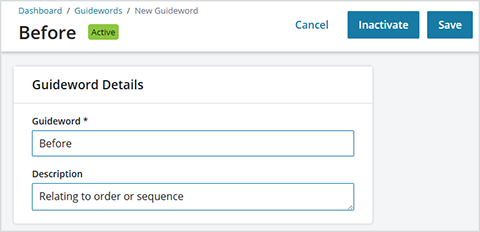
- Enter a Guideword and Description, and then Save the record. (Guidewords consist of only these two data items; for other types of records that include additional information, enter data for each field you intend to use so that they’re included in the export.)
- On the Guidewords page, select the Edit Columns icon on the toolbar, select the fields you want to include in the export, and then click Apply. Only fields selected here will be included.


- Click and drag the column headers to arrange the data columns in the order in which you’d like to export them. (The columns must also be arranged in this same order when importing from the Excel file later, when it’s complete with data.) Then select Export.
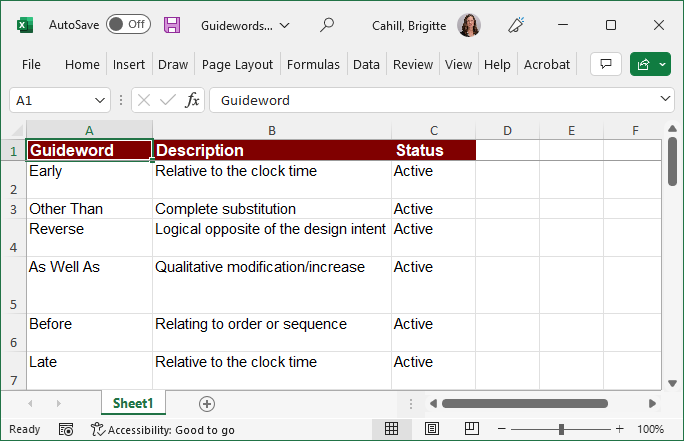
- Open the Excel file that was downloaded to your browser and enable it for editing. Follow the exported structure and add your data into the spreadsheet; do not change any column headers. Save the file.
Importing from Excel
When you have finished entering data in your spreadsheet, you’re ready to import it into the Operational Risk software.
- On the Guidewords page, select Import on the toolbar.
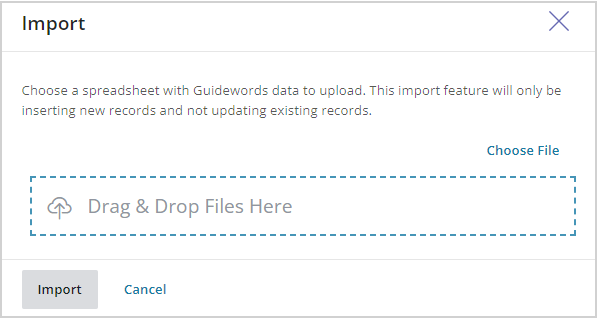
- Select Choose File to browse for and select the spreadsheet file you want to import, or drag and drop the file into the box. Select the Import button. Note: the larger and more complex file a file is, the longer it takes to import it.
- If the data structure and content are correct (see Formatting Worksheets in Excel to Prepare for Import, below), a message displays indicating that the upload completed successfully; all new data is added to any data that was already in the system.
- If the import fails, no data is imported; a message will describe the problem so that you can fix it and try again.
- On the Guidewords page, select Import on the toolbar.
Formatting Worksheets in Excel to Prepare for Import
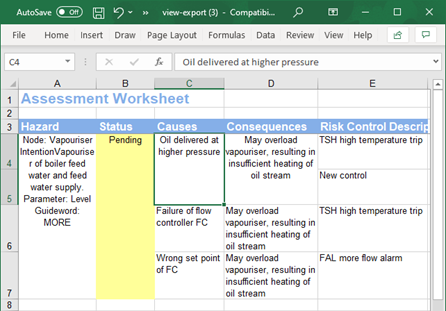
For larger and more complex files (for example, a risk assessment worksheet with multiple issues, causes, consequences, and controls), cell merging is used during data export to Excel to show the relationships between cells in different columns. When you then enter data into Excel, all the new cells must observe the same merged structure; otherwise, the subsequent import will fail, or you may get unexpected results.
For example, in a risk assessment worksheet, some cells are merged in the “inner view.” So, when importing data from Excel, it is vital to match that same format. We recommend exporting the worksheet view you want to work with (as described above for guidewords) and then adding data to the file for re-import. This will provide all the necessary column headers needed and you can begin entering data in Excel right away.
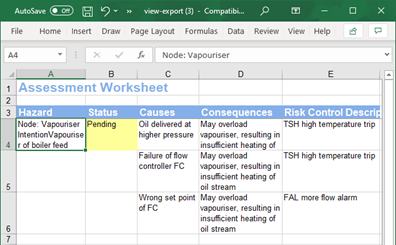
Here is an example of an exported Excel file ready to be used as a template for data entry.
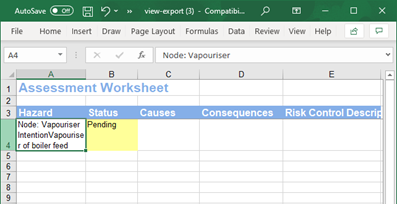
Start by adding each cause/consequence/control in its own row.
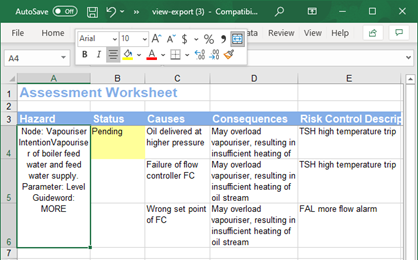
Next, merge the items in the outer view (Hazard and Status), stopping before the beginning of the inner view items (Causes, Consequences, Risk Control Description).
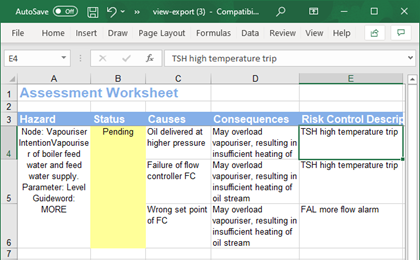
This file is ready to import back into the software:
If you need to add another control to a consequence, for example, add a new row below the consequence, and then add the item in the new row.
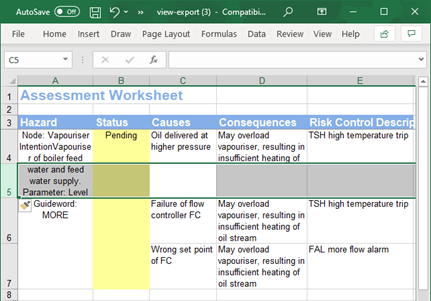
Merge the cells as needed. For this example, only the cause and consequence were merged. This file is ready to import: