

Working with Bowties
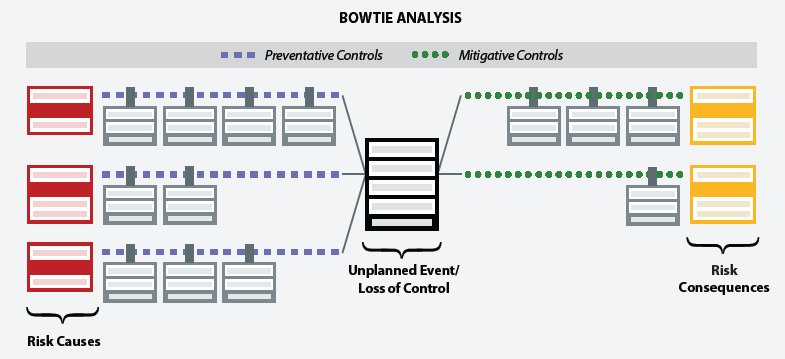
A bowtie diagram is a way to identify and review controls intended to prevent or mitigate a specific unwanted event. It’s a risk analysis and communication tool that provides a different way to view the same information captured in a risk assessment worksheet, but with the focus on identifying and reviewing controls, rather than the hazard. It presents a risk assessment in a more visual format to help risk managers understand the relationships between risk causes, events (the point at which control is lost), consequences, and controls
When a completed risk assessment worksheet reveals that there are some higher risks that will require mitigation and ongoing monitoring, it’s time to create a bowtie to help with that process.
The “tree” nature of the bowtie acknowledges the fact that events can have multiple causes and multiple consequences; any cause can lead to a loss of control, which can lead to many harmful consequences.
There are a few ways to create a bowtie:
- Generate a bowtie from an existing risk assessment worksheet
- Create a (“ad-hoc”) bowtie “from scratch”
- Create a site bowtie from a “master” bowtie (see Creating a Site Bowtie and Working with Master Bowties)
Regardless of the way you create bowties, their components, and the way they function are the same.
Generate a Bowtie from an Existing Risk Assessment Worksheet
You can generate a bowtie from a risk assessment after it has been reviewed and approved. This method is quick and easy; with the click of a button, you can see the tabular data in bowtie format. After the bowtie is generated, you can make updates to it right inside the bowtie. However, any changes made in the bowtie will not be reflected in the risk assessment from which it came—and vice versa. Once a bowtie is generated from a worksheet, the two are separate entities that do not “talk” to each other.
Here’s how to create a bowtie from a completed risk assessment worksheet:
- Select Hazards & Risks > Worksheets, and then select the worksheet from which you want to create a bowtie.
- Left-click the ellipsis icon (…) and select Open Worksheet.
- Select Create Bowtie from the Options menu.

- Select one or more issues to include in the bowtie and select the Create Bowtie button from the toolbar.
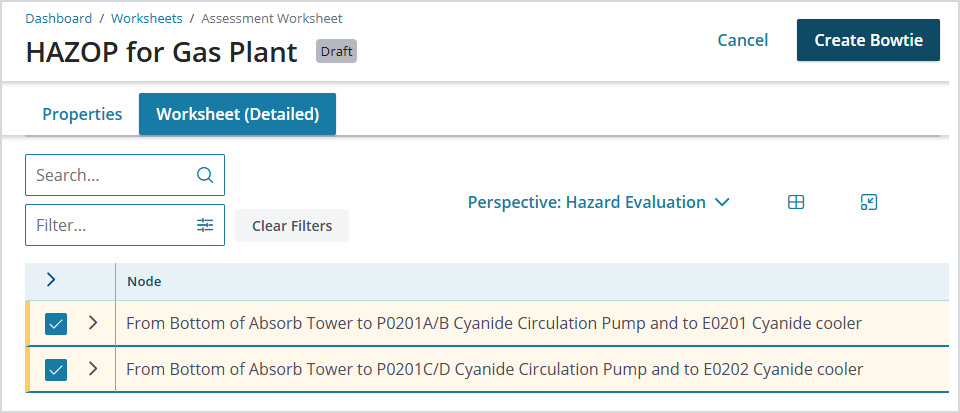
- Select one or more issues to include in the bowtie and select the Create Bowtie button from the toolbar.
- When the bowtie has been created, select Take me to bowtie.
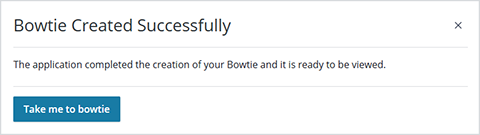
- When the bowtie has been created, select Take me to bowtie.
Create an “Ad-hoc” Bowtie
Creating a new risk assessment starting with a blank bowtie (without first using the tabular worksheet format), while not the norm, makes sense in certain situations, for example, when brainstorming risk scenarios individually or with a team. In the Operational Risk solution, these types of bowties are referred to as “ad-hoc” bowties.
To create an ad-hoc bowtie, select Hazards & Risks > Bowties. From the toolbar on the Bowties page, select Add > Bowtie.
Add Bowtie Details
Add identifying information for the new bowtie.
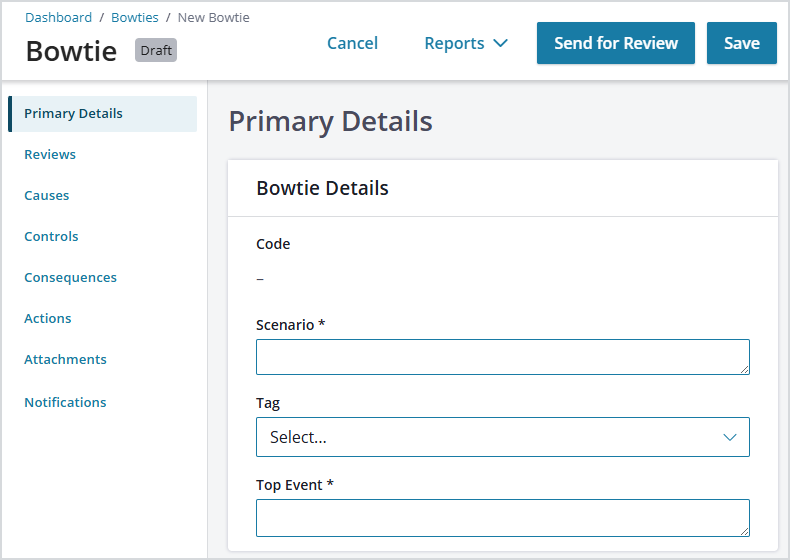
Describe the Scenario in which it applies and the Top Event (the point at which control is considered lost). The Top Event is critical for reporting purposes.
Here are a few examples:
| Scenario | Top Event |
| Working at heights | Loss of balance |
| Working in confined spaces | Loss of safe working environment |
| Heavy vehicle movement during carbide plant refurbishment | Loss of containment |
| Over-pressure in ammonia circuit due to feed-pump failure | Vessel rupture |
| Inadequate resources during shutdown | Schedule over-run |
| Inability of feed-stock supplier to deliver during key demand periods | Loss of clients |
Add Analysis Options
Under Analysis Options, decide the type of analysis the bowtie will reflect, including the types of results it will yield.
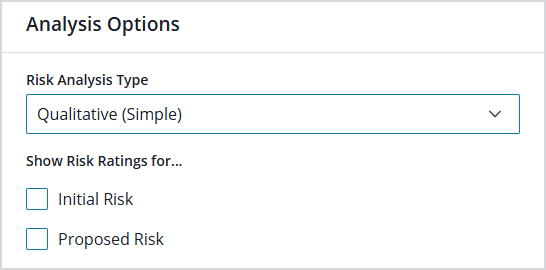
Select the Risk Analysis Type.
- A Qualitative (Simple) assessment will yield risk results in simple general terms or labels (like Low, Medium, and High), rather than numerical scores. This type of bowtie works in a similar way to how risk is assessed in worksheets. You’ll manually select initial (cause) likelihood, and mitigated and proposed (consequence) likelihoods, along with the initial and mitigative severity of the consequence(s). No calculation of likelihood occurs in this type of bowtie; the effectiveness assigned to any control measures is for information only. In addition, the risk matrix is used to determine the risk category based on the selected likelihood(s) and consequence severity. Choose whether to show risk ratings in the bowtie for Initial Risk (current risk without any controls applied) and/or Proposed Risk (to show the potential impact that controls may have on the current level of risk).
- A Semi-Quantitative assessment yields a much more complex assessment, which calculates the estimated frequency of a consequence occurring based on expected frequencies/likelihoods of causes occurring, along with the expected reliability (probability to fail on demand) of control measures. It is recommended that this type of assessment be carried out by a qualified process safety or functional safety professional.
- A Qualitative (Automatically Calculated) assessment works similar to a semi-quantitative assessment, but descriptors are used in place of frequencies and probabilities.
Add Scenario Context
Use the Scenario Context section to provide additional information about the risk scenario. Most of the options you have here are defined in Administration > Local/Global Setup. At this point, there is enough basic information to Save the new bowtie.
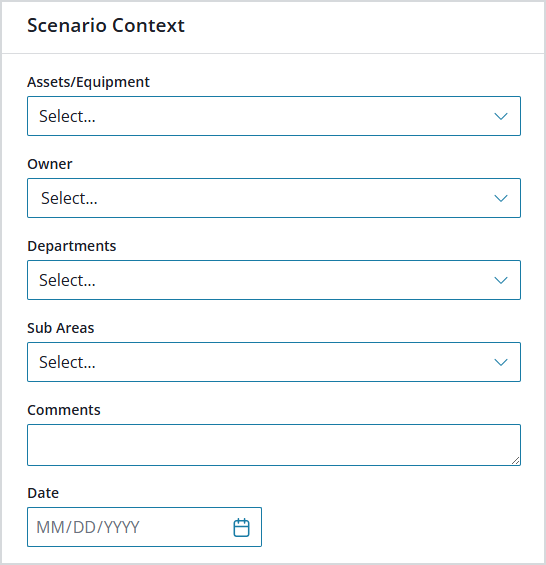
Note: In some cases, the system will save or auto-populate fields based on system or customer configuration preferences.
Add Causes, Consequences, and Controls
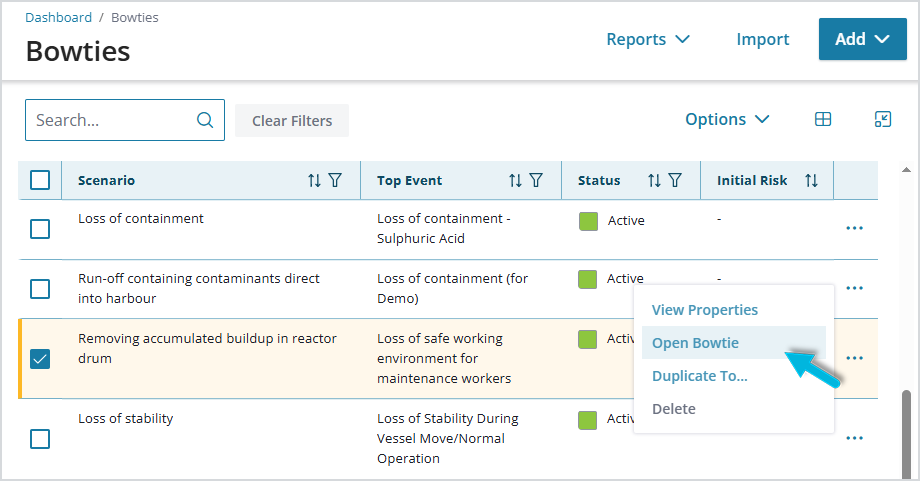
To begin adding causes, consequences, and controls to the bowtie, select Hazards & Risks > Bowties from the menu, select the bowtie, and from the ellipsis icon (…), select Open Bowtie.
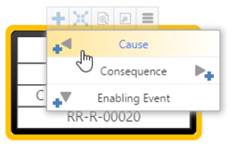
There are multiple ways to create new causes, consequences, and controls in the bowtie:
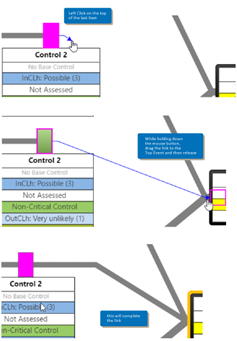
- Use the “+” icon in the main toolbar at the top of the page and drag the item onto the canvas.
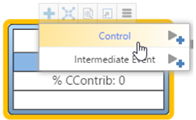
- Use the pop-up panel from the selected item (right-click the item, or left-click “+” (use this option to insert an Intermediate Event or Enabling Event).
- Use keyboard shortcuts: see Help > Keyboard Shortcut Reference.
As you add them, provide a name, and set the relevant properties for each.
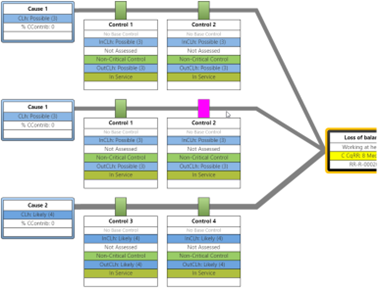
Here is an example of a bowtie with two causes and two consequences:
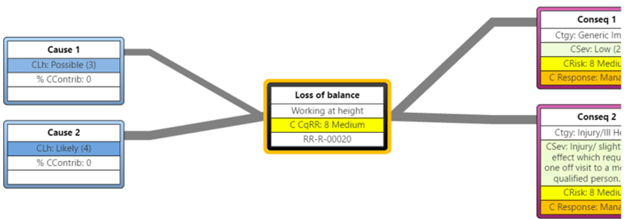
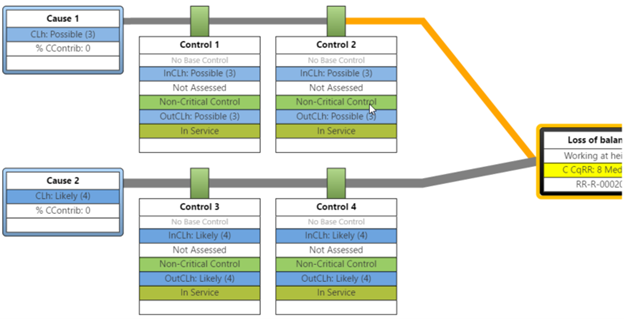
For each cause or consequence pathway (on each line), you can add controls and set their properties.
For example, Cause 1 and Cause 2 each have two controls associated with them.
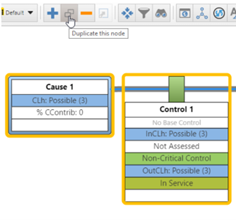
To Duplicate an Item
If, for example, you have identified another cause that is similar to an existing one along with its controls, you can duplicate it.
Select the cause and the control(s), and then select the Duplicate button on the toolbar or use the shortcut keys CTRL+ALT+D.
Click and drag to join the new items to the Top Event.
Here is the result:
To Copy and Paste an Item
If, for example, you need to add an additional consequence with the same control as is already defined for another, you can copy it.
Select the consequence and the control(s), including the link between the Top Event and the control, and press CTRL+C to copy the items. Then click on the bowtie canvas and press CTRL+V to paste the items.
Note that the Copy and Paste function also includes copies of the links, if they are selected, while the Duplicate function copies only the nodes.
Additional Bowtie Properties
You can also add or view the following items (accessed from the left navigation pane), which provide additional context for the bowtie:
- Reviews
- Actions
- Attachments
- Notifications
See Common Properties for more.
