

Materials Management
Materials management’s objective is to give users access to the materials and their properties necessary for environmental compliance.
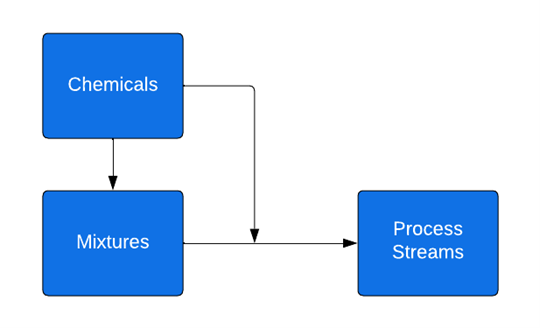
The materials management section is comprised of three areas:
- A chemical is defined as the purest form of a material, something with a single atom. For example, pure water is a chemical of H2O atoms.
- Mixtures, also known as a product, this is a combination of chemicals to make a single product. Mixtures, such as ACME blue paint #5, are usually purchased for use. Every mixture will have chemical components.
- Process Streams. A combination of chemicals and mixtures is usually the result of a process at a location; not something that is purchased.
Add chemical/mixture/process streams
Note: This example is for a mixture, but the process is the same for all materials.
- From the ESuite Navigation Menu, select Materials > Mixtures > Mixtures Summary.
- From the toolbar, select New Record.
- Complete the Mixture Profile Details; required fields are in red.
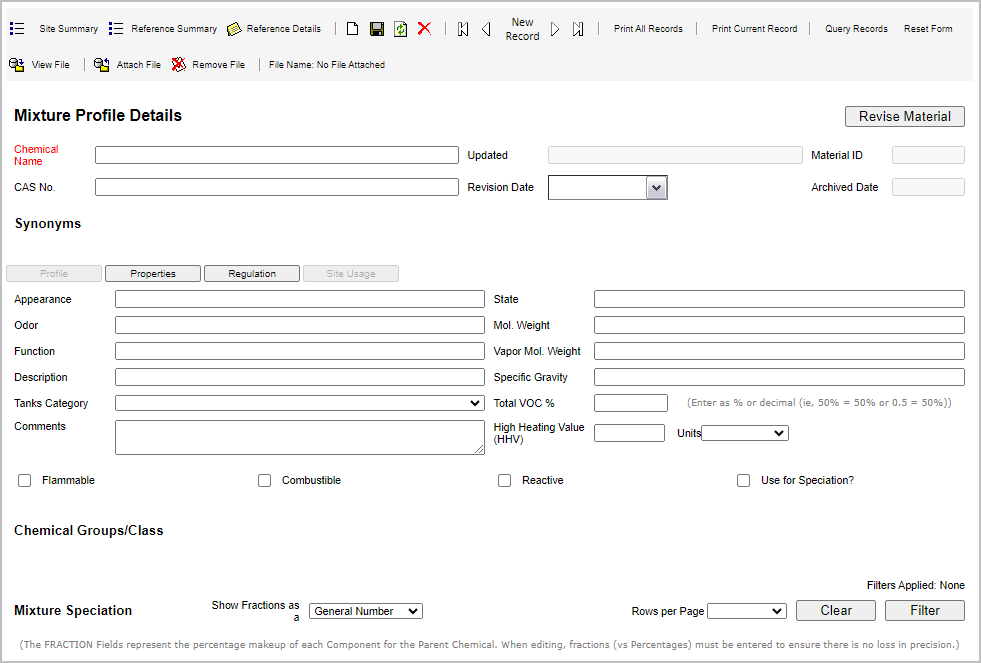
- Select the disc icon from the toolbar to save the new mixture.
Add components to mixture/process streams
Note: This example adds components to a mixture, but the process is the same for process streams.
- From the ESuite Navigation Menu, select Materials > Mixtures > Mixtures Summary.
- Find the mixture to which you want to add the components and select Details.
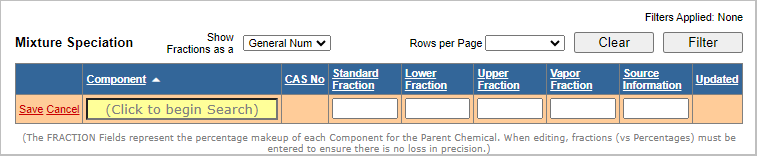
- In the Mixture Speciation section, select Add New Record.
- In the Component column, fill in the chemical. (This column includes type-ahead search.)
- If you can’t find the component, you can add it (see Add chemical/mixture/process streams, above).
- Process streams will not appear in the list when adding components to a mixture.
- Fill in the remaining fields.
- Select Save next to the component name.
Link a material to a location
Certain material lists in the application are location-specific to prevent long lists. If a company uses over 50,000 mixtures, a single location may only use 40 of them.
Note: This example is for a mixture, but the process is the same for all materials.
- From the ESuite Navigation Menu, select Materials > Mixtures > Mixtures Summary.
- Find the mixture to which you want to associate a location and select Add to Site.
- Select the location in the Select Site Name dropdown list.

- Select Okay next to the site name.
Add chemical groups
The ability to group chemicals is helpful for filtering and reporting purposes. For example, a common group is HAP (hazard air pollutants), an EPA grouping of chemicals that are standard in EPA air emission reports.
Note: This example is for a mixture, but the process is the same for all materials.
- From the ESuite Navigation Menu, select Materials > Mixtures > Mixtures Summary.
- Find the mixture you want to work with and select Details.
- In the Chemical Groups/Class section, select Add New Record.
- Select the chemical group in the Group dropdown list.
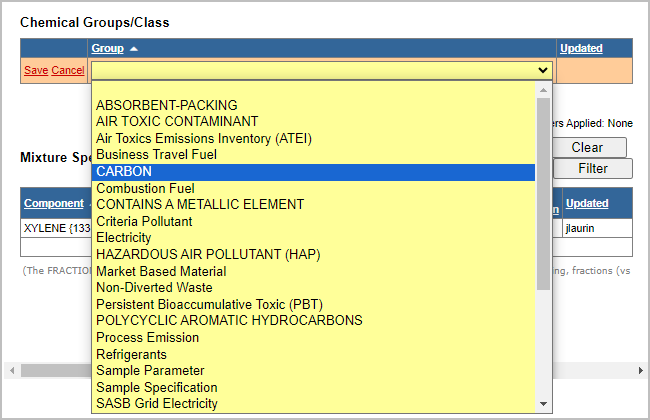
- Select Save next to the group name.
Notifications
Notifications can be configured for several reasons, for example, an unexpected variance in data that could indicate an error or a notice that you are within 95% of an allowed threshold. The application will notify you when monitored data requires human intervention. Notifications provide a proactive way to remain compliant without constant monitoring.
View a notification’s assignment
Notification assignments are how the application determines who receives a notification.
- From the ESuite Navigation Menu, select Admin > Notification > Notification Summary.
- Find the notification to view and select Details.
- Select the Assignment tab.
- In the Assign To? column, the values will be either role or user.
- User: assigned directly to the user receiving the notification.
- Role: assigned to a role that contains one or more users.
- If the Notify by Assigned Site option is selected, the system will use the user’s location assignment. So, if the notification is assigned to a group of ten people, but an exceedance occurred at the Oakville location, it will only notify the user linked to that location.
View users in a role
- From the ESuite Navigation Menu, select Compliance > Tasks > Role Summary.
- Find the role you want to view and select Details. The users will be listed under Assigned Users.
View a user’s location assignment
- From the ESuite Navigation Menu, select Admin > Security > Users Summary.
- From the list of users, choose the user for whom you want to see assigned locations and select Details.
- In the Site Access section, review the locations.
