

Administration
Adding New Users and Group Permissions
This guide will teach you how to manage user access and permissions efficiently as your business expands. Discover the process of adding new users, assigning them to the correct groups and sites, and configuring the appropriate read/write permissions.
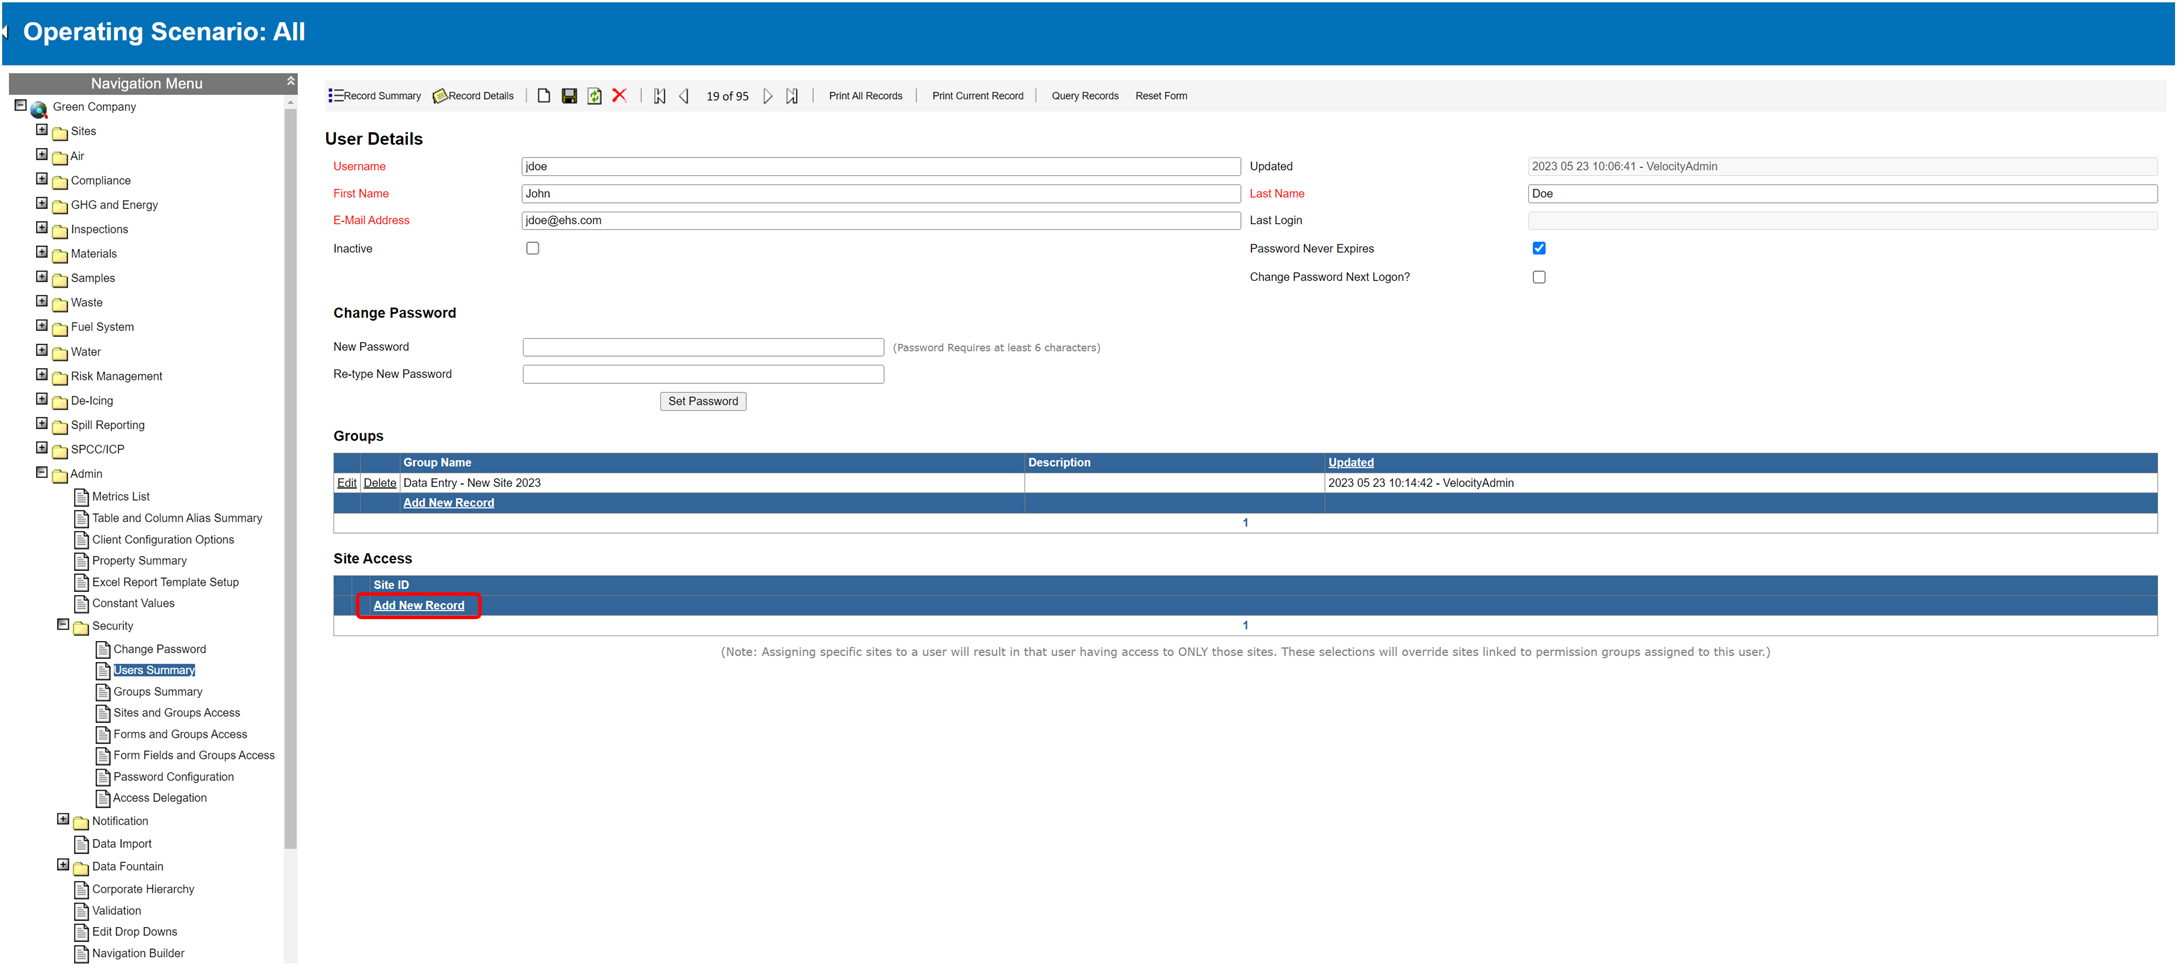
Add a New User
- From the Navigation Tree, select Security → Users Summary.
- On the toolbar, select New Record.
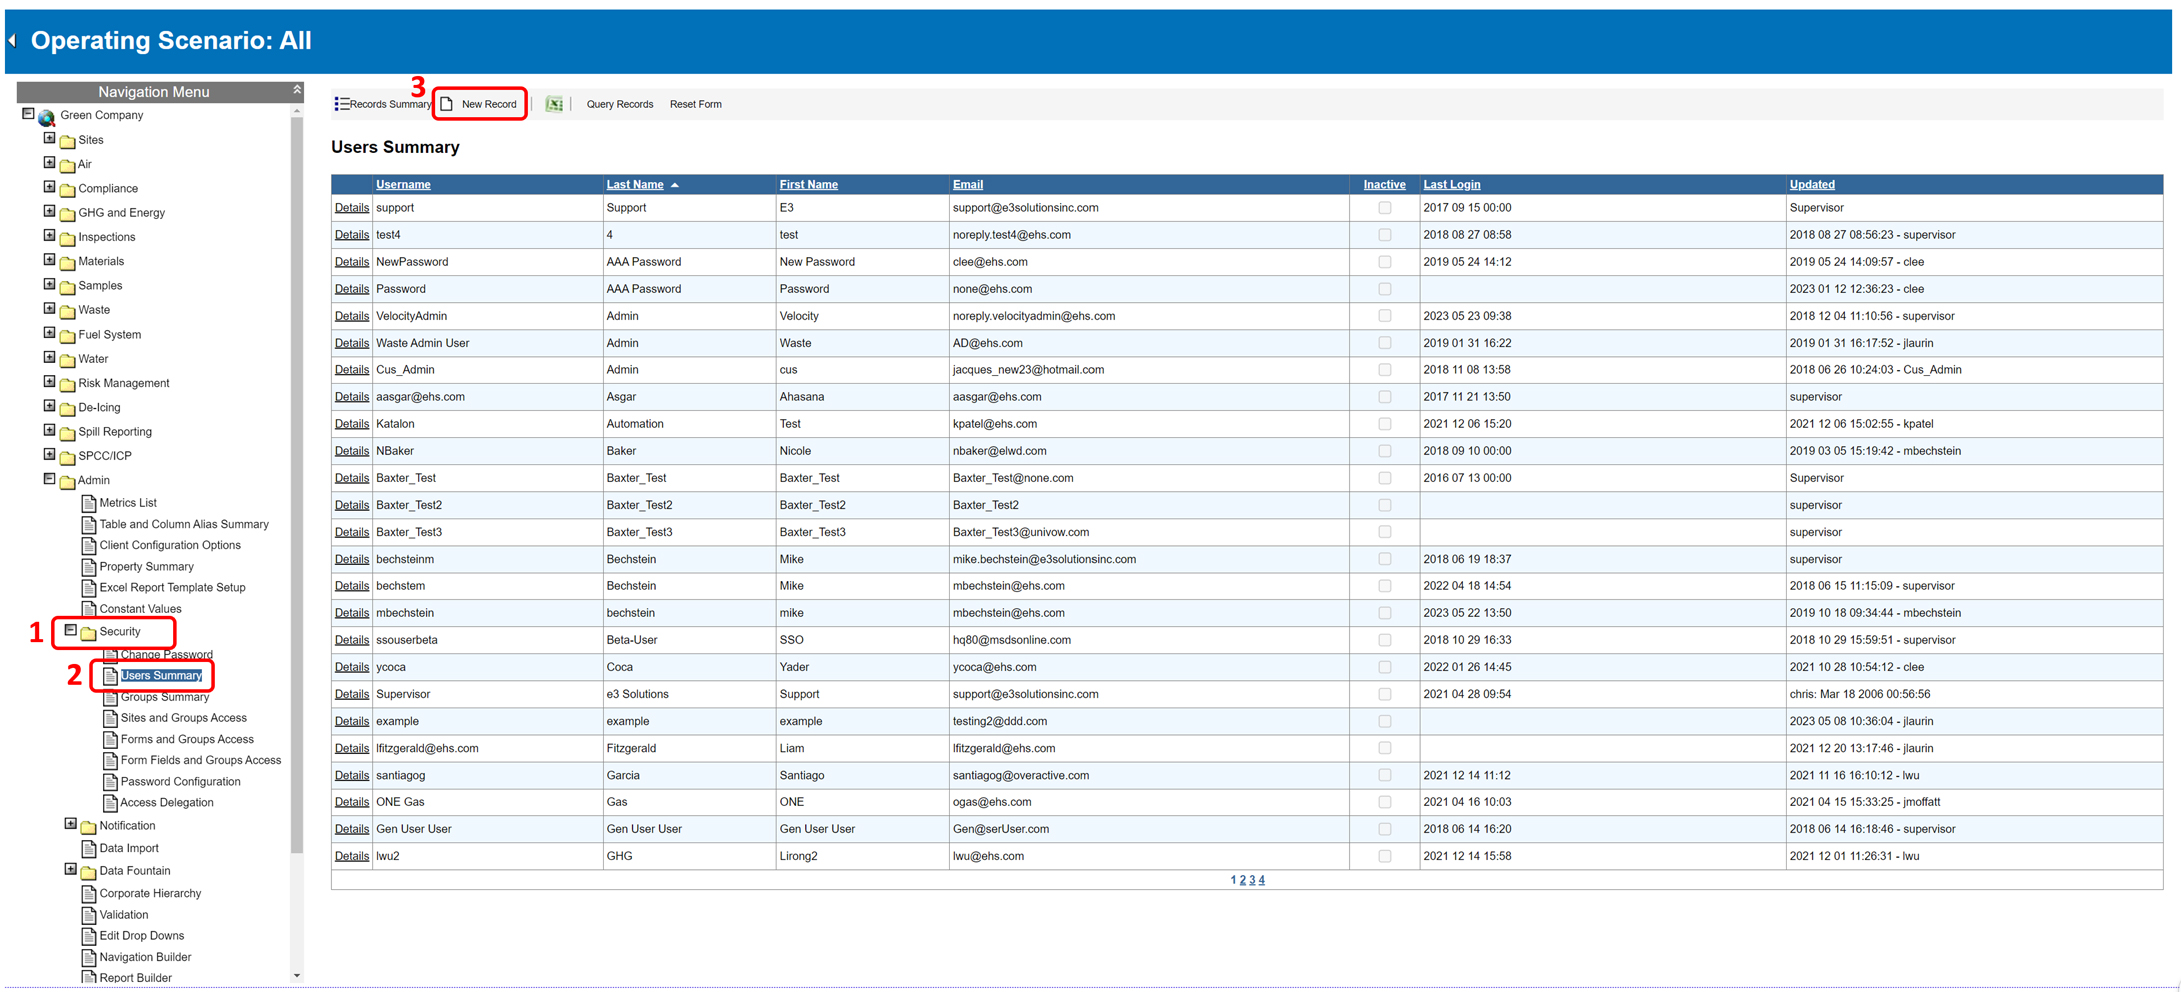
- Fill in all required fields, and then select Save.
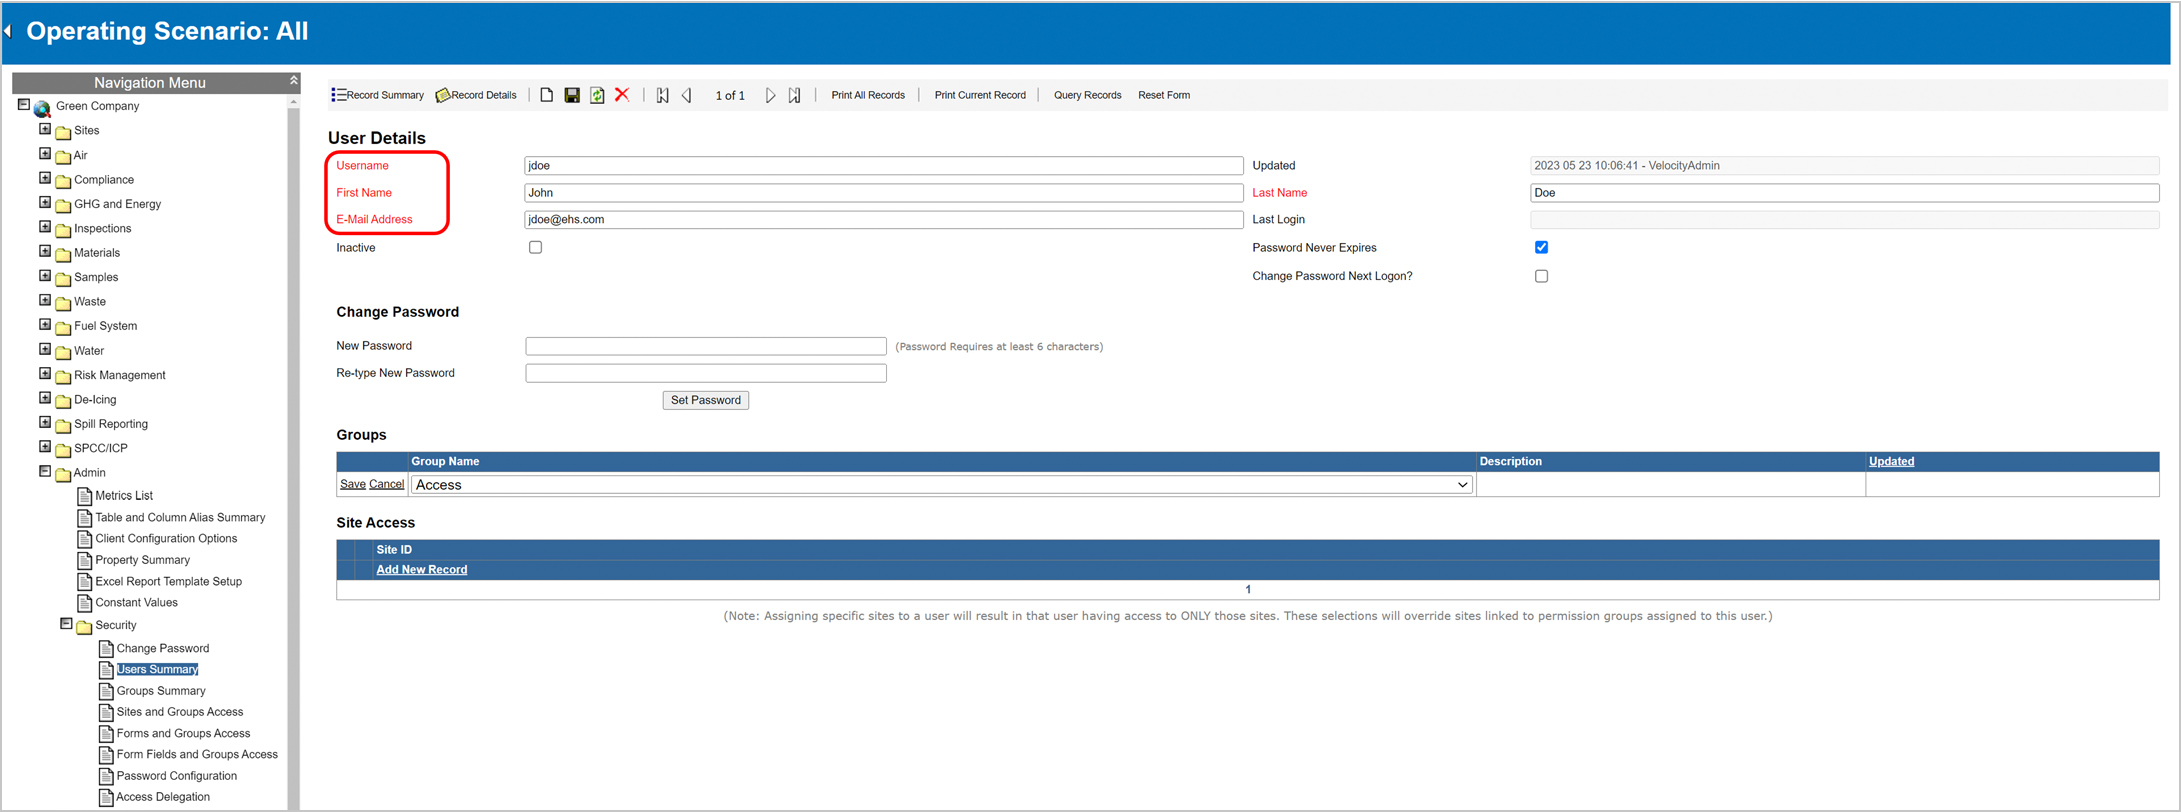
An alert will appear indicating that a temporary password has been emailed to the new user. Select OK to proceed.
Assign a User to a Group and Site
- In the Groups sub-table, select New Record.
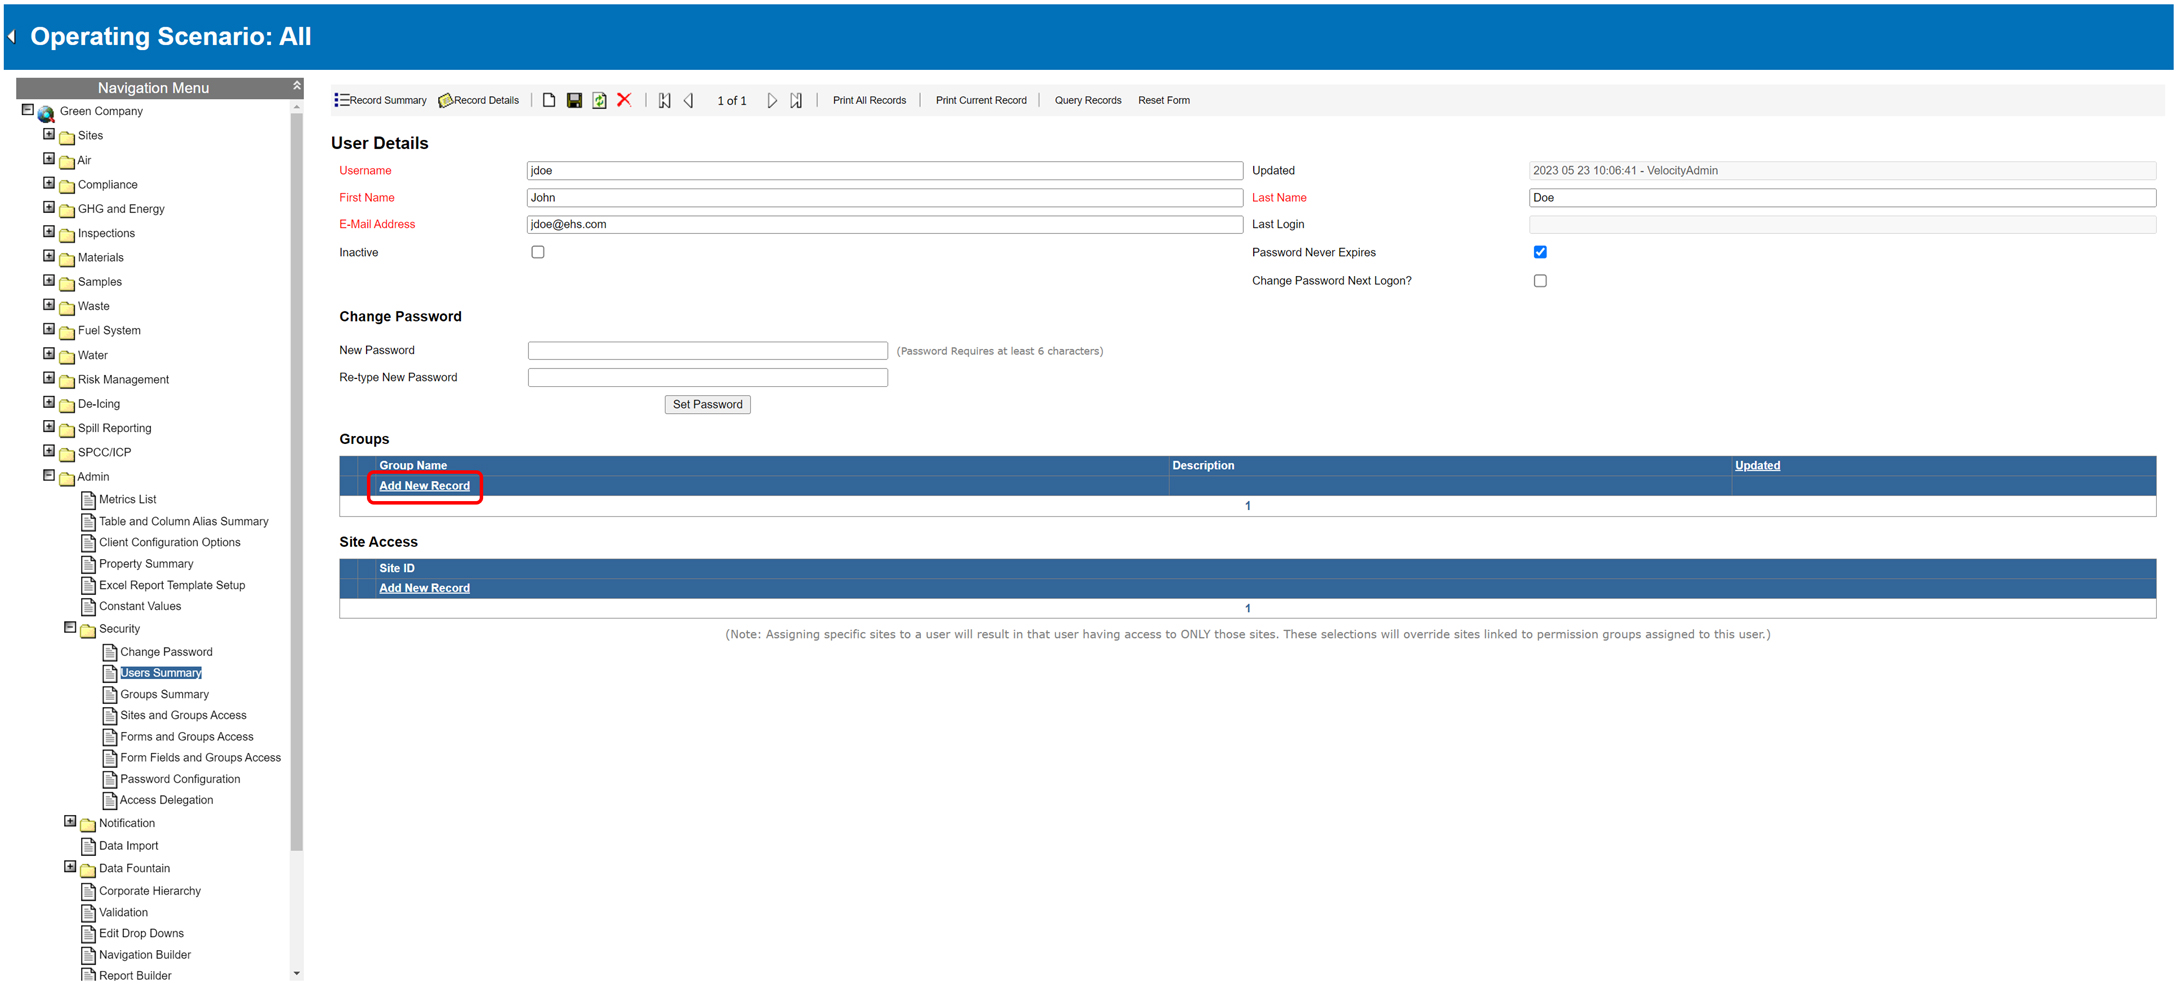
- Select the appropriate group for the user from the dropdown list.
- Select Save.
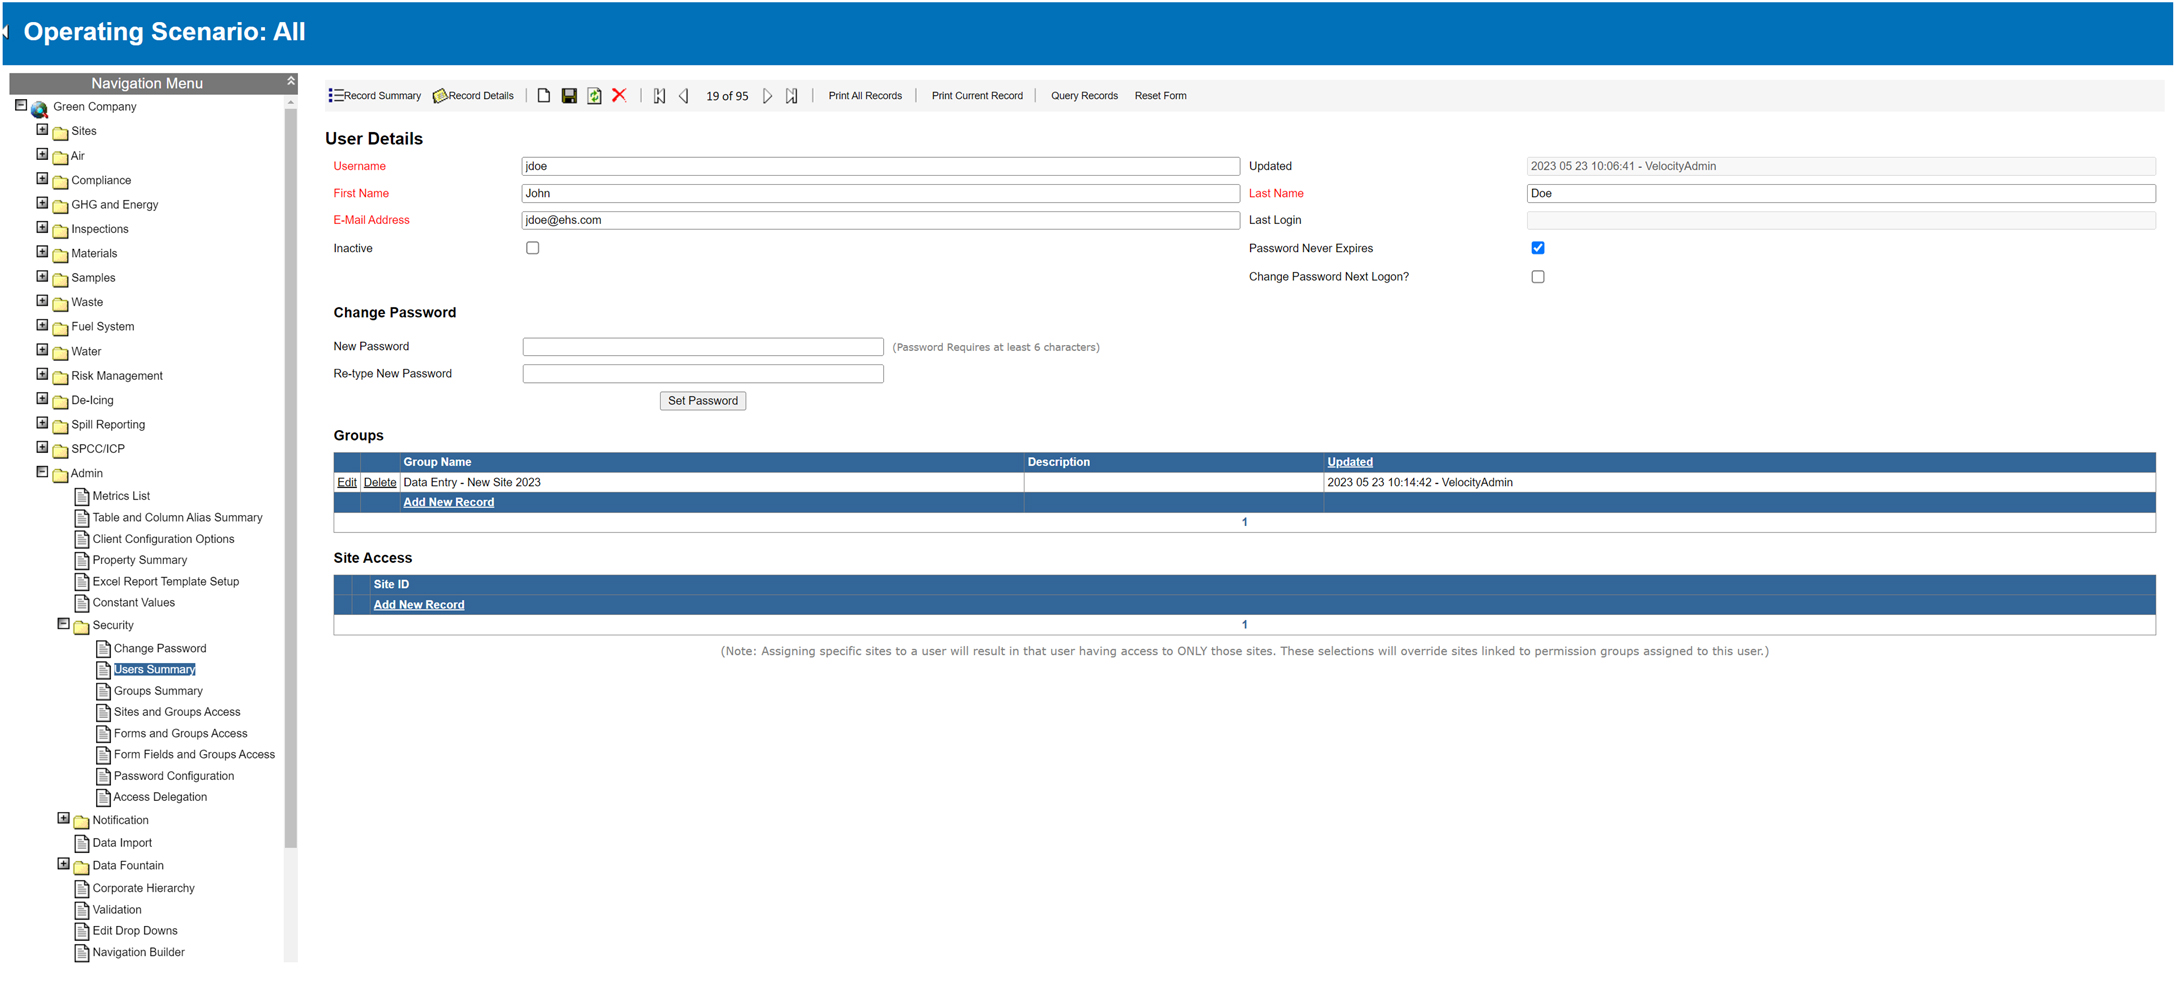
- If the user has site-specific access, assign that permission here.
Example: John was included in a corporate group that initially granted him access to all sites within the product. However, when an administrator assigned John to a specific site within the product, he subsequently lost access to all other sites. As a result, John’s permission was limited to viewing, reading, and/or editing information exclusively at that site. - In the Site Access sub-table, select Add New Record.
- Select the appropriate site from the dropdown list.
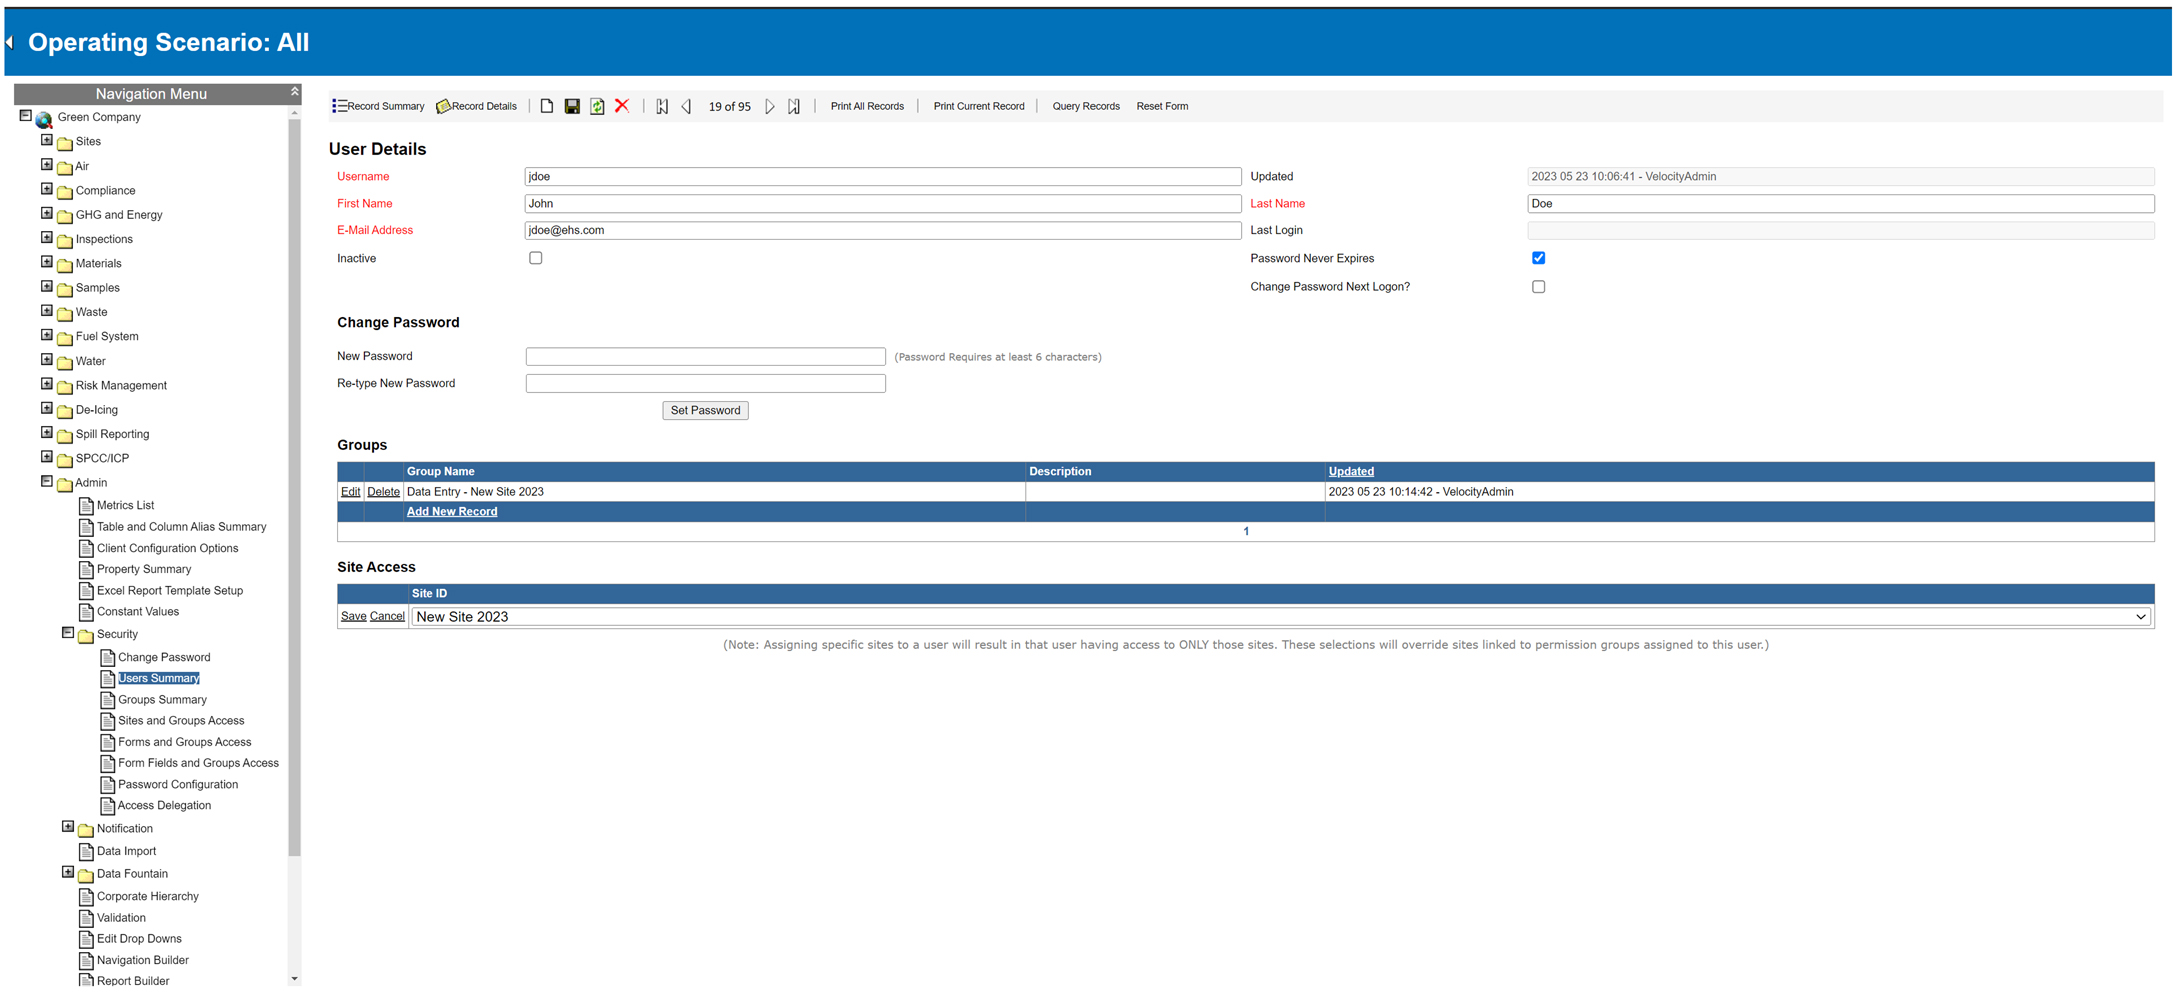
- Select Save.
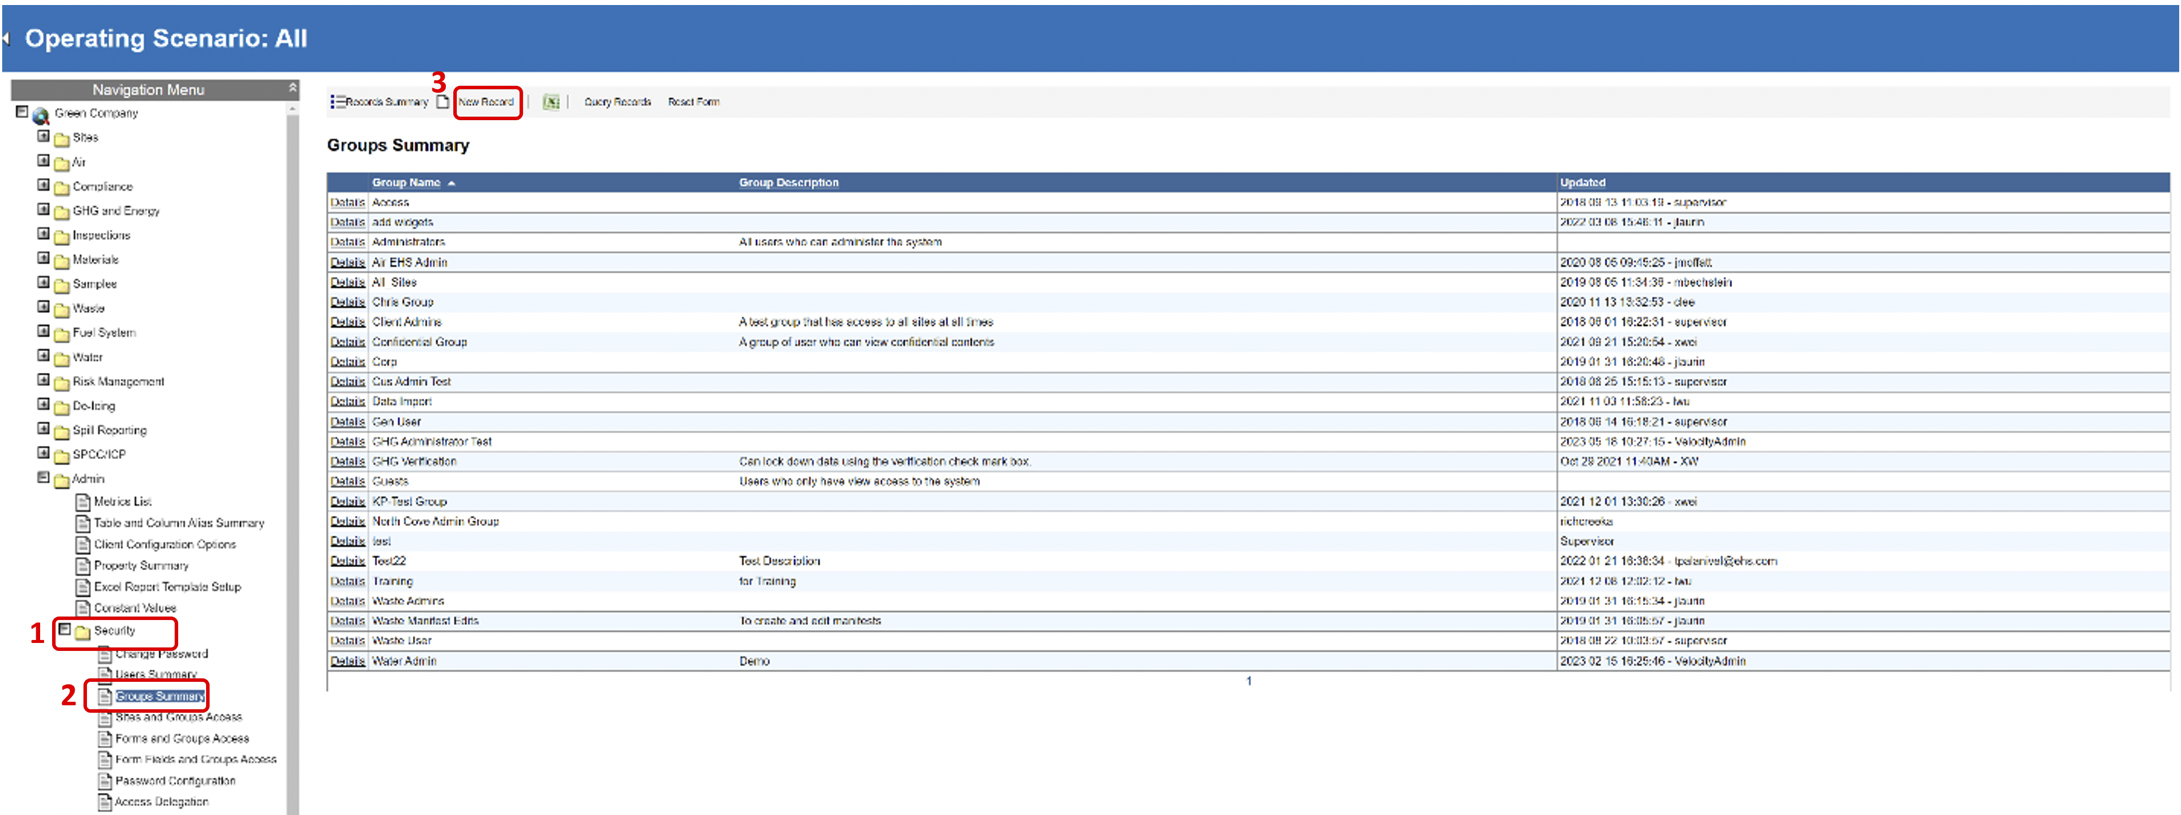
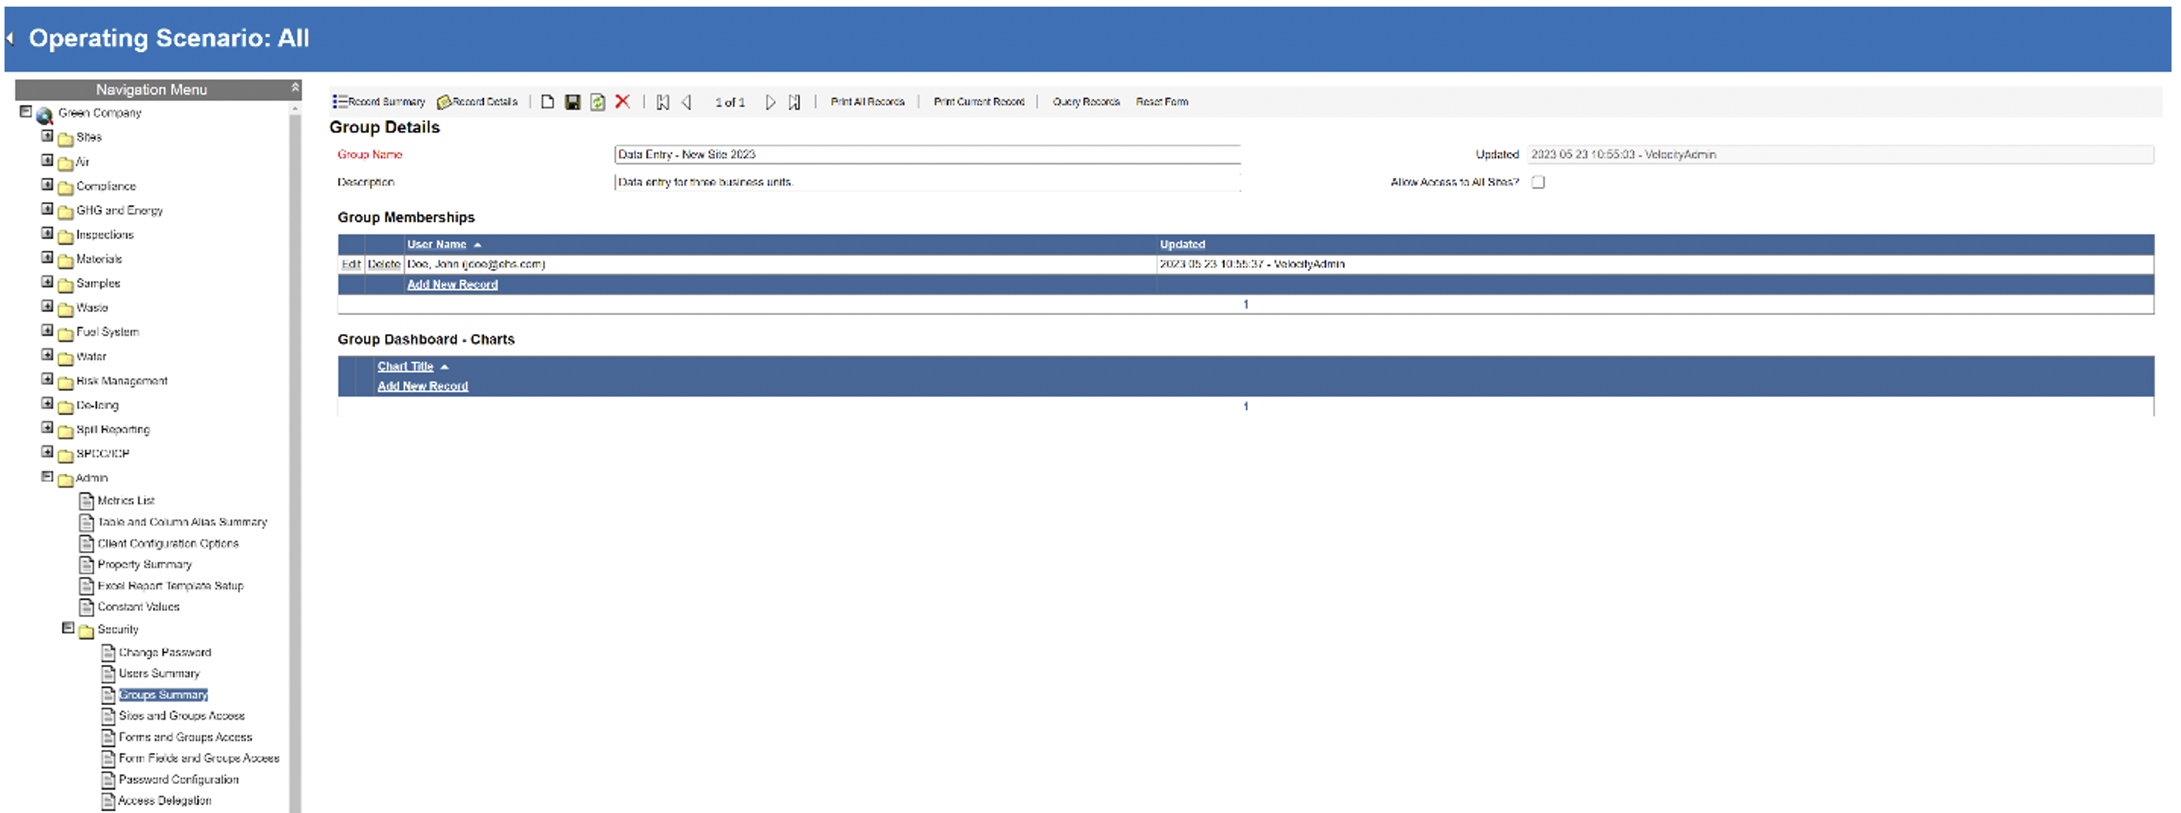
Assign New Group Permissions
- From the navigation menu, select Security → Groups Summary.
- On the toolbar, select New Record.
- Fill in the Group Name and Description.
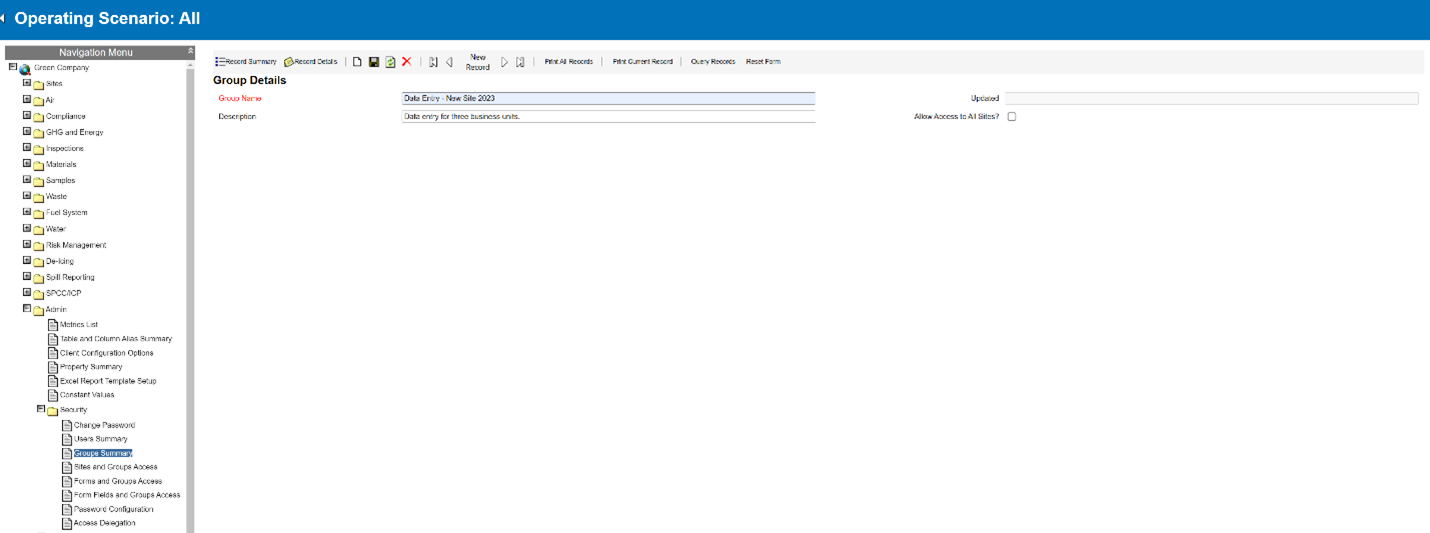
- If the group requires access to all sites within the product, check the Allow Access to All Sites box. If the group requires specific access to a smaller group of sites, skip this step.
- In the Group Memberships sub-table, select Add New Record.
- Choose the users who will be members of this group from the dropdown list.
- Select Save.
- Repeat steps 4-6 for all users in this group.
Set Up Sites and Group Access
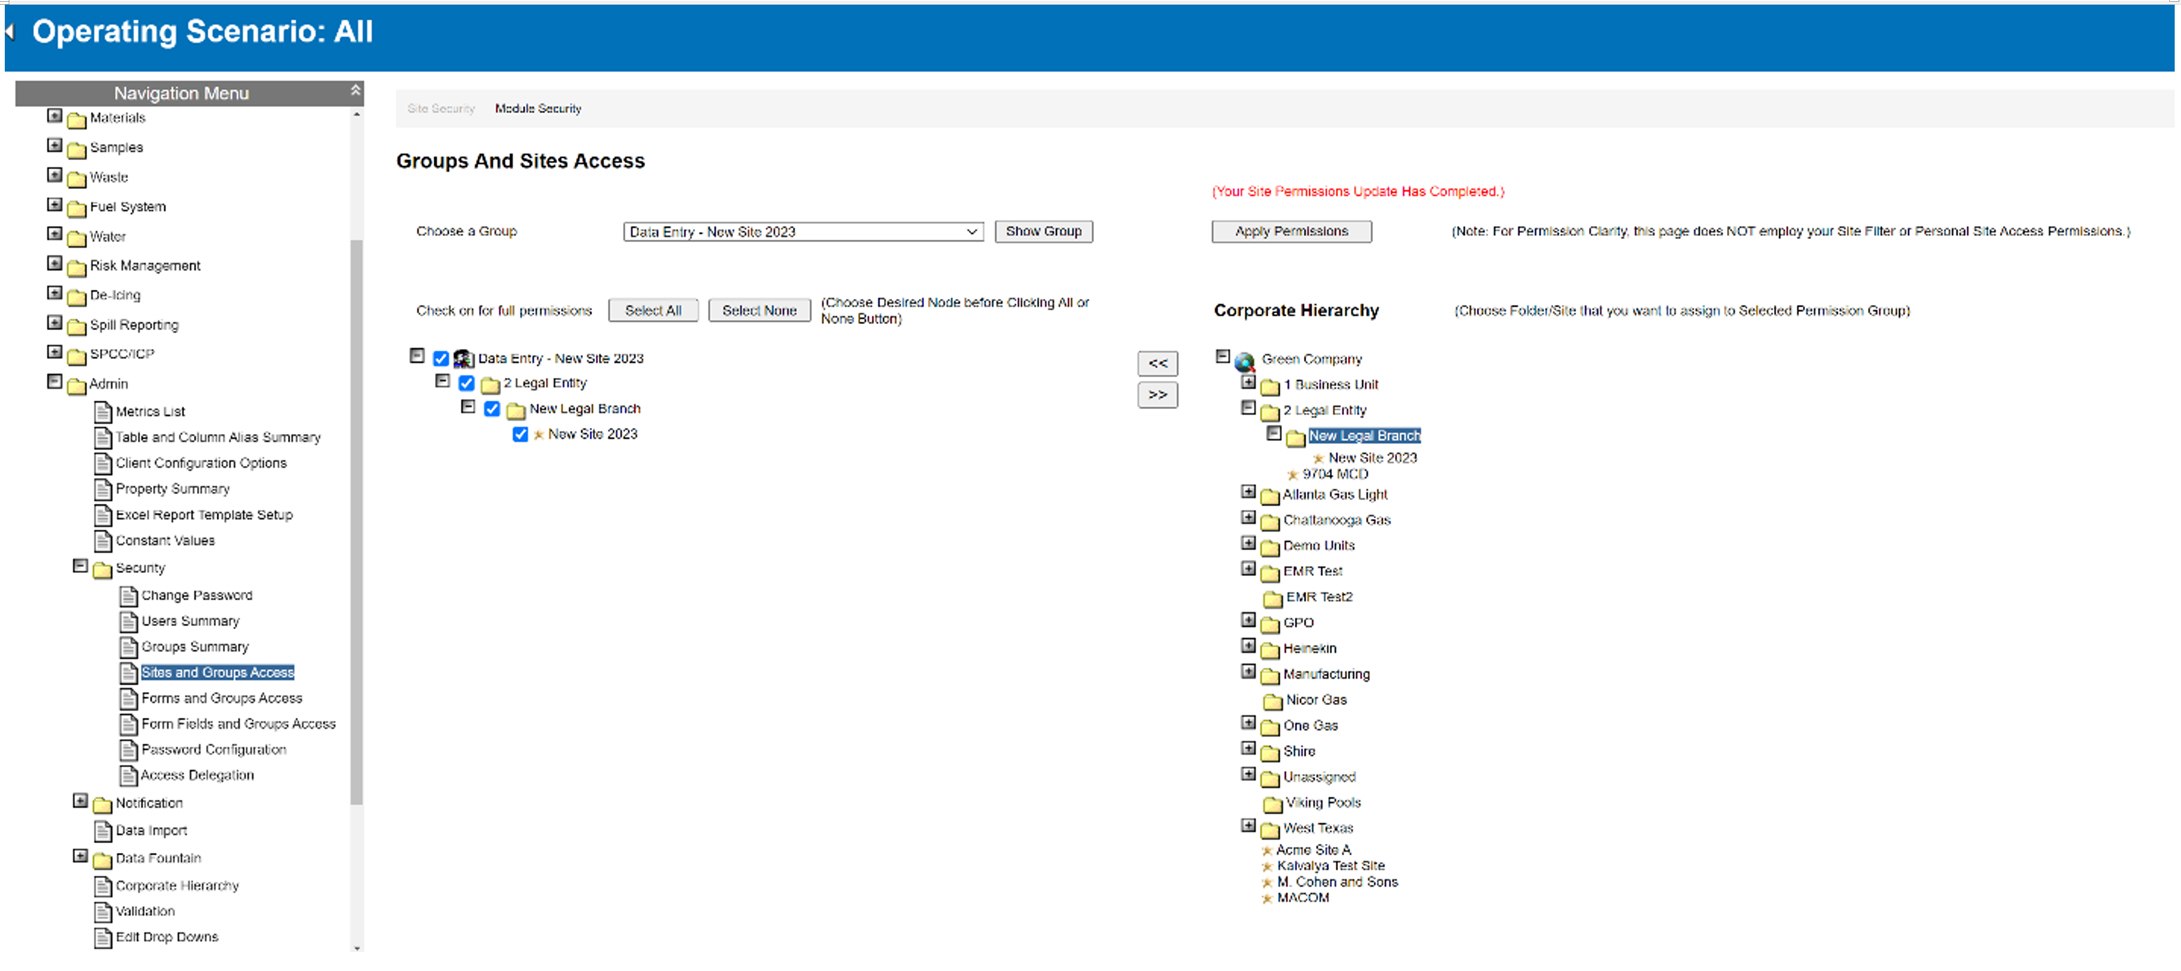
- On the Navigation Menu, go to Security → Sites and Groups Access.
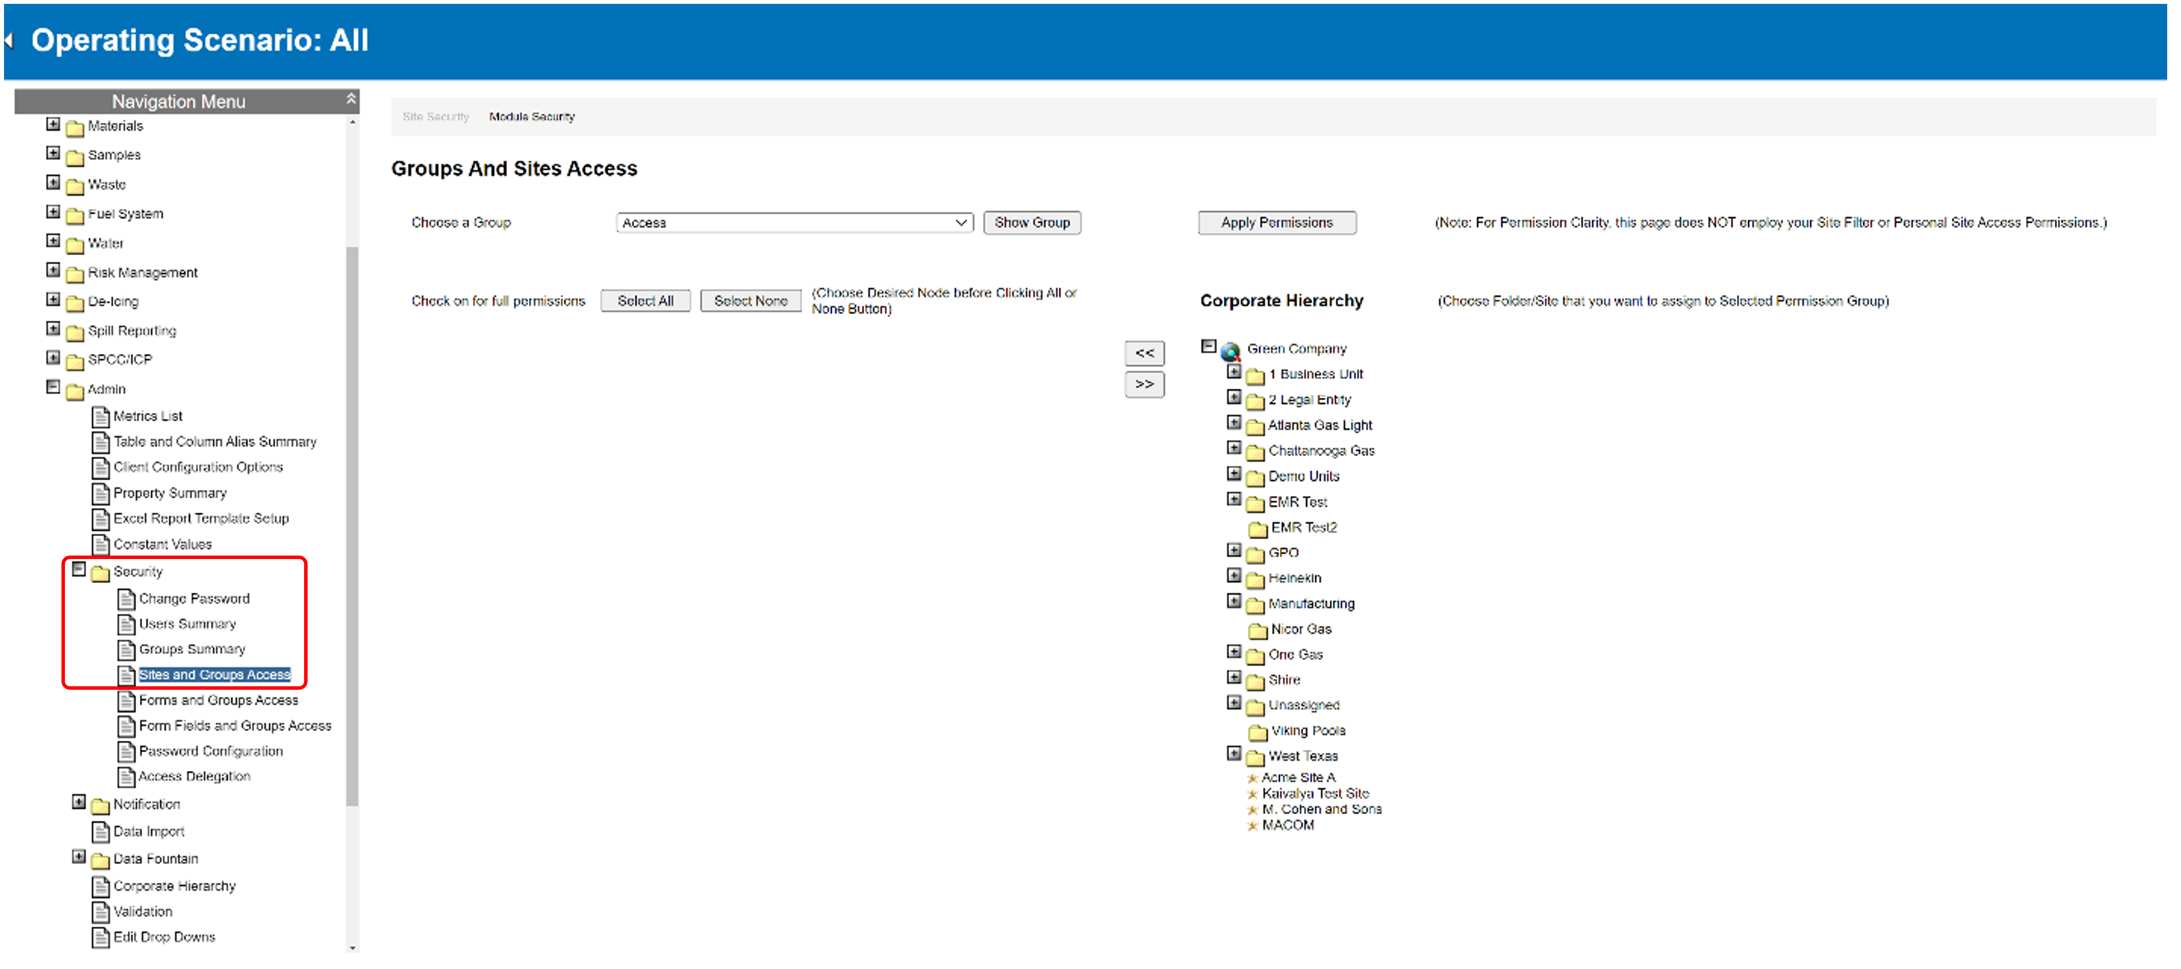
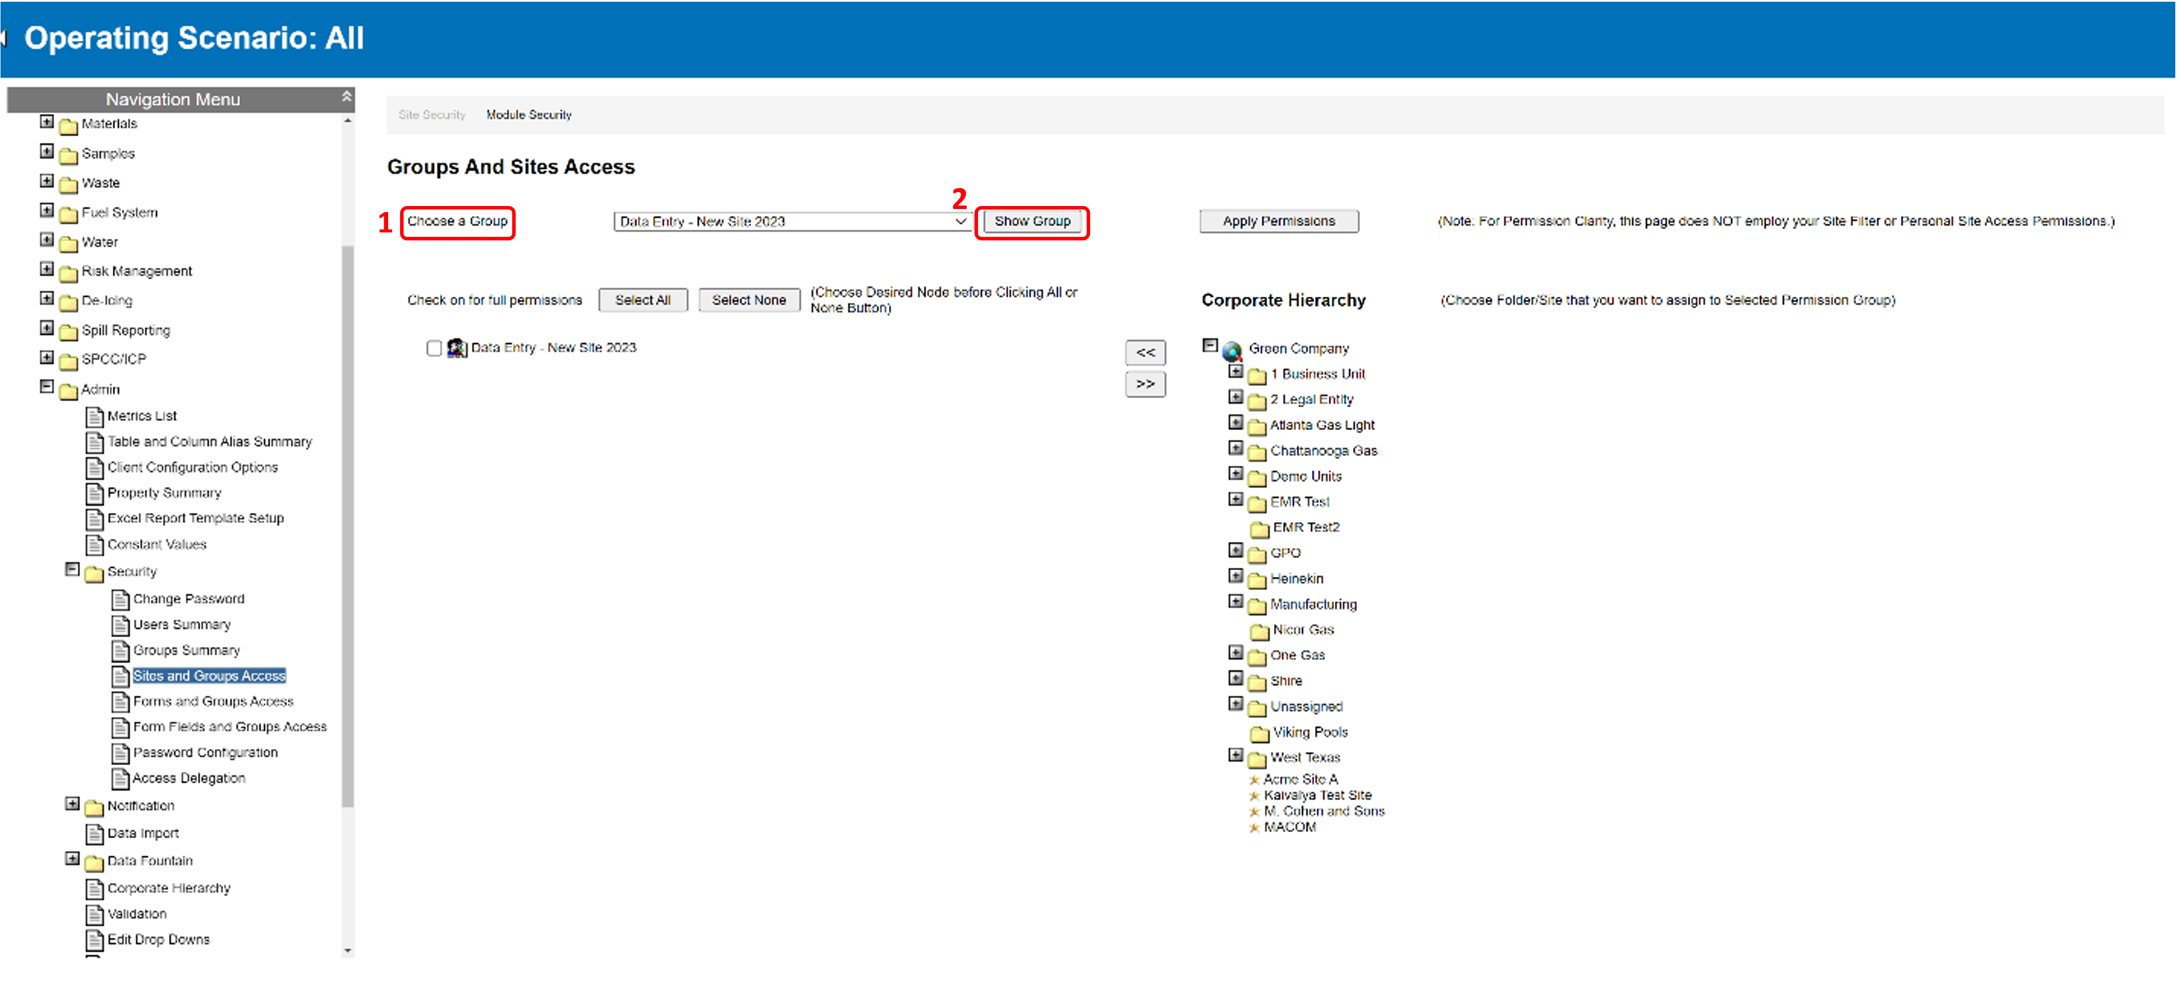
- In the dropdown list next to the field Choose a Group, find and select the new group created, then select Show Group.
- To assign the group to specific sites or business units on the corporate hierarchy, select the group name on the left and the desired site or business unit on the right. then select the “<<” button to associate the group with the selected site or business.
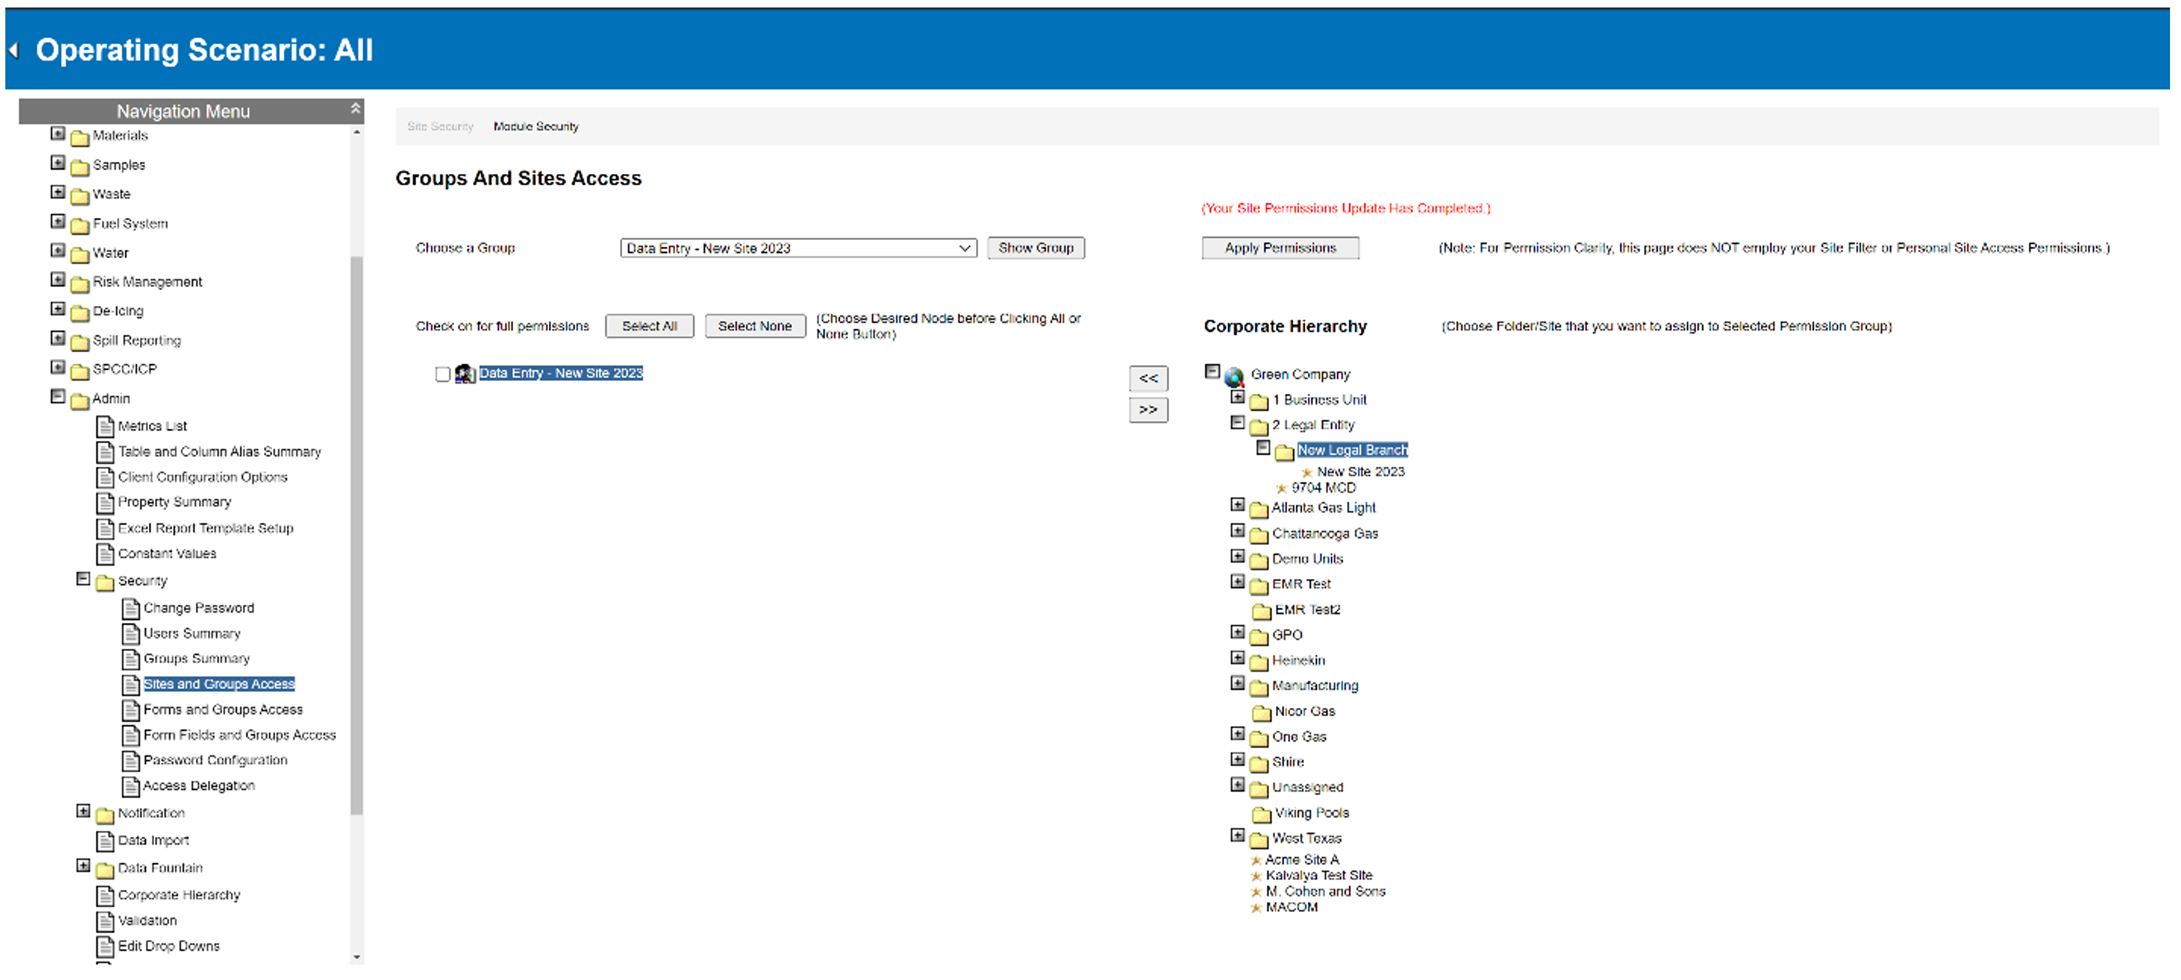
- The group is now successfully assigned to the business unit and its associated sites. Repeat step 3 for every business unit and site the new group must access.
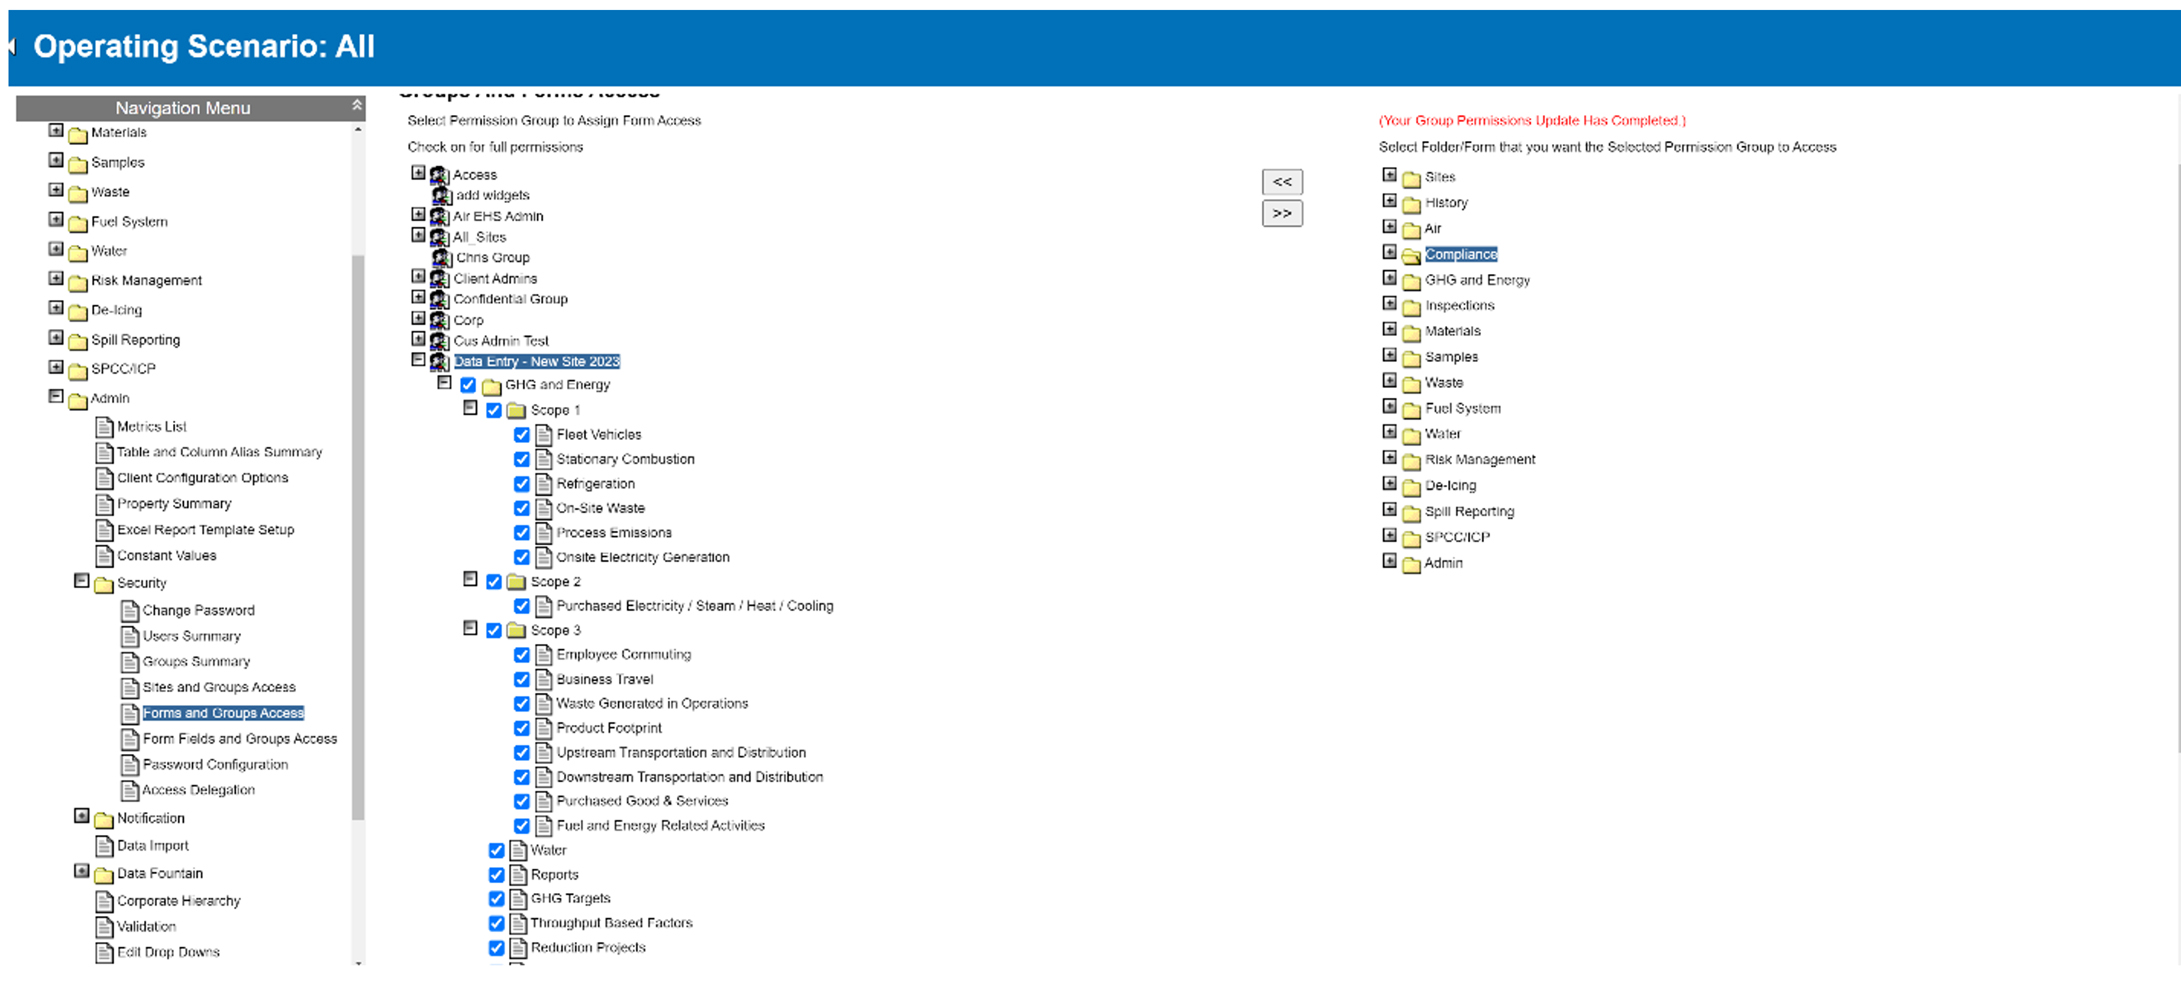
Set Up Forms and Group Access
- On the Navigation Menu, select Security → Forms and Groups Access.
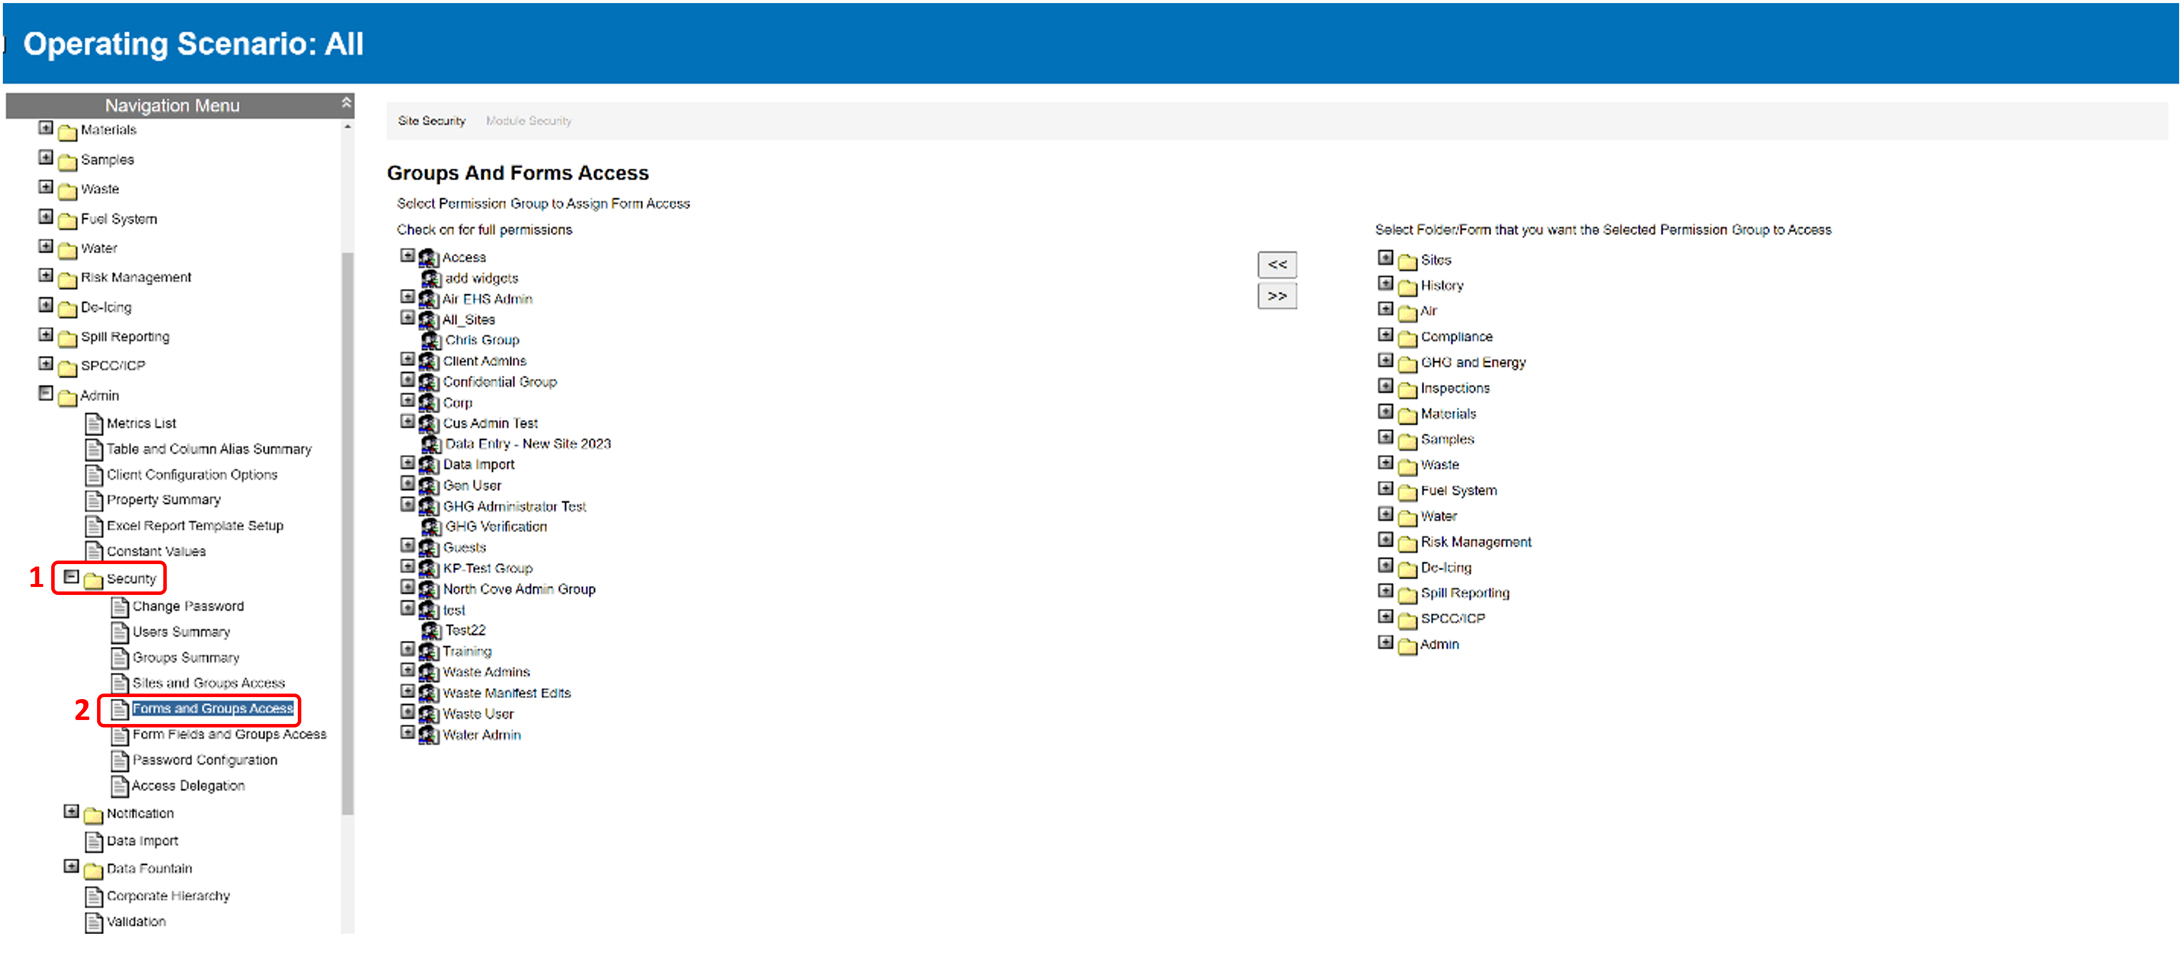
- From the group list on the left, select the name of the group that needs read/edit permissions.
- To grant access to specific folders for the group, select the desired folders from the Folders/Forms on the right-hand side of the screen, then select the << button to assign access to those selected folders. Select OK when the popup appears, confirming the application of permissions.
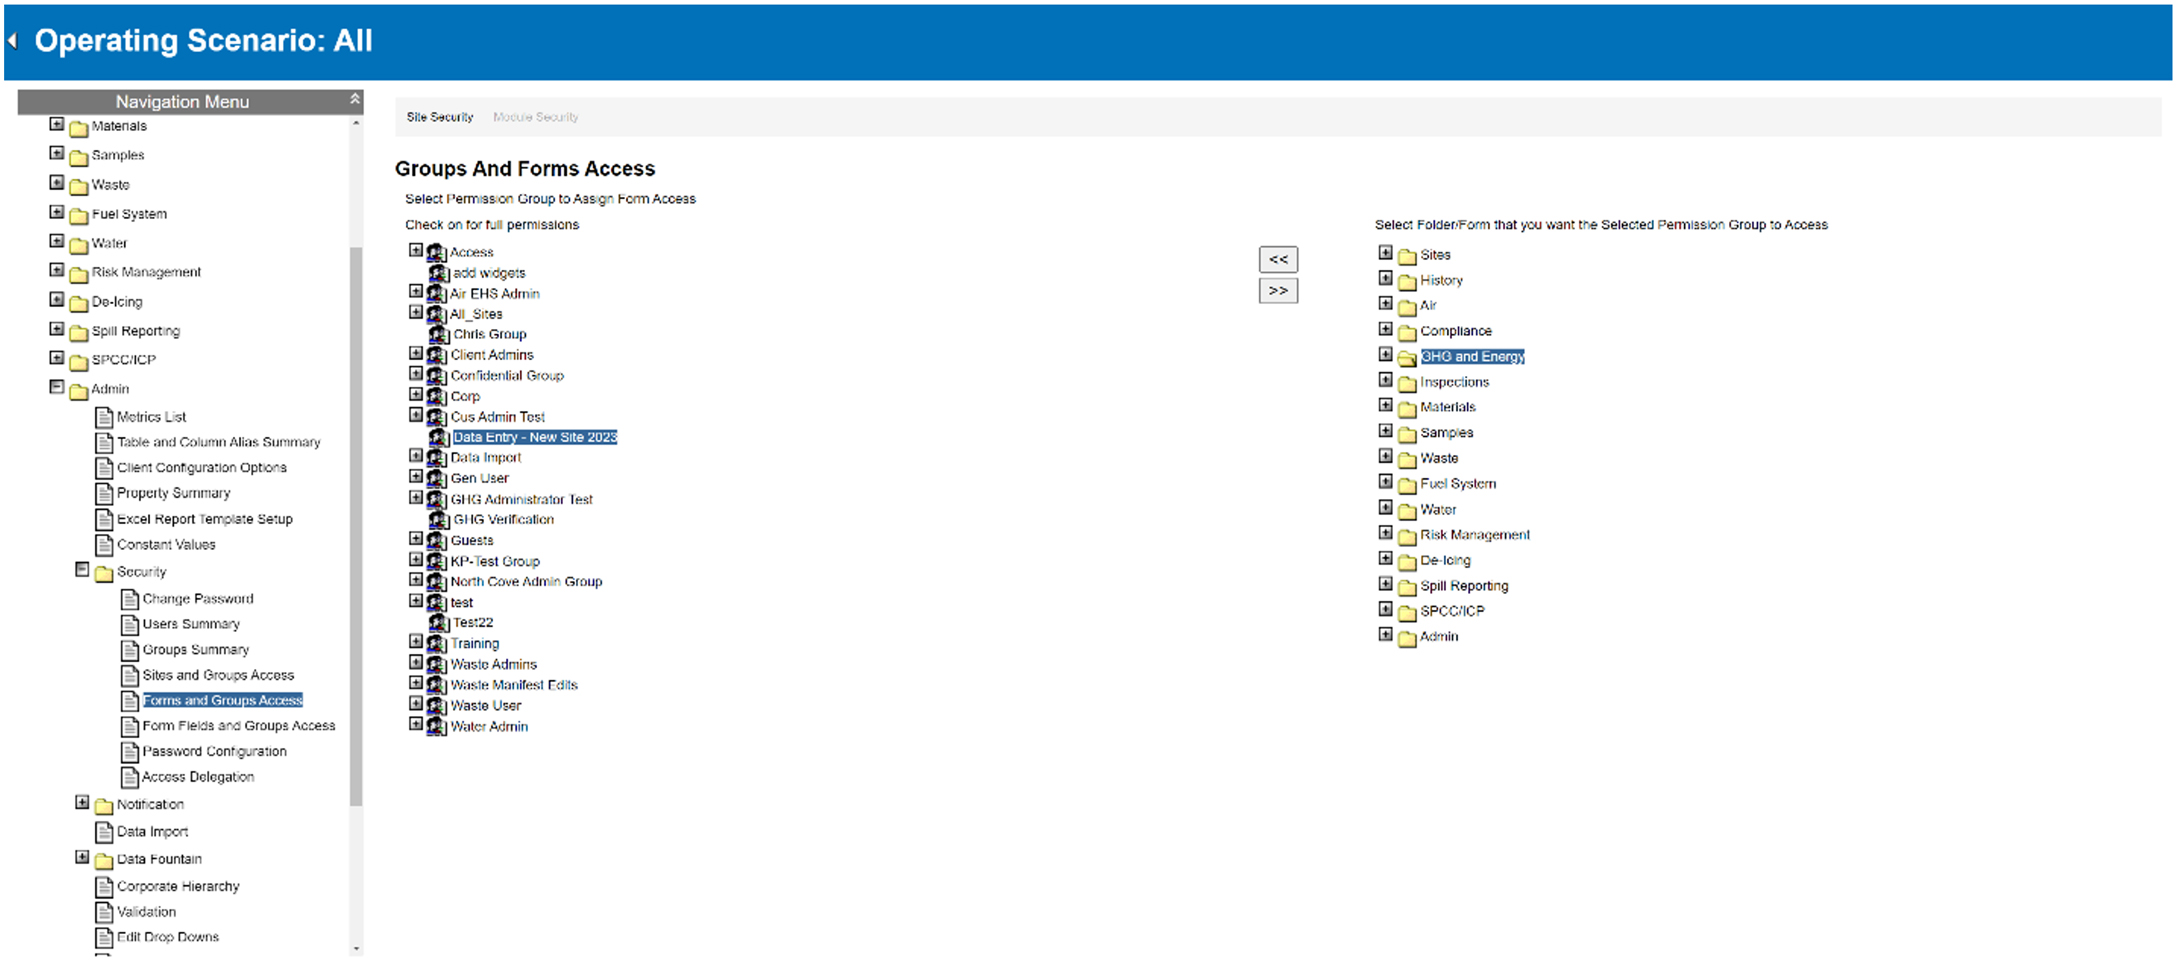
- Repeat steps 2 and 3 for all form folders the group needs to access.
Set up Read/Edit Permissions
- After assigning the folders to the new group, select the + symbol to expand the group’s permissions.
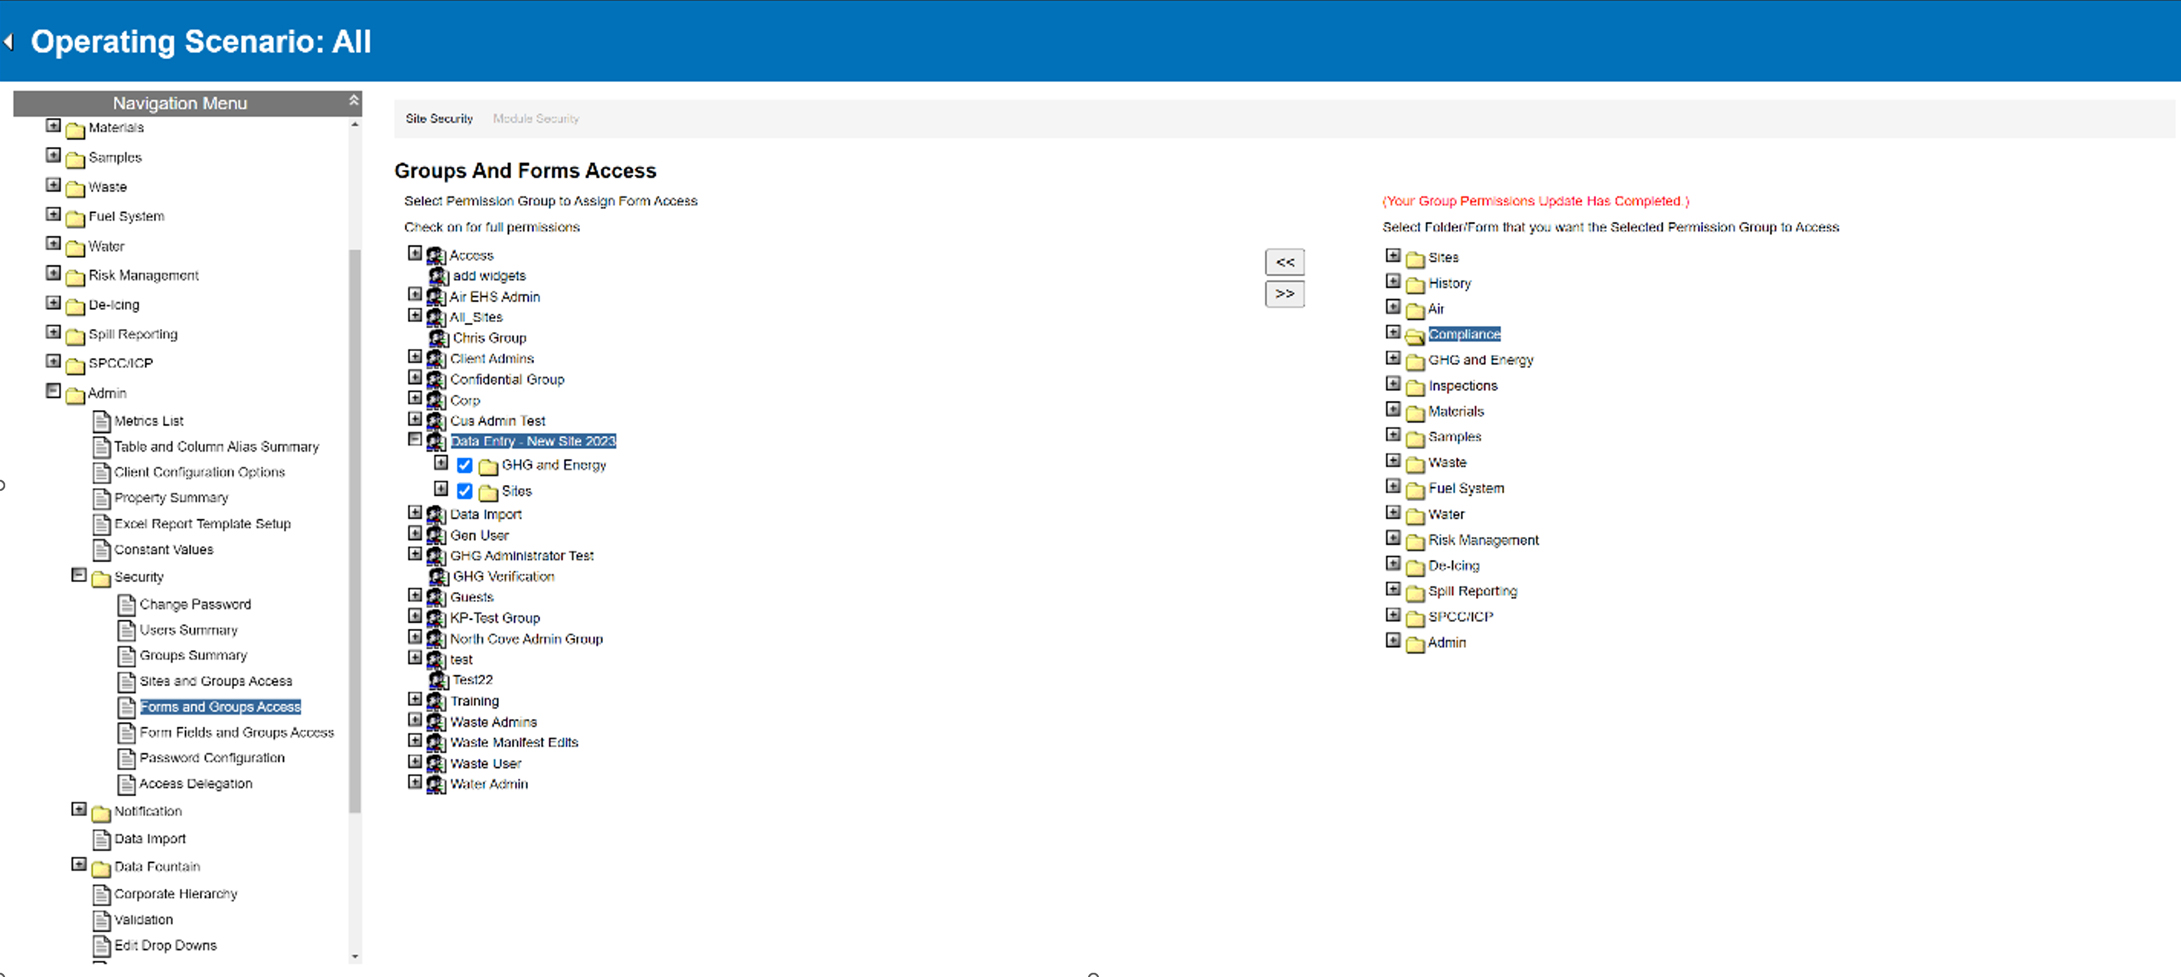
- All form folders with full read and edit permissions will have a checkmark next to them. This allows users in the group to read, add, edit, and/or delete items in the summary and detail pages within those folders.
 To revoke a group’s permission to edit but still allow them to read the contents of the summary and detail forms, uncheck the corresponding box. Example: Users can add, edit, and/or delete data within Scope 1, 2, and 3 categories. However, their access is limited to viewing for Reports, GHG Targets, Throughput Based Factors, Reduction Projects, and Metrics.
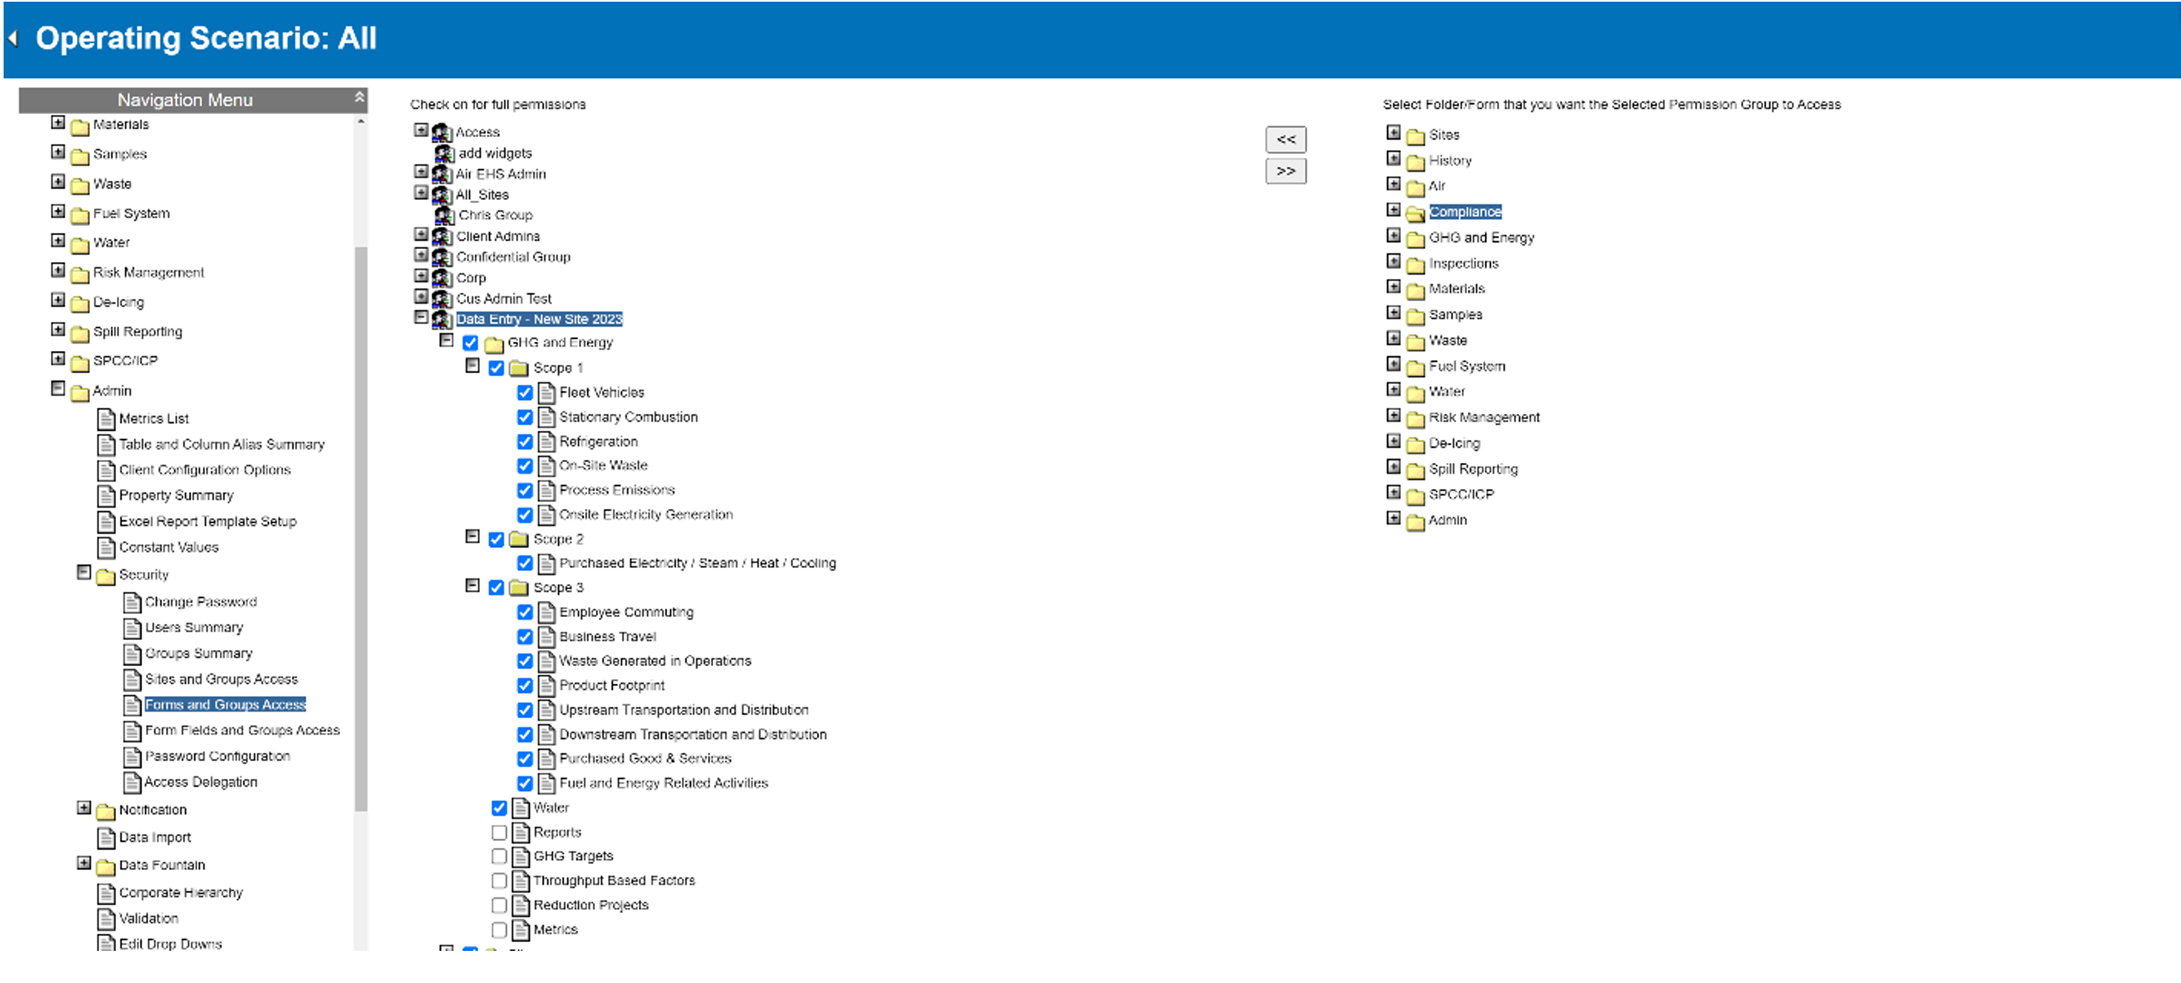
- Repeat steps 1 and 2 for all forms the group should and should not access.
Read/Edit permissions only extend as far as the summary pages. Permissions cannot be set up or configured at the detail page level.
Was this helpful?
Thanks for your feedback!
