

Completing a Standard Job Safety Analysis (JSA)
This article describes how to create a new JSA in the Standard Job Safety Analysis capability and how to complete the details of the analysis.
Performing a Job Safety Analysis enables you to:
- Engage a diverse team of participants to contribute to a safer workplace
- Reduce risk by systematically considering hazards and putting controls in place
- Maintain documentation to support employees who perform the task or conduct inspections on personal protective equipment
Beginning with the Draft stage, the overall JSA process looks like this:
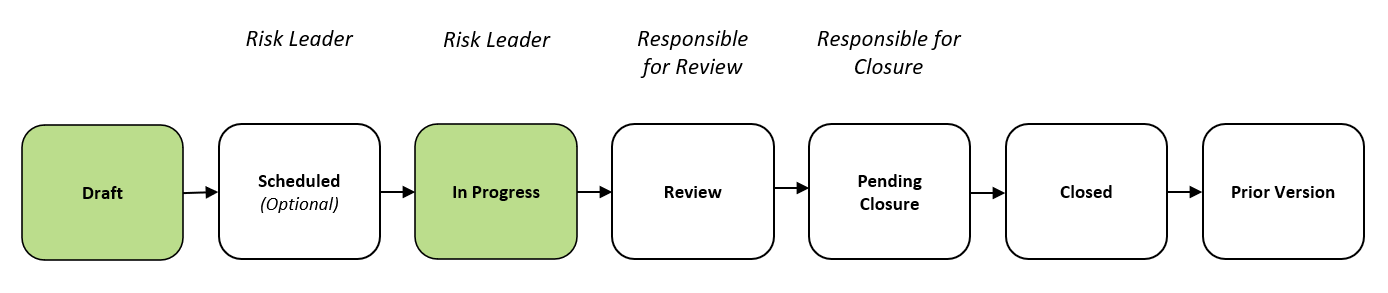
We’ll be working in the Draft and In Progress stages to complete the analysis. See Standard Job Safety Analysis in Accelerate for more about each stage in the JSA process.
Options along the way
At each stage of the JSA process, there are varying options available to risk leaders and others who are working with the record. Look for them at the top of the Job Safety Analysis page.
The available options are determined by the current stage of the process (Draft, In Progress, etc.) and the user’s role (for example, only administrators can delete an analysis).
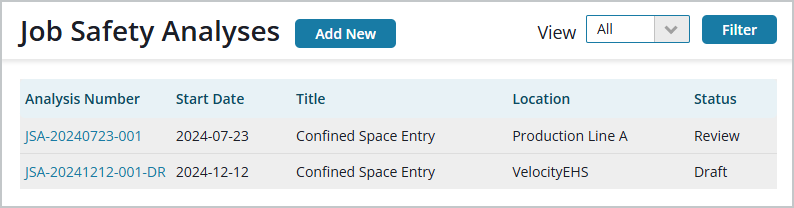
From the navigation menu, select Operational Risk > Standard Job Safety Analysis. Select Add New at the top of the Job Safety Analyses page.
Complete General Information for the JSA.
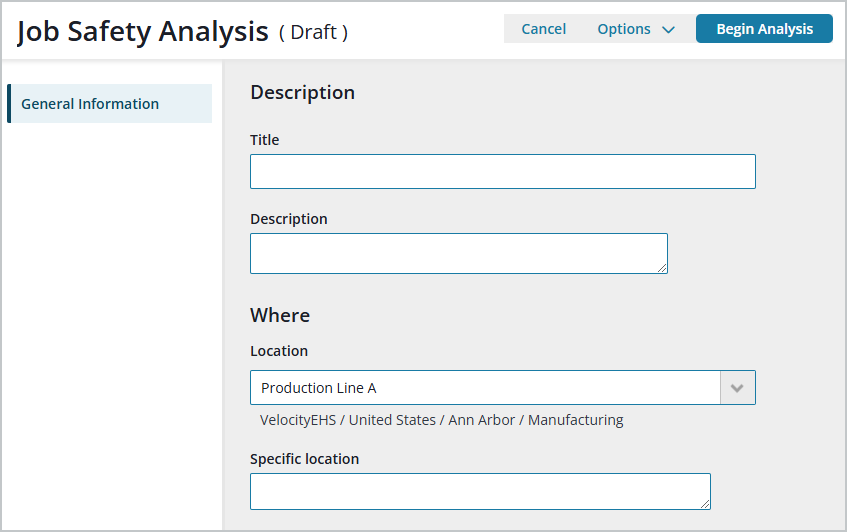
- Add a Title and Description.
- Select Where and When the analysis will take place, and Who will participate in the process, including those responsible for the Review stage and for closing the analysis.
Choose your next step.
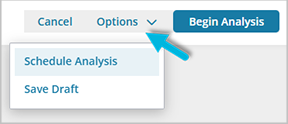
- Options > Save Draft at the top of the page to save the record in the Draft stage
- Options > Schedule Analysis to begin the analysis at the specified date/time. If notifications are set up to do so (in Admin Settings > Notifications), the Team lead gets a notification email to inform them that the JSA has been scheduled.
- Begin Analysis to move it to the In Progress stage now, where you’ll complete the details of the analysis
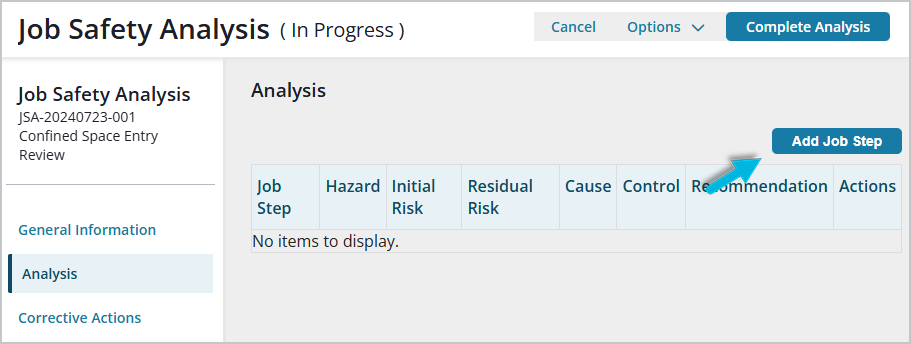
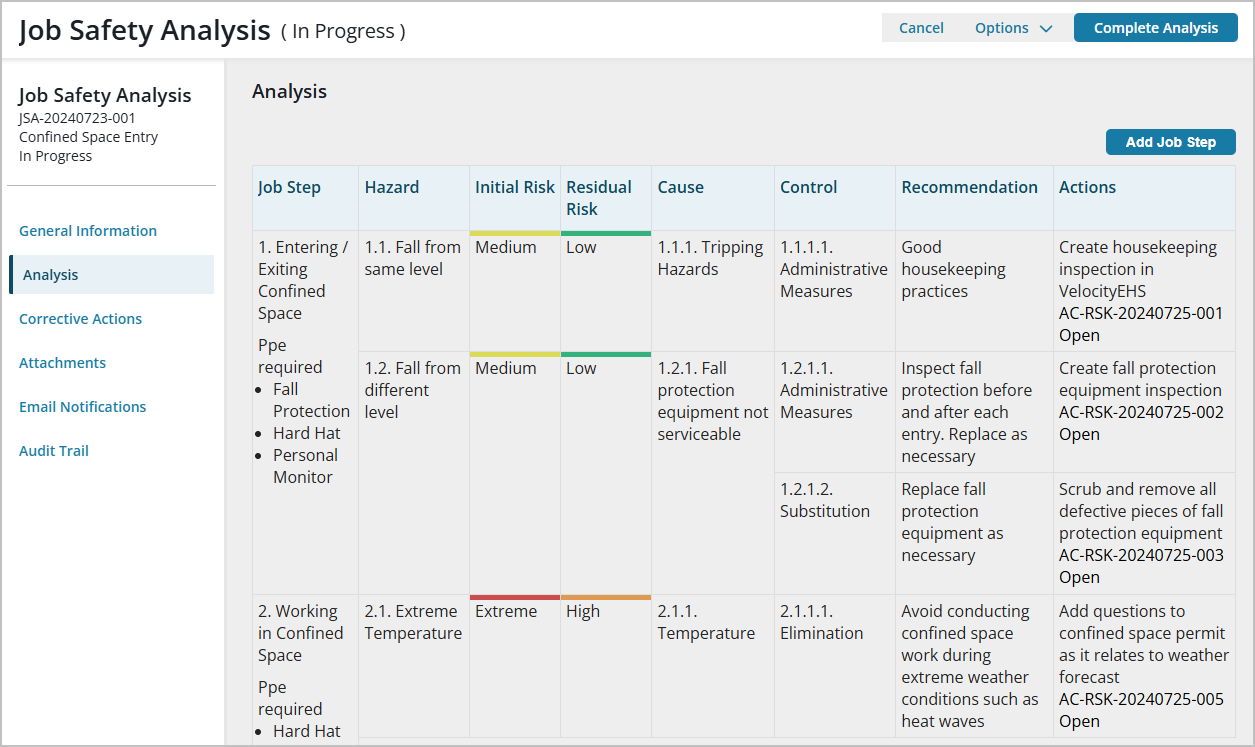
When you’re ready to complete the analysis, select the Analysis tab > Add Job Step.
In the Job Step window, add a description of the job step and associated data (for example, required PPE). You can also indicate the order in which this step should appear in the analysis.
Note: PPE options are defined upon system setup by an administrator in the EHS List Editor.
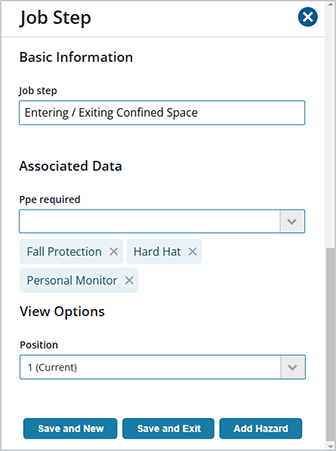
Then choose your next step:
-
- Immediately add a hazard to the job step (Add Hazard – see step 7).
- Save this job step and add another (Save and New).
- Save this job step and return to the Analysis table (Save and Exit – see step 6).
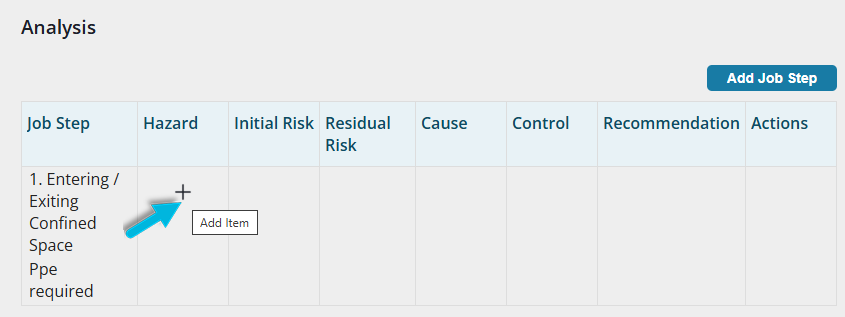
When you’re ready to add a hazard to the job step, select the + symbol in the Analysis table Hazard column and select one.
Note: The + symbol is available in the table anywhere you can add more information, along with the pencil icon (edit).
In the Hazard window, select the following:
- the Hazard (e.g., ambient noise, confined space, overexertion)
- the appropriate Consequence (e.g., minor, moderate, serious) and Likelihood (e.g., unlikely, likely, frequent) of the hazard that describe the current risk level
- the residual risk (Consequence and Likelihood) projected to be present after improvements have been made
Note: As a best practice, enter the residual risk after controls have been implemented.
Then choose your next step (Add Cause, Save and New, or Save and Exit). Note that a job step may have multiple hazards associated with it.
Note: Hazard, Consequence, and Likelihood options are defined upon system setup by an administrator in the EHS List Editor.
In the Cause window, describe the cause of the hazard, and then choose your next step (Add Control, Save and New, or Save and Exit). Note that a hazard may have multiple causes associated with it.
In the Control window, select the type of control (e.g., elimination, substitution, PPE), recommendations for improvement, and corrective actions to reduce risk, with responsibility for completing them. Choose your next step (Save and New or Save and Exit). Note that a cause may have multiple controls associated with it.
Note: Controls are defined upon system setup by an administrator in the EHS List Editor.
Repeat the entry steps for each job step, and add documentation to the record, if needed, including Corrective Actions (not directly associated with a particular hazard) and any (file or URL) Attachments, on their respective tabs.
If you are an administrator, you can use the Email Notifications and Audit Trail tabs to monitor notifications that have been sent out in relation to the JSA and a log of changes that have been made to the record along the way. See JSA Notifications for more about email notifications.
When you’ve added all analysis details to the JSA, select Complete Analysis at the top of the Job Safety Analyses page.
What happens next?
A few things:
- The analysis advances to the Review stage.
- If notifications are set up to do so (in Admin Settings > Notifications), the designated Reviewer gets a notification email to inform them that it’s time for their review.
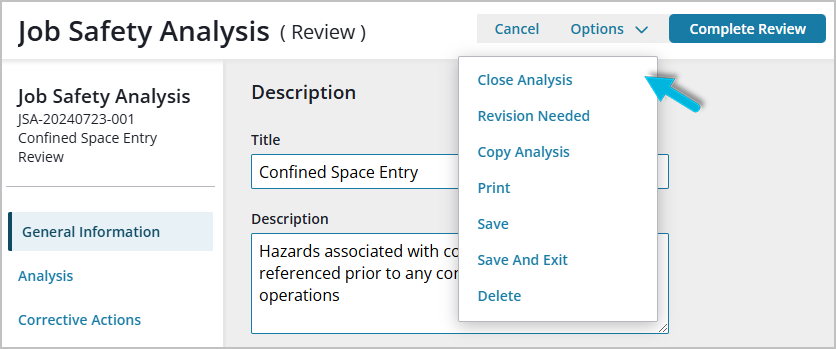
- The Reviewer has a few options:
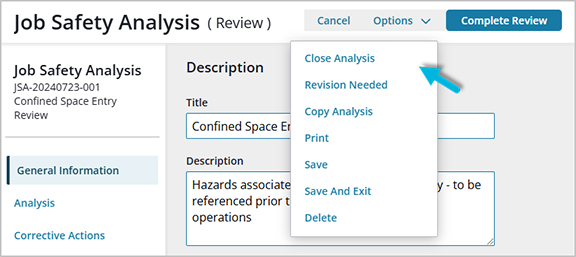
- Complete Review – send the JSA to the Pending Closure stage so that the person responsible for closure can close it
- Close Analysis – if the Reviewer is also the person who is responsible for closure, close the JSA, allowing no further changes
- Revision Needed – send the JSA back to the In Progress stage for further updates
