

Creating a PSSR Checklist
From the Navigation menu, select Operational Risk > Management of Change > Checklists.

At the top of the Checklists page, select Add New.
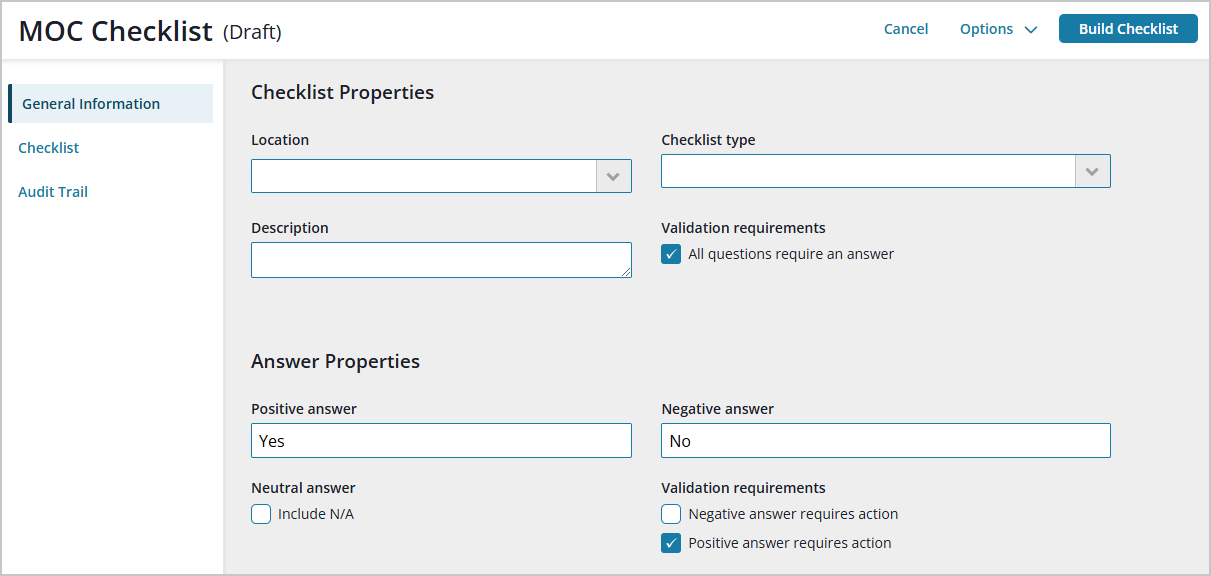
On the MOC Checklist page General Information tab:
- Add checklist properties, including Location(s) it applies to, Checklist type (pre- or post-startup), and a Description (for example, what it’s used for). Check the All questions require an answer box if this will be true for the checklist.
- Indicate how you want positive and negative answers to display in the checklist, for example, “Yes/No,” or “Safe/Unsafe.”
- Check the Include N/A box if you want to allow neutral answers.
- Decide on Validation requirements: check the Negative/Positive answer requires action boxes if the requirements should apply.
- To begin adding items to the checklist, select Build Checklist at the top of the page.
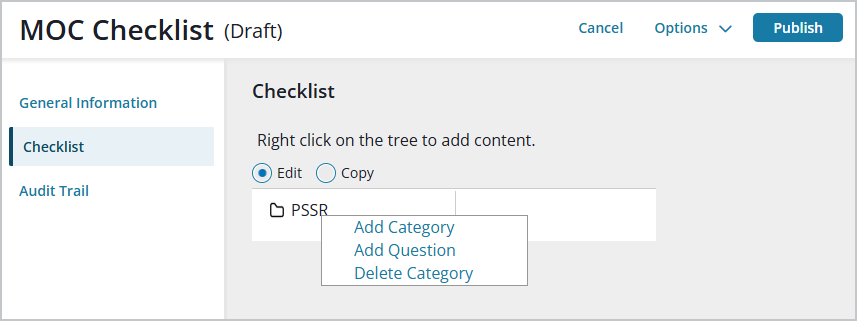
Select Edit, and then right-click on the location to begin creating the checklist.
For most checklists, particularly longer ones, you’ll likely want to group the questions into categories for ease of use. To begin a new category and then add questions to it, select Add Category.
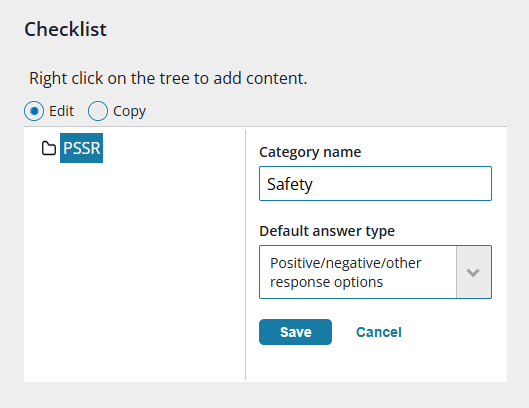
Name the category and set a Default answer type (None, Positive/negative/other response options, or Text response). The default can be overridden when you add individual questions.
Save the new category. You’ll see the category you just created on the left side of the table.

To begin adding questions to the category, right-click on it, and then choose Add Question.

Add the first Question and select an Answer type or accept the default type. Select a (or multiple) Change category and Change type to which this question will apply. Select Save. You’ll see the question you just added under the question category.
Repeat steps 6 and 7 for each question you want to add. You can also add new categories and questions to them, as well.
When you’ve added all categories and questions to your satisfaction and the checklist is complete, select Publish at the top of the page and confirm. Your checklist is now ready for use. You’ll see its status as Published on the Checklists page.
